您好,登錄后才能下訂單哦!
您好,登錄后才能下訂單哦!
本篇文章給大家分享的是有關CSS3中怎么利用border-radius繪制一個太極,小編覺得挺實用的,因此分享給大家學習,希望大家閱讀完這篇文章后可以有所收獲,話不多說,跟著小編一起來看看吧。
太極圖
border-radius 除了做邊框圓角效果之外,把它用在畫圖示上的話,其實能產生出很多不同的創意哩。筆者今天要繼續使用它來教各位畫-太極圖。
檢視原始碼 HTML
XML/HTML Code復制內容到剪貼板
<body>
<div class="taichi">
<div class="white-circle"></div>
<div class="black-circle"></div>
</div>
</body>
因為太極圖中有一黑一白的圓,所以多放了兩個 div 在區塊中。
接著請張大眼仔細看,筆者要先將大區塊分成一白一黑:
檢視原始碼 CSS
CSS Code復制內容到剪貼板
.taichi {
position: relative;
width: 48px; /* 50 - 2 */
height: 96px; /* 100 - 2 - 2 */
background: #fff;
border: 2px solid #000;
border-width: 2px 50px 2px 2px;
border-radius: 50%;
}
一般的盒子模式(Box Model)是連同邊框寬度都計算在區塊的寬高中的,所以我們想要做一個寬高 100×100 的區塊,但邊框寬度如果是 2px 的話,那么里面的部份應該就是只有 96px。再來特別的是,筆者將右邊的邊框寬度直接設定成 50px,所以區塊內部的寬度就只需要 48px 就可以了。
當這樣設定好再加上 border-radius 圓角效果之后,就會變成~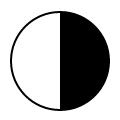
嘿嘿~已經有一黑一白的區塊的,再來先補上一顆白圓:
檢視原始碼 CSS
CSS Code復制內容到剪貼板
.white-circle {
position: absolute;
top: 0;
left: 50%;
background: #fff;
border-radius: 50%;
width: 48px;
height: 48px;
}
這邊就是直接產生一個完整的白色圓形并放在上半部的中間:
那黑色圓形就是放在下半部囉:
檢視原始碼 CSS
CSS Code復制內容到剪貼板
.black-circle {
position: absolute;
top: 50%;
left: 50%;
background: #000;
border-radius: 50%;
width: 48px;
height: 48px;
}
看起來就已經有 9 成像囉~
最后還差兩個相反顏色的小圓點在這兩個圓形中,這兩個小圓點我們只要使用 ::after 擬元素(Pseudo-elements) 就可以了:
檢視原始碼 CSS
CSS Code復制內容到剪貼板
.white-circle::after {
content: "";
position: absolute;
top: 17px; /* (50-16)/2 */
left: 17px; /* (50-16)/2 */
background: #000;
border-radius: 50%;
width: 16px;
height: 16px;
}
.black-circle::after {
content: "";
position: absolute;
top: 17px; /* (50-16)/2 */
left: 17px; /* (50-16)/2 */
background: #fff;
border-radius: 50%;
width: 16px;
height: 16px;
}
將將~是不是很神奇呢!?
愛心
上面教各位使用 border-radius 來畫太極圖,下面則是要教各位一樣是使用圓角效果來愛心。
我們只需要一個 div 區塊就可以了:
XML/HTML Code復制內容到剪貼板
<body>
<div class="heart"></div>
</body>
然后指定區塊的寬高:
檢視原始碼 CSS
CSS Code復制內容到剪貼板
.heart {
position: relative;
width: 140px;
height: 115px;
}
一樣是將愛心分成左右兩區塊,一樣是先用 ::before 擬元素(Pseudo-elements)來產生左邊的區塊:
檢視原始碼 CSS
CSS Code復制內容到剪貼板
.heart::before {
content: "";
position: absolute;
left: 70px;
top: 0;
width: 70px;
height: 115px;
background: red;
border-radius: 50px 50px 0 0;
}
因為只有設定左上及右上的圓角效果,所以就變成圓頭的柱子了: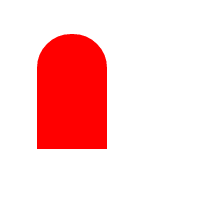
接著筆者要改變它的旋轉中心點來把它往左旋轉 45 度:
檢視原始碼 CSS
CSS Code復制內容到剪貼板
.heart::before {
content: "";
position: absolute;
left: 70px;
top: 0;
width: 70px;
height: 115px;
background: red;
border-radius: 50px 50px 0 0;
-webkit-transform: rotate(-45deg);
-moz-transform: rotate(-45deg);
-o-transform: rotate(-45deg);
transform: rotate(-45deg);
-webkit-transform-origin: left bottombottom;
-moz-transform-origin: left bottombottom;
-o-transform-origin: left bottombottom;
transform-origin: left bottombottom;
}
transform-origin 可以改變元素的中心點。它跟 background-position 一樣是接受兩個值,第一個是設定水平,第二個是設定垂直。預設是以 center center 為主,現在筆者將它改成在左下方:
右邊的部份也一樣,但只是旋轉中心點改在右下,并往右旋轉:
檢視原始碼 CSS
CSS Code復制內容到剪貼板
.heart::after {
content: "";
position: absolute;
top: 0;
left: 0;
width: 70px;
height: 115px;
background: red;
border-radius: 50px 50px 0 0;
-webkit-transform: rotate(45deg);
-moz-transform: rotate(45deg);
-o-transform: rotate(45deg);
transform: rotate(45deg);
-webkit-transform-origin: rightright bottombottom;
-moz-transform-origin: rightright bottombottom;
-o-transform-origin: rightright bottombottom;
transform-origin: rightright bottombottom;
}
當兩邊都產生完后,一個紅通通的愛心就出現囉:
什么~中和的鐘先生問說怎么不會動...沒關系,補上個 animation 的動畫效果給它:
檢視原始碼 CSS
CSS Code復制內容到剪貼板
.heart {
-webkit-animation: jump 1s infinite ease-out;
-moz-animation: jump 1s infinite ease-out;
-o-animation: jump 1s infinite ease-out;
animation: jump 1s infinite ease-out;
}
@-webkit-keyframes jump {
0%, 60%, 75%, 90%, 100% {
-webkit-transform: scale(1);
}
15% {
-webkit-transform: scale(0.6);
}
30% {
-webkit-transform: scale(1);
}
45% {
-webkit-transform: scale(0.7);
}
}
@-moz-keyframes jump {
0%, 60%, 75%, 90%, 100% {
-moz-transform: scale(1);
}
15% {
-moz-transform: scale(0.6);
}
30% {
-moz-transform: scale(1);
}
45% {
-moz-transform: scale(0.7);
}
}
@-o-keyframes jump {
0%, 60%, 75%, 90%, 100% {
-o-transform: scale(1);
}
15% {
-o-transform: scale(0.6);
}
30% {
-o-transform: scale(1);
}
45% {
-o-transform: scale(0.7);
}
}
@keyframes jump {
0%, 60%, 75%, 90%, 100% {
transform: scale(1);
}
15% {
transform: scale(0.6);
}
30% {
transform: scale(1);
}
45% {
transform: scale(0.7);
}
}
透過 transform 的 scale(x, y) 來改變愛心的大小,讓整個動畫的看起來就象是噗通噗通的跳一樣:
以上就是CSS3中怎么利用border-radius繪制一個太極,小編相信有部分知識點可能是我們日常工作會見到或用到的。希望你能通過這篇文章學到更多知識。更多詳情敬請關注億速云行業資訊頻道。
免責聲明:本站發布的內容(圖片、視頻和文字)以原創、轉載和分享為主,文章觀點不代表本網站立場,如果涉及侵權請聯系站長郵箱:is@yisu.com進行舉報,并提供相關證據,一經查實,將立刻刪除涉嫌侵權內容。