您好,登錄后才能下訂單哦!
您好,登錄后才能下訂單哦!
本篇內容介紹了“vite怎么搭建與使用”的有關知識,在實際案例的操作過程中,不少人都會遇到這樣的困境,接下來就讓小編帶領大家學習一下如何處理這些情況吧!希望大家仔細閱讀,能夠學有所成!
實際開發中編寫的代碼往往是不能被瀏覽器直接識別的,比如ES6,TypeScript,Vue文件等。所以此時我們必須通過構建工具來對代碼進行轉換,編譯,類似的工具有webpack,rollup,parcel.但是隨著項目越來越大,需要處理的javascript呈指數級增長,模塊越來越多。構建工具需要很長時間才能開啟服務器,HMR也需要幾秒鐘才能在瀏覽器反應過來。所以出現了vite。
提示:vite僅支持vue3.0+的項目,也即是說我們無法在其中使用vue2.x
npm init vite-app     //項目名字
cd 項目名字           //進入項目
npm i                //安裝依賴
npm run dev         //打開項目
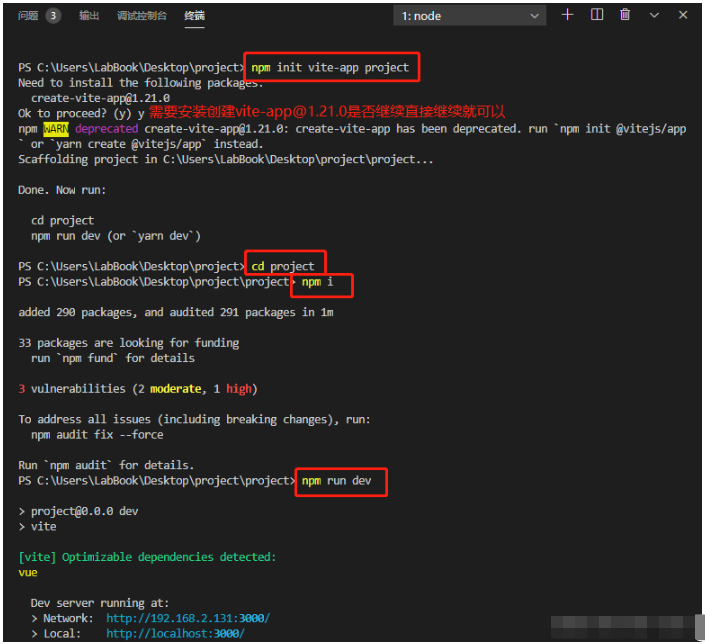
vite完全可以支持Typescript,不需要任何配置,只需要直接引入ts即可。
<script lang = "ts">
   const abc: number = 123456789;   //定義一個abc類型是數字,為什么這么定義可以去看一下Typescript的數據類型
   console.log(abc, "abc");
</script>

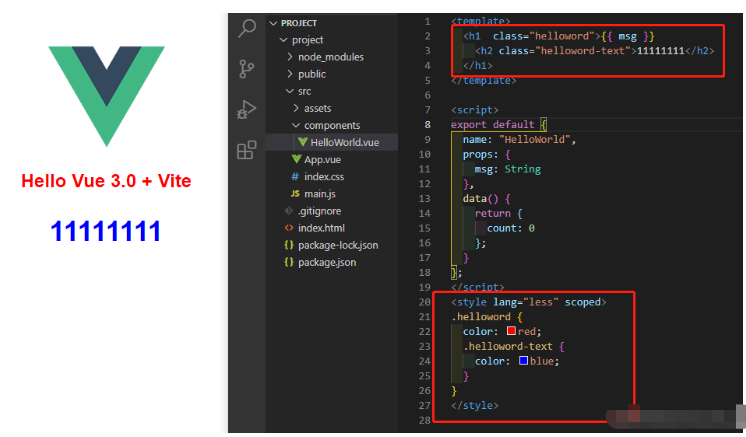
安裝 less:npm install less less-loader -D
安裝 sass:npm install sass node-sass sass-loader -D
安裝好之后在<style lang="less" scoped></style>標簽上面直接就可以用
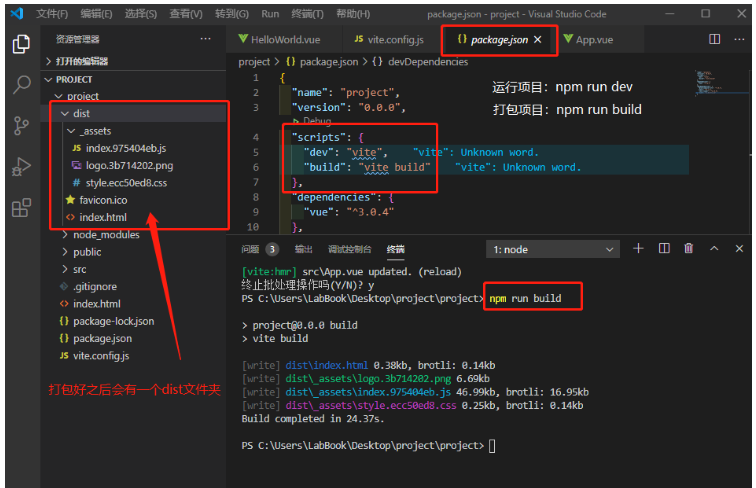
npm run build
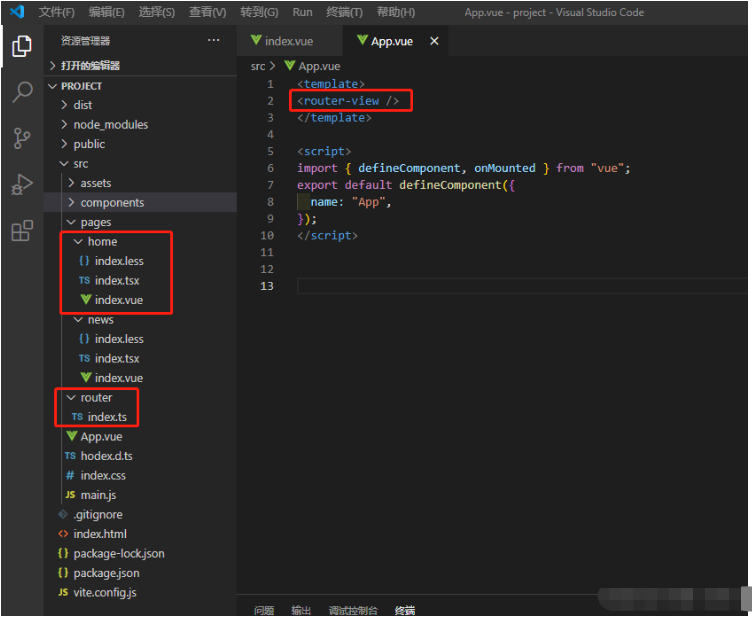
安裝路由:npm install vue-router@4(這里我是指定安裝的版本)
在src文件夾下面建一個router的文件夾 里面放一個index.ts的路由文件,內容如下:
import { createRouter, createWebHashHistory } from 'vue-router'
const routes = [
    {
        path: '/',
        name: 'Home',
        //如果沒有在.d.ts文件中定義,在這里引入路徑時加后綴名.vue是會報錯的
        component: () => import("../pages/home/index.vue"),
        children: [
            {
                path: '/news',
                name: 'Hews',
                component: () => import("../pages/news/index.vue")
            }
        ]
    },

]
const router = createRouter({
    history: createWebHashHistory(),
    routes,
})
export default router;
App.vue文件內容如下:
<template>
  <router-view />
</template>

<script>
import { defineComponent, onMounted } from "vue";
export default defineComponent({
  name: "App",
});
</script>
在src文件夾下面建一個后綴名為.d.ts的文件夾,內容如下:
declare module "*.vue" {
  import { ComponentOptions } from "vue";
  const componentOptions: ComponentOptions;
  export default componentOptions;
}
declare module "*.svg";
declare module "*.png";
declare module "*.jpg";
declare module "*.jpeg";
declare module "*.gif";
declare module "*.bmp";
declare module "*.tiff";
declare module "lodash";
declare module "@/api/*";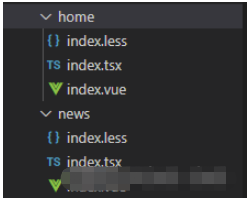
兩個文件夾內容大致一樣,在這里就只說一個home,
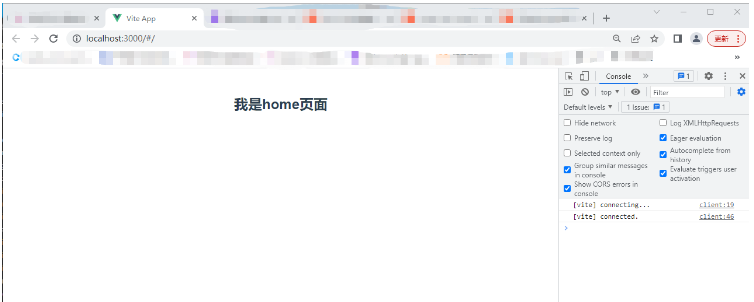
home文件夾下面的index.vue里的內容如下:
<template>
 <div>
     <h2>我是home頁面</h2>
 </div>
</template>

<script lang="tsx"></script>
<style lang="less" src="./index.less" scoped></style>
home文件夾下面的index.tsx里的內容如下:
import { defineComponent } from "vue";
export default defineComponent({
    name: "Home",

})
“vite怎么搭建與使用”的內容就介紹到這里了,感謝大家的閱讀。如果想了解更多行業相關的知識可以關注億速云網站,小編將為大家輸出更多高質量的實用文章!
免責聲明:本站發布的內容(圖片、視頻和文字)以原創、轉載和分享為主,文章觀點不代表本網站立場,如果涉及侵權請聯系站長郵箱:is@yisu.com進行舉報,并提供相關證據,一經查實,將立刻刪除涉嫌侵權內容。