溫馨提示×
您好,登錄后才能下訂單哦!
點擊 登錄注冊 即表示同意《億速云用戶服務條款》
您好,登錄后才能下訂單哦!
這篇文章將為大家詳細講解有關Android如何制作圓角按鈕,小編覺得挺實用的,因此分享給大家做個參考,希望大家閱讀完這篇文章后可以有所收獲。
具體內容如下
【主要步驟】
創建一個XML文件
以此文件作為Button的Background
1.創建XML文件
在res目錄下的drawable-mdpi下建立XML文件
button_frame_shape.xml
<?xml version="1.0" encoding="utf-8"?>
<shape xmlns:android="http://schemas.android.com/apk/res/android">
  <solid android:color="#ffffff" /><!-- 填充的顏色 -->
  <!-- 設置按鈕的四個角為弧形 -->
  <!-- android:radius 弧形的半徑 -->
  <corners android:topLeftRadius="5dp"
    android:topRightRadius="5dp"
    android:bottomRightRadius="5dp"
    android:bottomLeftRadius="5dp"/>
  <!-- 邊框粗細及顏色 -->
  <stroke android:width="2dp" android:color="@color/colorAccent" />
</shape>
2.使用
在Button下使用Android:background=”@drawable/button_frame_shape”
<?xml version="1.0" encoding="utf-8"?>
<LinearLayout xmlns:android="http://schemas.android.com/apk/res/android"
  android:orientation="vertical"
  android:layout_width="fill_parent"
  android:layout_height="fill_parent">
<Button
  android:id="@+id/roundButton"
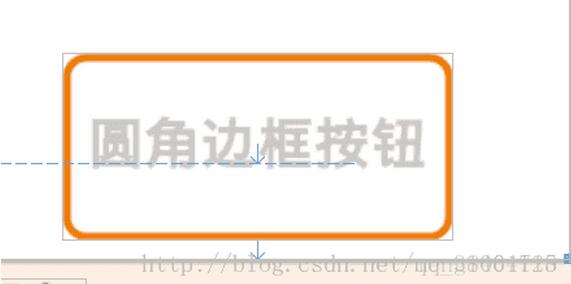
  android:text=" 圓角邊框按鈕 "
  android:layout_width="wrap_content"
  android:layout_height="wrap_content"
  android:background="@drawable/button_frame_shape"
  />
</LinearLayout>
效果如圖:

關于“Android如何制作圓角按鈕”這篇文章就分享到這里了,希望以上內容可以對大家有一定的幫助,使各位可以學到更多知識,如果覺得文章不錯,請把它分享出去讓更多的人看到。
免責聲明:本站發布的內容(圖片、視頻和文字)以原創、轉載和分享為主,文章觀點不代表本網站立場,如果涉及侵權請聯系站長郵箱:is@yisu.com進行舉報,并提供相關證據,一經查實,將立刻刪除涉嫌侵權內容。