溫馨提示×
您好,登錄后才能下訂單哦!
點擊 登錄注冊 即表示同意《億速云用戶服務條款》
您好,登錄后才能下訂單哦!
這篇文章給大家分享的是有關Android如何實現帶有指示器的自定義底部導航欄的內容。小編覺得挺實用的,因此分享給大家做個參考,一起跟隨小編過來看看吧。
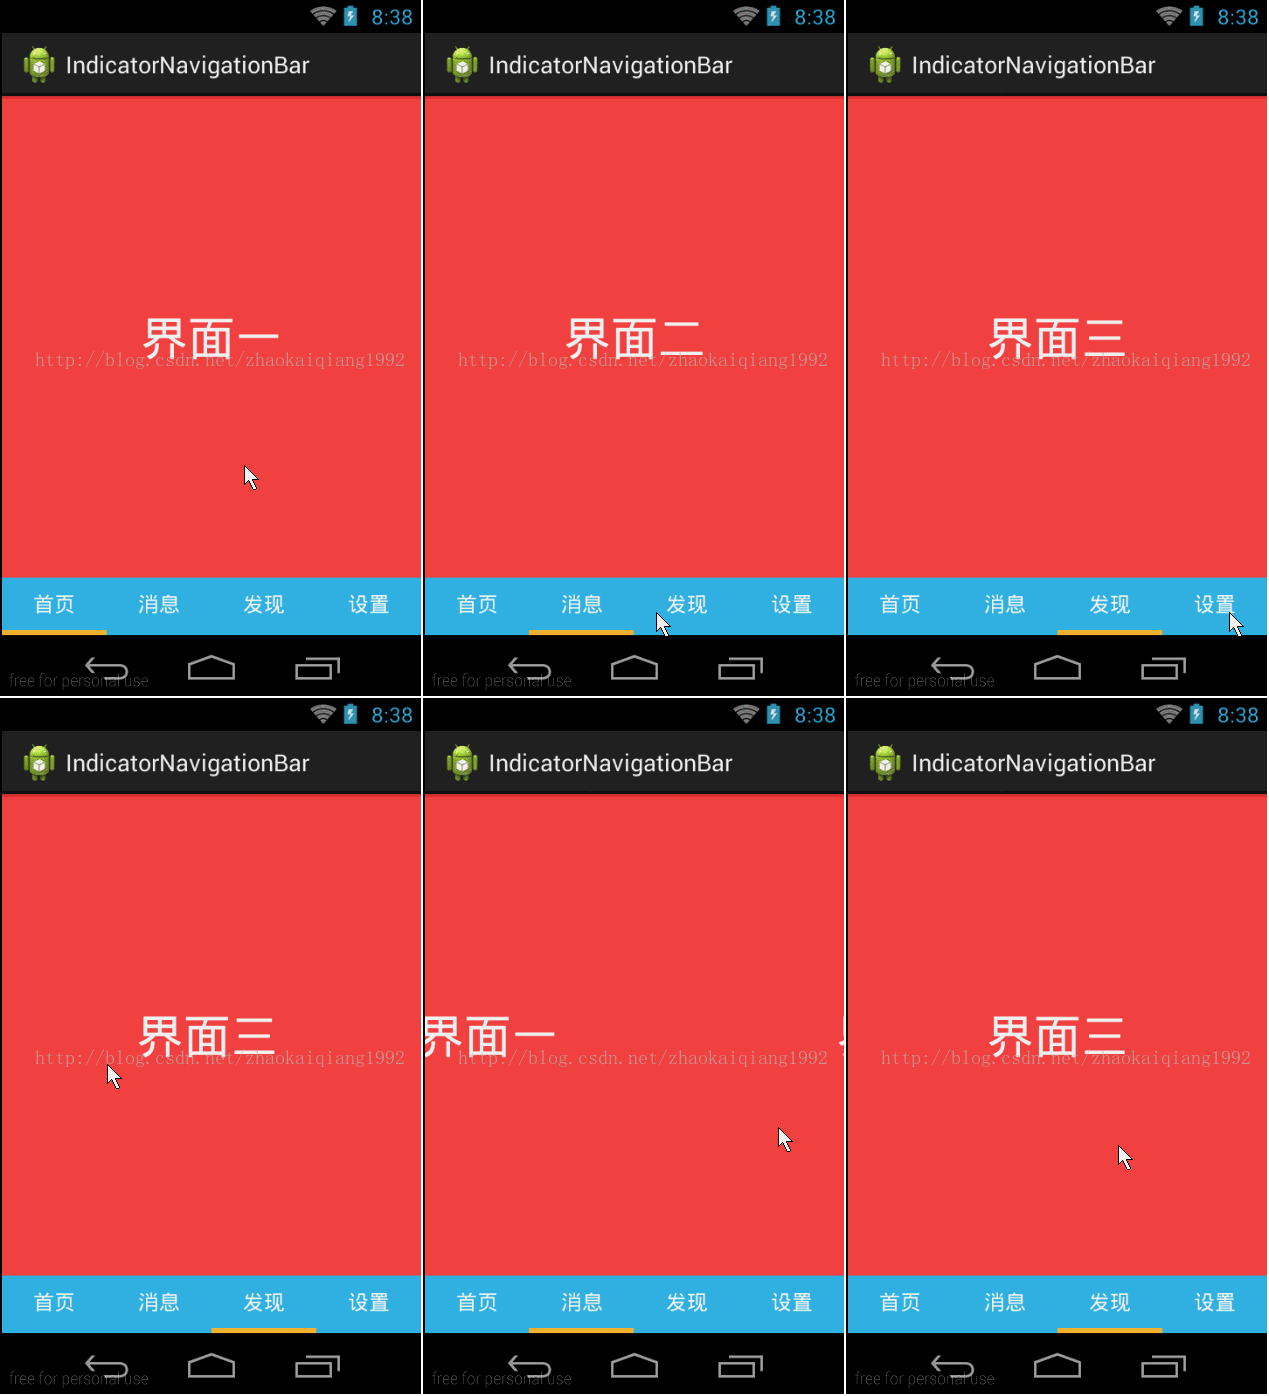
實現一個自定義的帶有指示器的底部導航欄,先看一下實現的效果吧。

這個自定義控件的使用要注意以下幾個方面:
1.沒有布局文件及資源文件,只需要一個java文件就可調用
2.可以非常靈活的使用,一句代碼就可以添加到項目中
3.暫時只支持4.0以上版本,顏色值使用的是系統自帶色值,如需在低版本使用,請自己替換顏色值
4.支持智能適配,可以根據底部按鈕的數量,自動的調整布局
5.主內容區域,必須使用Fragment實現,通過附加到Viewpager上實現界面的左右滑動
下面給出主程序的實現,注釋很清楚哈
package com.example.indicatornavigationbar;

import android.app.Activity;
import android.content.Context;
import android.support.v4.view.ViewPager;
import android.support.v4.view.ViewPager.OnPageChangeListener;
import android.util.DisplayMetrics;
import android.view.Gravity;
import android.view.View;
import android.view.View.OnClickListener;
import android.view.ViewGroup;
import android.view.animation.Animation;
import android.view.animation.TranslateAnimation;
import android.widget.ImageView;
import android.widget.ImageView.ScaleType;
import android.widget.LinearLayout;
import android.widget.TextView;

/**
 *
 * @ClassName: com.mengle.activity.IndicatorNavigationBar
 * @Description: 帶有指示器的底部導航欄
 * @author zhaokaiqiang
 * @date 2014-10-17 上午11:07:40
 *
 */
public class IndicatorNavigationBar extends LinearLayout implements
  OnClickListener, OnPageChangeListener {

 // 導航欄默認高度,不包括指示器高度,單位是dp
 private static final int HEIGHT_NAVIGATION_BAR = 40;
 // 指示器默認高度,單位是dp
 private static final int HEIGHT_INDICATOR = 4;

 private Context context;
 private ViewPager viewPager;
 // 指示器
 private ImageView ivBottomLine;
 // 當前顯示的index
 private int currIndex = 0;
 // 存儲移動位置
 private int positions[];
 // 標題數量
 private int titleCount;

 public IndicatorNavigationBar(Context context) {
  super(context);
  this.context = context;
 }

 /**
  *
  * @Description: 依附到父布局上
  * @param viewGroup
  *   要依附在的父布局
  * @param titles
  *   底部顯示的導航文字
  * @param viewPager
  *   綁定的ViewPager對象
  * @return void
  */
 public void attachToParent(ViewGroup viewGroup, String[] titles,
   ViewPager viewPager) {

  this.viewPager = viewPager;
  titleCount = titles.length;

  // 初始化主布局
  setLayoutParams(new LayoutParams(LayoutParams.MATCH_PARENT,
    dip2px(HEIGHT_NAVIGATION_BAR + HEIGHT_INDICATOR)));
  setBackgroundColor(getResources().getColor(android.R.color.transparent));
  setOrientation(VERTICAL);

  // 導航欄布局
  LinearLayout ll_navigation = new LinearLayout(context);
  ll_navigation.setLayoutParams(new LayoutParams(
    LayoutParams.MATCH_PARENT, dip2px(HEIGHT_NAVIGATION_BAR)));
  ll_navigation.setBackgroundColor(getResources().getColor(
    android.R.color.holo_blue_light));
  ll_navigation.setOrientation(HORIZONTAL);

  // 生成導航按鈕(TextView)
  for (int i = 0; i < titles.length; i++) {

   TextView textView = new TextView(context);
   textView.setLayoutParams(new LayoutParams(0,
     dip2px(HEIGHT_NAVIGATION_BAR), 1));
   textView.setText(titles[i]);
   textView.setGravity(Gravity.CENTER);
   textView.setTextSize(16);
   textView.setTextColor(getResources()
     .getColor(android.R.color.white));
   textView.setId(i);
   textView.setOnClickListener(this);
   ll_navigation.addView(textView);
  }
  // 添加導航
  this.addView(ll_navigation);

  // 指示器布局
  LinearLayout ll_indicator = new LinearLayout(context);
  ll_indicator.setLayoutParams(new LayoutParams(
    LayoutParams.MATCH_PARENT, dip2px(HEIGHT_INDICATOR)));
  ll_indicator.setBackgroundColor(getResources().getColor(
    android.R.color.holo_blue_light));
  ll_indicator.setOrientation(HORIZONTAL);

  // 指示器
  ivBottomLine = new ImageView(context);
  ivBottomLine.setImageResource(android.R.color.holo_orange_light);
  ivBottomLine.setScaleType(ScaleType.MATRIX);
  ivBottomLine
    .setLayoutParams(new LinearLayout.LayoutParams(
      getScreenWidth(context) / titleCount,
      dip2px(HEIGHT_INDICATOR)));
  ll_indicator.addView(ivBottomLine);
  // 添加指示器
  this.addView(ll_indicator);

  viewGroup.addView(this);
  viewPager.setOnPageChangeListener(this);

  // 初始化移動位置
  positions = new int[titleCount];
  positions[0] = 0;
  int distance = (int) (getScreenWidth(context) / titleCount);
  for (int i = 1; i < titleCount; i++) {
   positions[i] = distance * i;
  }

 }

 @Override
 public void onClick(View v) {
  viewPager.setCurrentItem(v.getId());
 }

 @Override
 public void onPageScrollStateChanged(int arg0) {

 }

 @Override
 public void onPageScrolled(int position, float positionOffset,
   int positionOffsetPixels) {

 }

 @Override
 public void onPageSelected(int position) {

  Animation animation = new TranslateAnimation(currIndex * positions[1],
    positions[position], 0, 0);
  currIndex = position;
  animation.setFillAfter(true);
  animation.setDuration(300);
  ivBottomLine.startAnimation(animation);
 }

 private int dip2px(float dpValue) {
  final float scale = context.getResources().getDisplayMetrics().density;
  return (int) (dpValue * scale + 0.5f);
 }

 // 獲取屏幕寬度
 private int getScreenWidth(Context context) {
  DisplayMetrics dm = new DisplayMetrics();
  ((Activity) context).getWindowManager().getDefaultDisplay()
    .getMetrics(dm);
  return dm.widthPixels;
 }
}
感謝各位的閱讀!關于“Android如何實現帶有指示器的自定義底部導航欄”這篇文章就分享到這里了,希望以上內容可以對大家有一定的幫助,讓大家可以學到更多知識,如果覺得文章不錯,可以把它分享出去讓更多的人看到吧!
免責聲明:本站發布的內容(圖片、視頻和文字)以原創、轉載和分享為主,文章觀點不代表本網站立場,如果涉及侵權請聯系站長郵箱:is@yisu.com進行舉報,并提供相關證據,一經查實,將立刻刪除涉嫌侵權內容。