您好,登錄后才能下訂單哦!
您好,登錄后才能下訂單哦!
這篇“vue3路由配置及路由跳轉傳參的方法是什么”文章的知識點大部分人都不太理解,所以小編給大家總結了以下內容,內容詳細,步驟清晰,具有一定的借鑒價值,希望大家閱讀完這篇文章能有所收獲,下面我們一起來看看這篇“vue3路由配置及路由跳轉傳參的方法是什么”文章吧。
npm i vue-router
在src目錄下創建pages文件夾,里面創建兩個vue文件命名為student.vue,person.vue
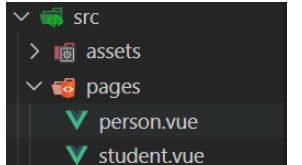
分別編寫兩個vue文件
student.vue和person.vue
<template>
    學生
</template>

<script setup>

</script>

<style scoped lang="less">

</style>
<template>
人類
</template>

<script setup>

</script>

<style scoped lang="less">

</style>
在src目錄下配置router.js文件
import { createRouter,createWebHistory } from "vue-router";
const router=createRouter({
    history:createWebHistory(),
    routes:[
        {
            component:()=>import('../pages/person.vue'),
            name:'person',
            path:'/person'
        },
        {
            component:()=>import('../pages/student.vue'),
            name:'student',
            path:'/student'
        },
        {
            //實現路由重定向,當進入網頁時,路由自動跳轉到/student路由
            redirect:'/student',
            path:'/'
        }
    ]
})
export default router在main.js中使用路由
import { createApp } from 'vue'
import App from './App.vue'
import router from './router'

createApp(App).use(router).mount('#app')
在app.vue中進行路由展示,使用router-link進行路由跳轉,to代表跳轉到哪個路由
<template>
  <router-view></router-view>
  <hr>
  <div>
    <router-link to="/student">到student路由</router-link>
    <br>
    <router-link to="/person">到person路由</router-link>
  </div>
</template>

<script setup>

</script>
<style scoped>

</style>
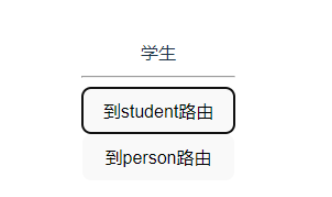
效果如下圖所示,點擊(到student路由)或(到person路由)會進行路由跳轉

聲明式路由通過router-link進行路由跳轉,編程式路由通過函數實現
修改app.vue,vue3使用的是組合式API,需要引入
要引入useRouter,useRoute,還要
const router=useRouter()
const route=useRoute()
<template>
  <router-view></router-view>
  <hr>
  <div>
    <button @click="toStudent">到student路由</button>
    <br>
    <button @click="toPerson">到person路由</button>
  </div>
</template>

<script setup>
import {useRouter,useRoute} from 'vue-router'
const router=useRouter()
const route=useRoute()
const toStudent=()=>{
  router.push('student')
}
const toPerson=()=>{
  router.push('person')
}
</script>
<style scoped>

</style>
通過router.push進行路由跳轉
路由之間用router路由器,當前路由使用toute路由
結果如下圖所示,實現編程式路由跳轉
如果在配置路由時沒有設置別名,需要通過router.push配置對象進行跳轉
const toStudent=()=>{
  router.push({
    path:'/student'
  })
}
const toPerson=()=>{
  router.push({
    path:'/person'
  })
}向student路由傳遞id,name
const toStudent=()=>{
  router.push({
    path:'/student',
    query:{
      id:1,
      name:'張三'
    }
  })
}
student路由接收query參數
<template>
    學生組件
    <div>{{data.query}}</div>
</template>

<script setup>
import { reactive } from 'vue';
import {useRouter,useRoute} from 'vue-router'
const route=useRoute()
let data=reactive({
    query: route.query
})
</script>
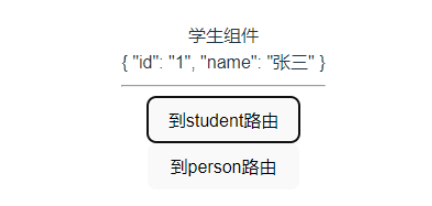
效果如下圖所示
假設向person路由傳遞params參數,要在路由配置時進行修改
params傳參需要使用name進行指定路由
const toPerson=()=>{
  router.push({
    name:'person',
    params:{
      keyword:2
    }
  })
}
同時在路由配置需要修改,假設傳遞的是keyword,
需要在path使用占位符加關鍵字
?表示可傳可不傳
{
      component:()=>import('../pages/person.vue'),
      name:'person',
      path:'/person/:keyword?'
},
在person.vue中接收params參數
<template>
    人類組件
    <div>{{data.params.keyword}}</div>
</template>

<script setup>
import { reactive } from 'vue';
import {useRouter,useRoute} from 'vue-router'
const route=useRoute()
let data=reactive({
    params: route.params
})
</script>
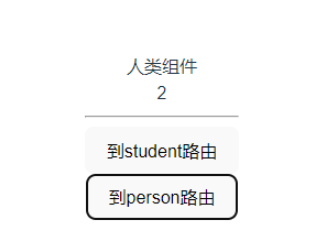
效果如下所示
給student路由添加子組件(stu1,stu2組件)
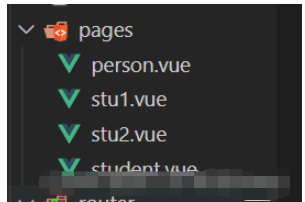
子組件的path不帶 /
{
            component:()=>import('../pages/student.vue'),
            name:'student',
            path:'/student',
            children:[
                {
                    path:'stu1',
                    name:'stu1',
                    component:()=>import('../pages/stu1.vue')
                },
                {
                    path:'stu2',
                    name:'stu2',
                    component:()=>import('../pages/stu2.vue')
                },
                {
                    path:'',
                    component:()=>import('../pages/stu1.vue')
                }
            ]
        }
編寫stu1組件
<template>
stu1
</template>

<script setup>

</script>

<style scoped lang="less">

</style>
編寫stu2組件
<template>
stu2
</template>

<script setup>

</script>

<style scoped lang="less">

</style>
在student組件進行子組件展示
<template>
    學生組件
    <div>{{data.query}}</div>
    子組件展示
    <router-view></router-view>
    <router-link to="/student/stu1">到stu1</router-link>
    <router-link to="/student/stu2">到stu2</router-link>
</template>

<script setup>
import { reactive } from 'vue';
import {useRouter,useRoute} from 'vue-router'
const route=useRoute()
let data=reactive({
    query: route.query
})
</script>
通過使用router-link進行路由跳轉,也可以通過編程式路由跳轉
to="/student/stu1" 需要使用完整路徑進行跳轉
效果展示
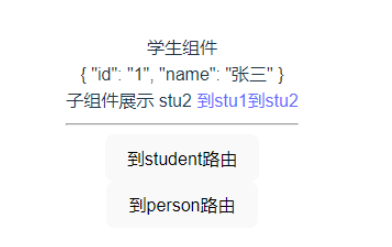
以上就是關于“vue3路由配置及路由跳轉傳參的方法是什么”這篇文章的內容,相信大家都有了一定的了解,希望小編分享的內容對大家有幫助,若想了解更多相關的知識內容,請關注億速云行業資訊頻道。
免責聲明:本站發布的內容(圖片、視頻和文字)以原創、轉載和分享為主,文章觀點不代表本網站立場,如果涉及侵權請聯系站長郵箱:is@yisu.com進行舉報,并提供相關證據,一經查實,將立刻刪除涉嫌侵權內容。