您好,登錄后才能下訂單哦!
您好,登錄后才能下訂單哦!
這篇文章主要介紹“uniapp如何開發安卓App實現高德地圖路線規劃導航功能”,在日常操作中,相信很多人在uniapp如何開發安卓App實現高德地圖路線規劃導航功能問題上存在疑惑,小編查閱了各式資料,整理出簡單好用的操作方法,希望對大家解答”uniapp如何開發安卓App實現高德地圖路線規劃導航功能”的疑惑有所幫助!接下來,請跟著小編一起來學習吧!
描述這個技術是做什么的/什么情況下會使用到這個技術,學習該技術的原因,技術的難點在哪里。控制在50-100字內。
uniapp的map組件中導航路線的展示。是uniapp開發app時引入地圖導航的實現方式。技術難點在于實現map組件時對于屬性以及函數的細節使用很容易出現一些奇怪的bug。
描述你是如何實現和使用該技術的,要求配合代碼和流程圖詳細描述。可以再細分多個點,分開描述各個部分。
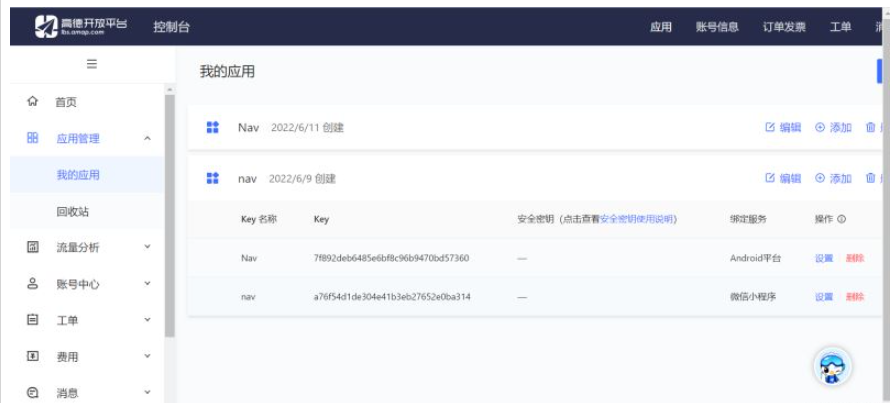
首先是在地圖開發者平臺申請地圖的key
key在地圖開發時引入地圖時是必備
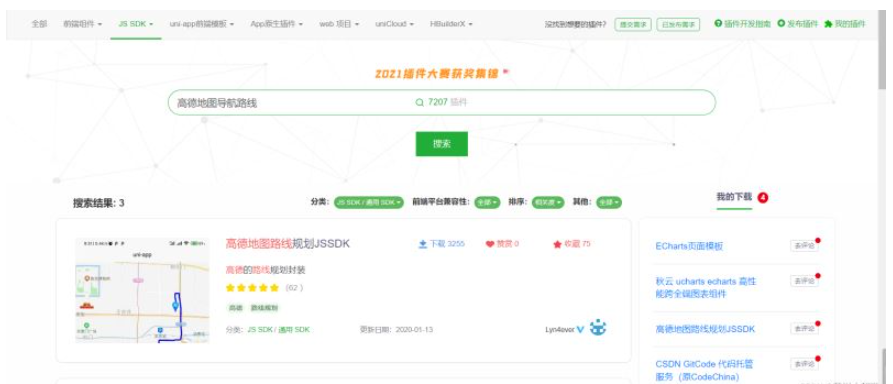
接著在開發工具HbuilderX的插件市場安裝插件
在插件市場找到這個路線規劃插件,點擊進行安裝到開發工具中。
在頁面的script中引入js文件
import Amap from '@/js/lyn4ever-gaode.js';
以上的js文件有兩個函數,分別為繪制路線與路線標記點函數
繪制規劃路線函數
//繪制規劃路線
function PlanningRoute(start, end, _waypoints, result, fail) {
	let that = this;
	var myAmapFun = new amapFile.AMapWX({
		key: key
	});
	myAmapFun.getDrivingRoute({
		origin: start,
		destination: end,
		waypoints: _waypoints,
		success: function(data) {
			var points = [];
			if (data.paths && data.paths[0] && data.paths[0].steps) {
				var steps = data.paths[0].steps;
				for (var i = 0; i < steps.length; i++) {
					var poLen = steps[i].polyline.split(';');
					for (var j = 0; j < poLen.length; j++) {
						points.push({
							longitude: parseFloat(poLen[j].split(',')[0]),
							latitude: parseFloat(poLen[j].split(',')[1])
						})
					}
				}
			}
			result({
				points: points,
				color: "#0606ff",
				width: 8
			})
		},
		fail: function(info) {
			fail(info)
		}
	})
}
路線標記點函數
//標記標記點
function Makemarkers(startpoi, endpoi, waypoints, success) {
	let markers = [];
	//起點
	let start = {
		iconPath: "@/static/img/log/nav.png",
		id: 0,
		longitude: startpoi.split(",")[0],
		latitude: startpoi.split(",")[1],
		width: 23,
		height: 33,
		callout:{
			content:'起點',
		}
	}
	markers.push(start)
	//終點
	let end = {
		iconPath: "@/static/img/log/nav.png",
		id: 1,
		longitude: endpoi.split(",")[0],
		latitude: endpoi.split(",")[1],
		width: 23,
		height: 33,
		callout:{
			content:'終點',
		}
	}
	markers.push(end)
	//途經點,先將其分隔成為數組
	let _waypoints = waypoints.split(';')
	for (let i = 0, _len = _waypoints.length; i < _len; i++) {
		let point = {
			iconPath: "/static/tjd.png",
			id: i,
			longitude: parseFloat(_waypoints[i].split(",")[0]),
			latitude: parseFloat(_waypoints[i].split(",")[1]),
			width: 23,
			height: 33,
			callout:{
				content:'途徑點',
			}
		}
		markers.push(point)
	}
	success(markers);
}
接著在script里的showRouter()調用js里面的兩個函數
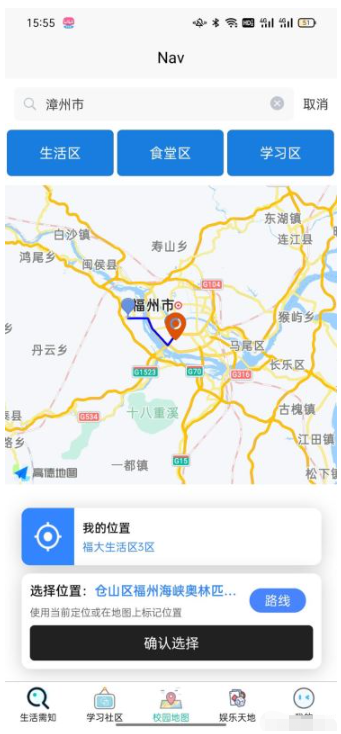
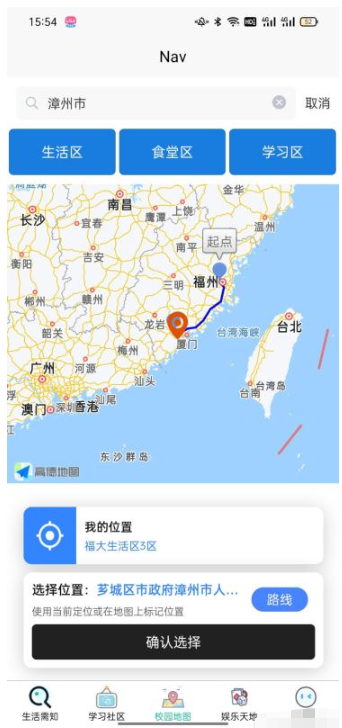
只要傳入起點與終點的經緯度即可在map組件里展示出規劃路線來
只要傳入對應的路線途中打點的數組對象即可在路線中顯示經過的點。
showRouter(){
	let that = this;
	var startPoi = that.longitude+','+that.latitude;
	var wayPoi ="";
	var endPoi = that.addressObj.longitude+','+that.addressObj.latitude;

	Amap.line(startPoi, endPoi, wayPoi,function(res){
		that.polyline=[];
		that.polyline.push(res)
	});

	Amap.markers(startPoi,endPoi,wayPoi,function(res){
		that.markers=[];
		that.markers.push.apply(that.markers,res)
	})
}
效果圖
技術使用中遇到的問題和解決過程。要求問題的描述和解決有一定的內容,不能草草概括。要讓遇到相關問題的人看了你的博客之后能夠解決該問題。
導航路線展示后地圖頁面縮放大小不能很好的控制, 由于展示路線后我們期望地圖視角能夠涵括這個路線的起始點,這個問題困擾了我很久,解決前,總是在路線規劃展示后視野僅僅停留在路線的一小部分。解決后,即可完全展示整個路線的視野。
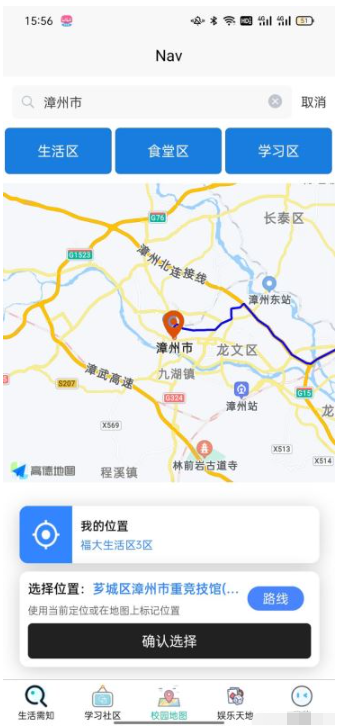
我根據路線的起始點之間的距離,利用一個擬合函數來處理地圖scale的大小,這樣就可以調整好地圖的縮放大小。
通過請求后端來返回導航的距離,設置一個surface數組來存放標記值,將距離換算成km后去遍歷surface數組,當距離大于數組的值時,將地圖的scale設置為surface對應下標值+5,這樣就可以實現路線展示后地圖縮放大小的控制了。
uni.request({
	/* url: 'http://47.95.151.202:8087/getDist/福州大學/福州三坊七巷', */
	url: 'http://47.95.151.202:8087/getDist/'+that.myAddress+'/'+that.realAddress,
	success: (res) => {
		// 請求成功之后將數據給Info
		var result = res.data;
		console.log(that.myAddress);
		console.log(that.realAddress);

		if(result.code===200)
		{
			var surface = [500, 200, 100, 50, 20, 10, 5, 2, 1, 0.5, 0.2, 0.1, 0.05, 0.02];
			var isset=1;
			var farthestDistance=result.data/1000;
			console.log(result.data);
			for(var i in surface) {
				if(farthestDistance >surface[i]) {
					that.myscale = 5 + Number(i);
					isset=0;
					break;
				}
			}
			if(isset) that.myscale=16;
			console.log(that.myscale);
		};
		if(result.code===500){
			uni.showToast({
				title: '獲取距離錯誤,換個地點試試唄',
				icon: 'none',
			});
		}
	},
	fail(err) {
		res(err);
	}
});
到此,關于“uniapp如何開發安卓App實現高德地圖路線規劃導航功能”的學習就結束了,希望能夠解決大家的疑惑。理論與實踐的搭配能更好的幫助大家學習,快去試試吧!若想繼續學習更多相關知識,請繼續關注億速云網站,小編會繼續努力為大家帶來更多實用的文章!
免責聲明:本站發布的內容(圖片、視頻和文字)以原創、轉載和分享為主,文章觀點不代表本網站立場,如果涉及侵權請聯系站長郵箱:is@yisu.com進行舉報,并提供相關證據,一經查實,將立刻刪除涉嫌侵權內容。