您好,登錄后才能下訂單哦!
您好,登錄后才能下訂單哦!
本篇內容介紹了“如何用Vue-Element-Admin集成自己的接口實現登錄跳轉”的有關知識,在實際案例的操作過程中,不少人都會遇到這樣的困境,接下來就讓小編帶領大家學習一下如何處理這些情況吧!希望大家仔細閱讀,能夠學有所成!
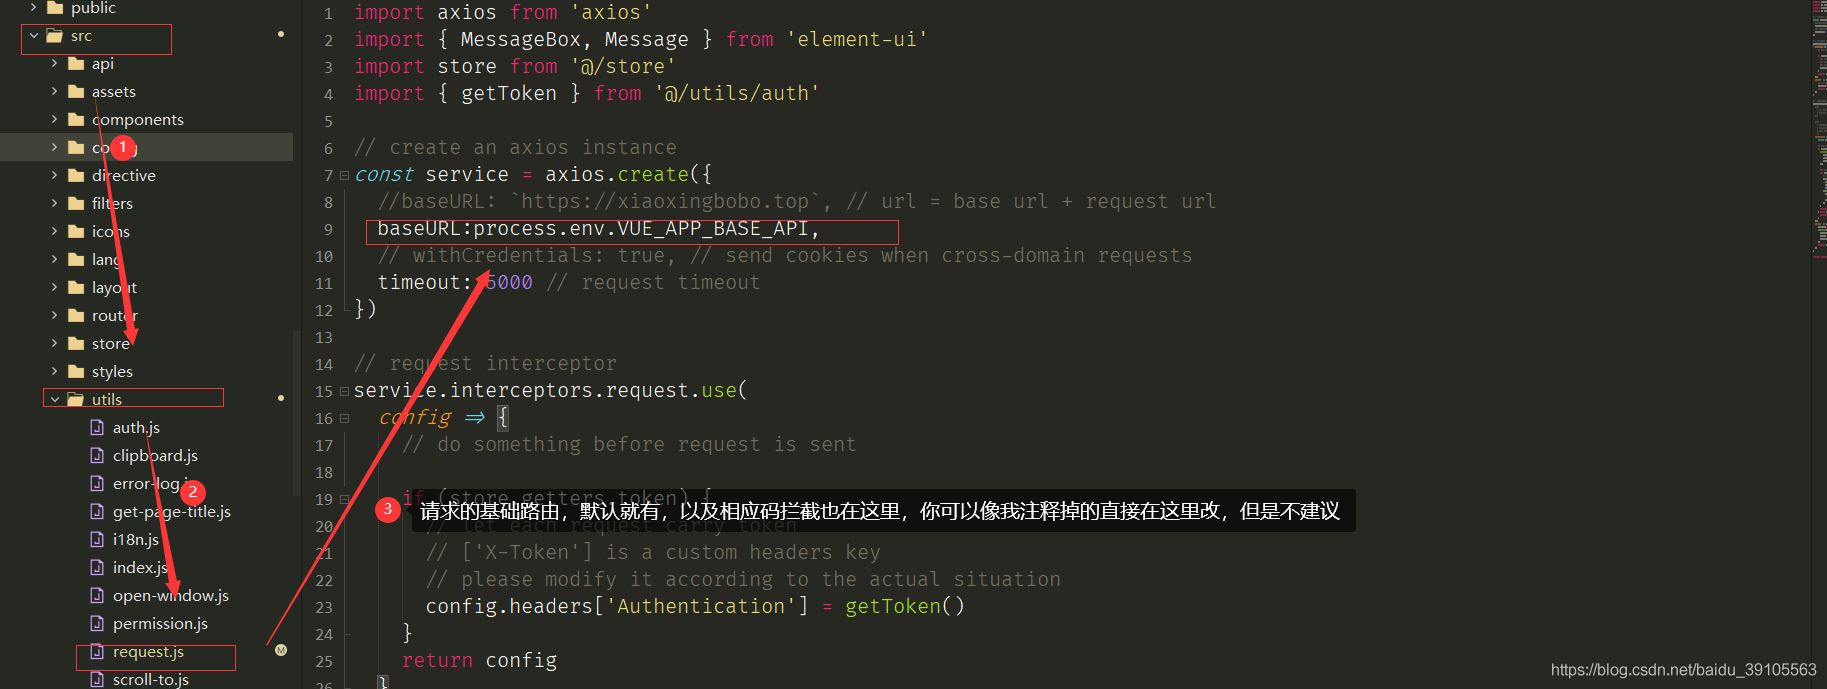
1、先看一下請求配置文件,看axios.create這個方法,baseURL是基礎路由
baseURL:process.env.VUE_APP_BASE_API,
路徑:src-utils-request.js
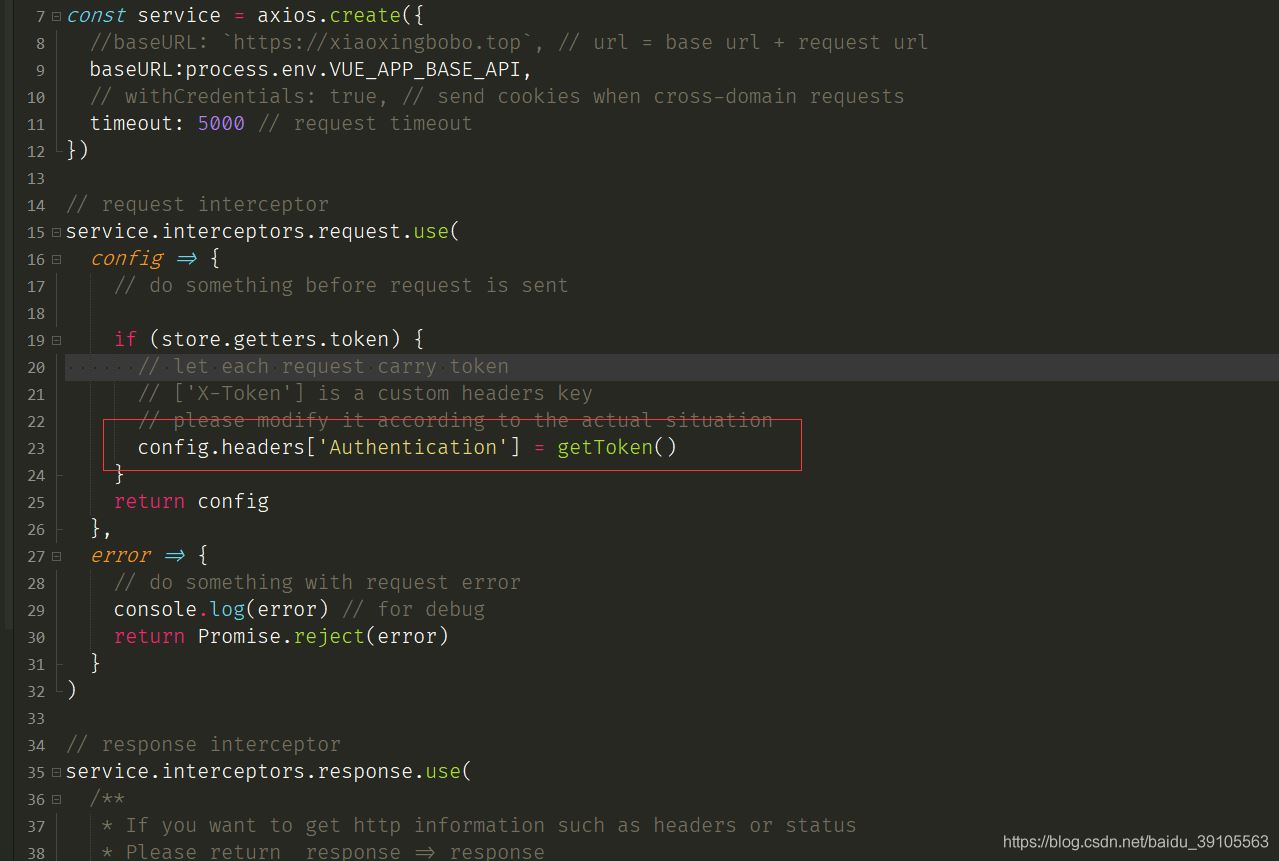
2、然后再看service.interceptors.request.use,設置token請求頭,我后端集成的是jwt,所以請求頭是Authentication,如圖
config.headers['Authentication'] = getToken()
3.設置自己的狀態碼,看service.interceptors.response.use,如圖,設置為自己的狀態碼
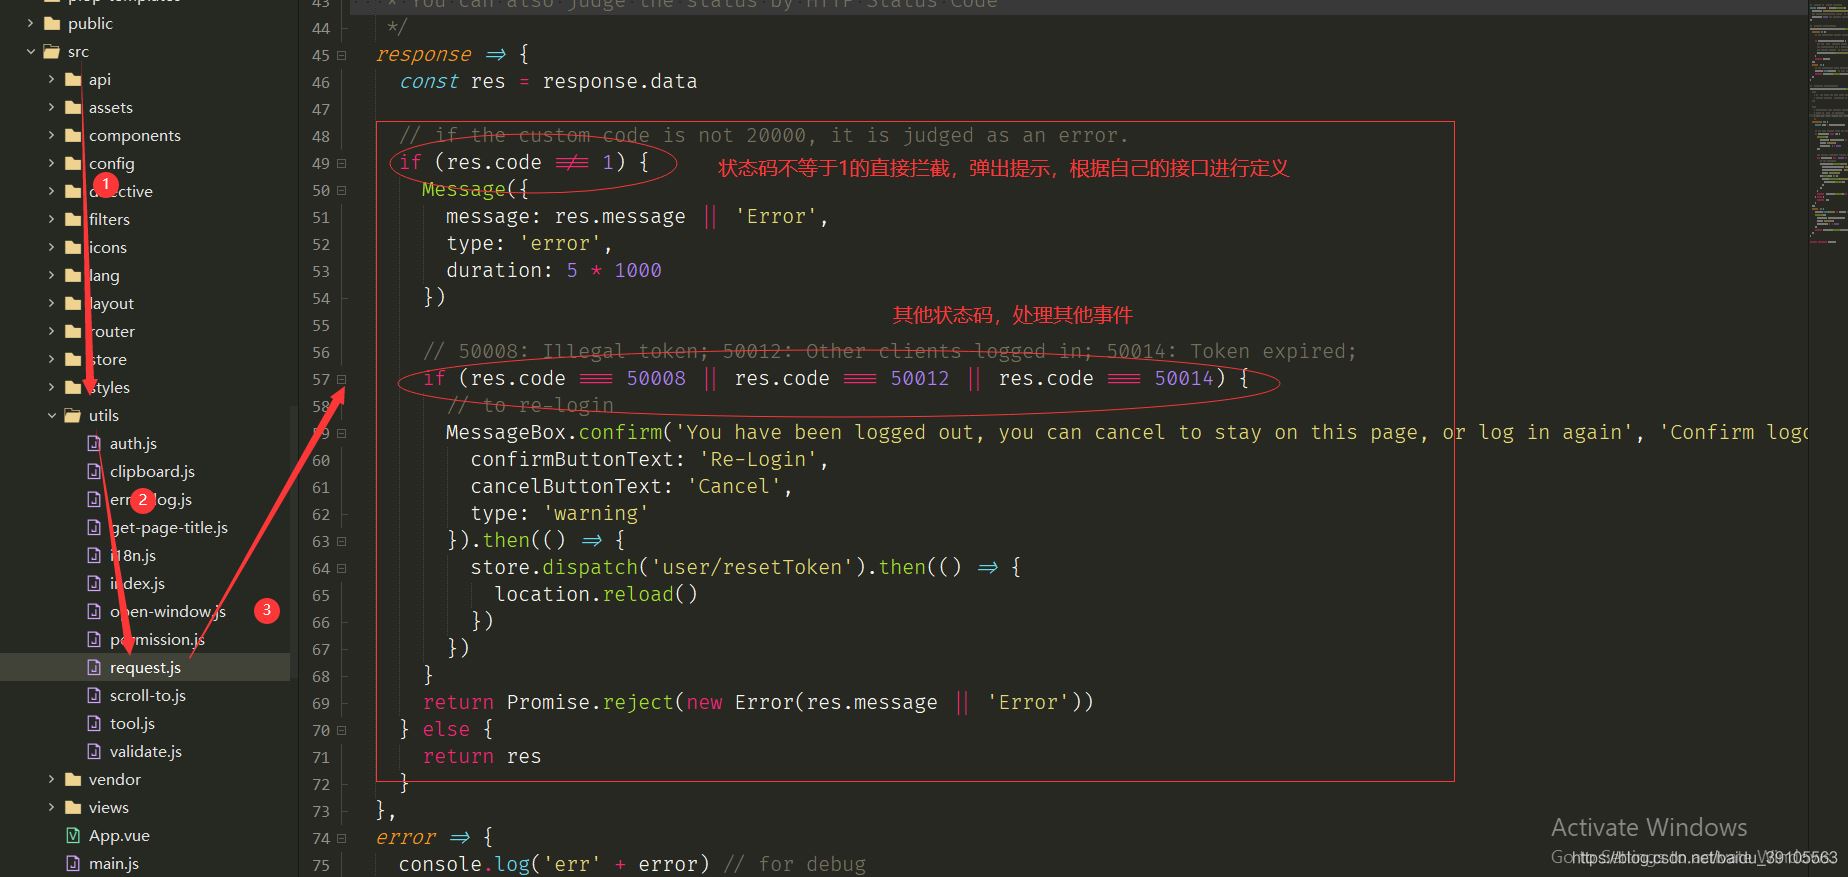
這是我服務器響應的數據,如下,1是正常響應數據
{
    "code": 1,
    "data": {
    "token": "eyJhbGciOiJIUzI1NiIsInR5cCI6IkpXVCJ9.eyJBY2NvdW50SWQiOiJhZG1pbiIsIm5iZiI6MTYyNDE3NTM4MiwiZXhwIjoxNjI0MTc1NDQyLCJpYXQiOjE2MjQxNzUzODJ9.7p8EHMx1b4-yIMRN7Qxden3nZsDmBvevHEf-3oVhFMg",
    "message": "登錄成功",
    "state": true
    }
}
4、改.env.production和.env.development里面的api都為空,圖只展示.env.production

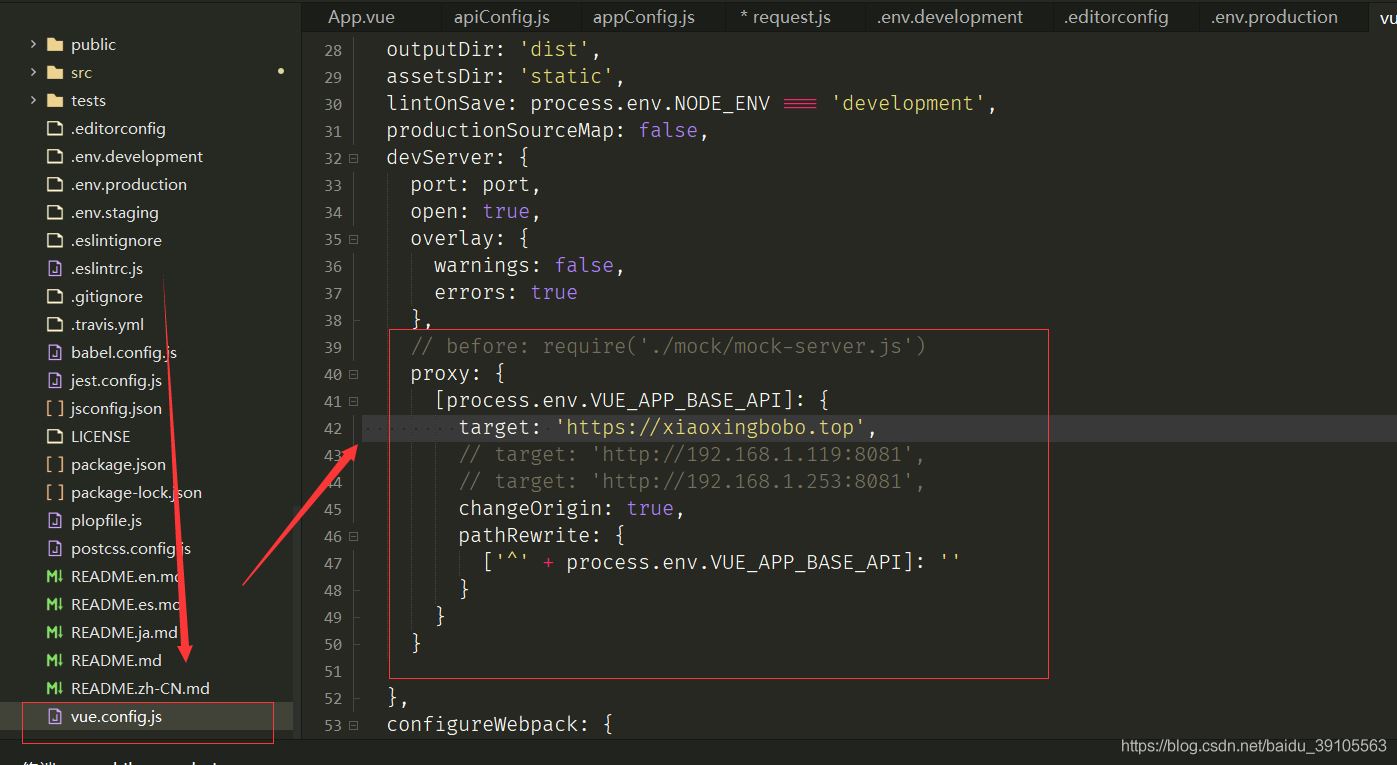
5、改基礎路由配置,在devServer后面添加如下代碼(before這行注釋掉,這個用來模擬數據的,用不到),如圖
// before: require('./mock/mock-server.js')
    proxy: {
      [process.env.VUE_APP_BASE_API]: {
        target: 'https://xiaoxingbobo.top',
        // target: 'http://192.168.1.119:8081',
        // target: 'http://192.168.1.253:8081',
        changeOrigin: true,
        pathRewrite: {
          ['^' + process.env.VUE_APP_BASE_API]: ''
        }
      }
    }
到這里基礎路由基本配置好了
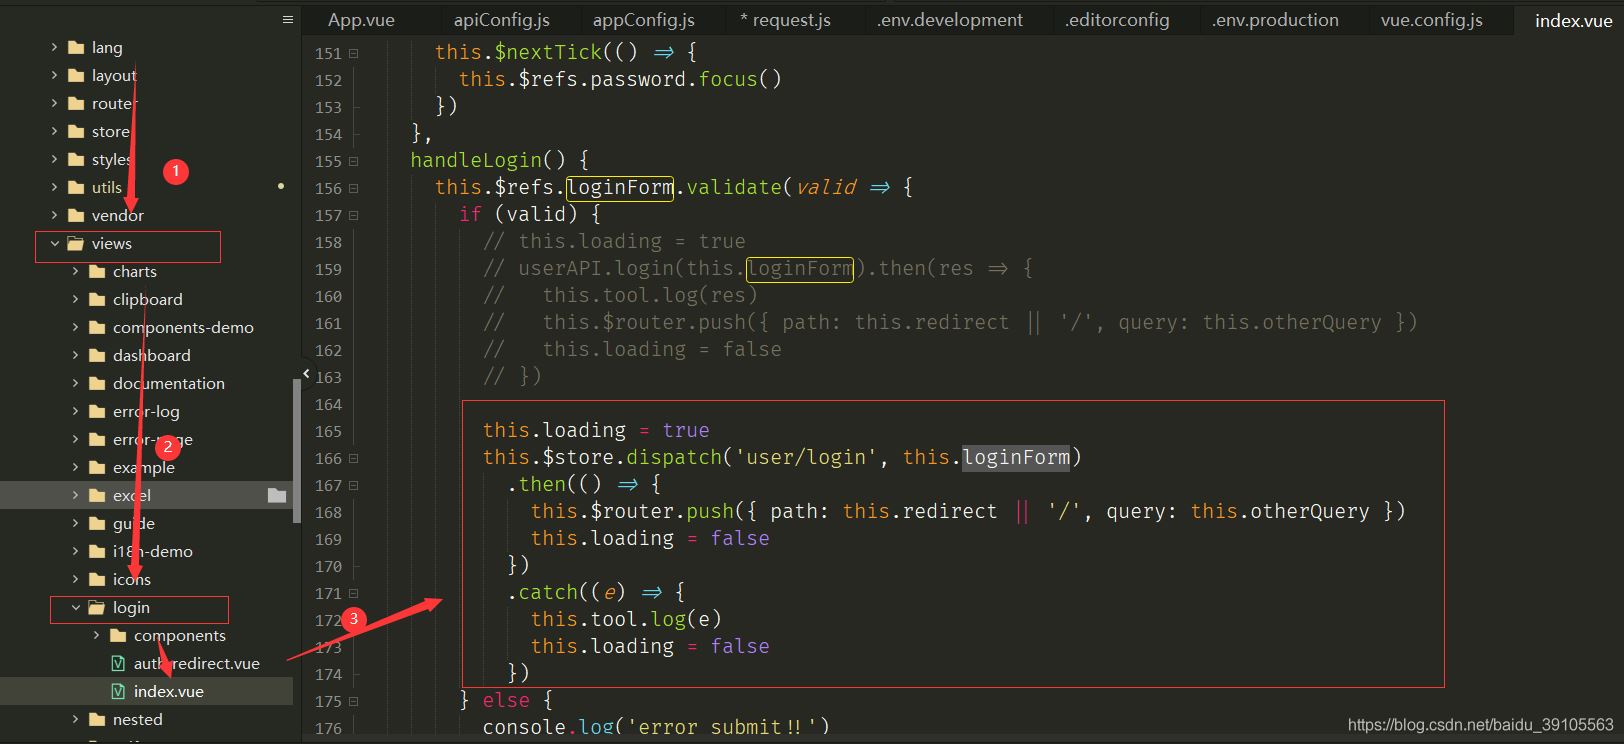
6、在src-view-login-index.html文件中,找到Vue-Element-Admin的登錄接口,添加如下代碼,如圖,把官方的請求方式注釋掉,this.loginForm是請求參數
this.loading = true
          this.$store.dispatch('user/login', this.loginForm)
            .then(() => {
              this.$router.push({ path: this.redirect || '/', query: this.otherQuery })
              this.loading = false
            })
            .catch((e) => {
              this.tool.log(e)
              this.loading = false
            })
7、設置用戶登錄成功后的跳轉,登錄后必須把token做緩存,不然登錄頁跳轉不了
在src-store-moduls-use.js,如圖
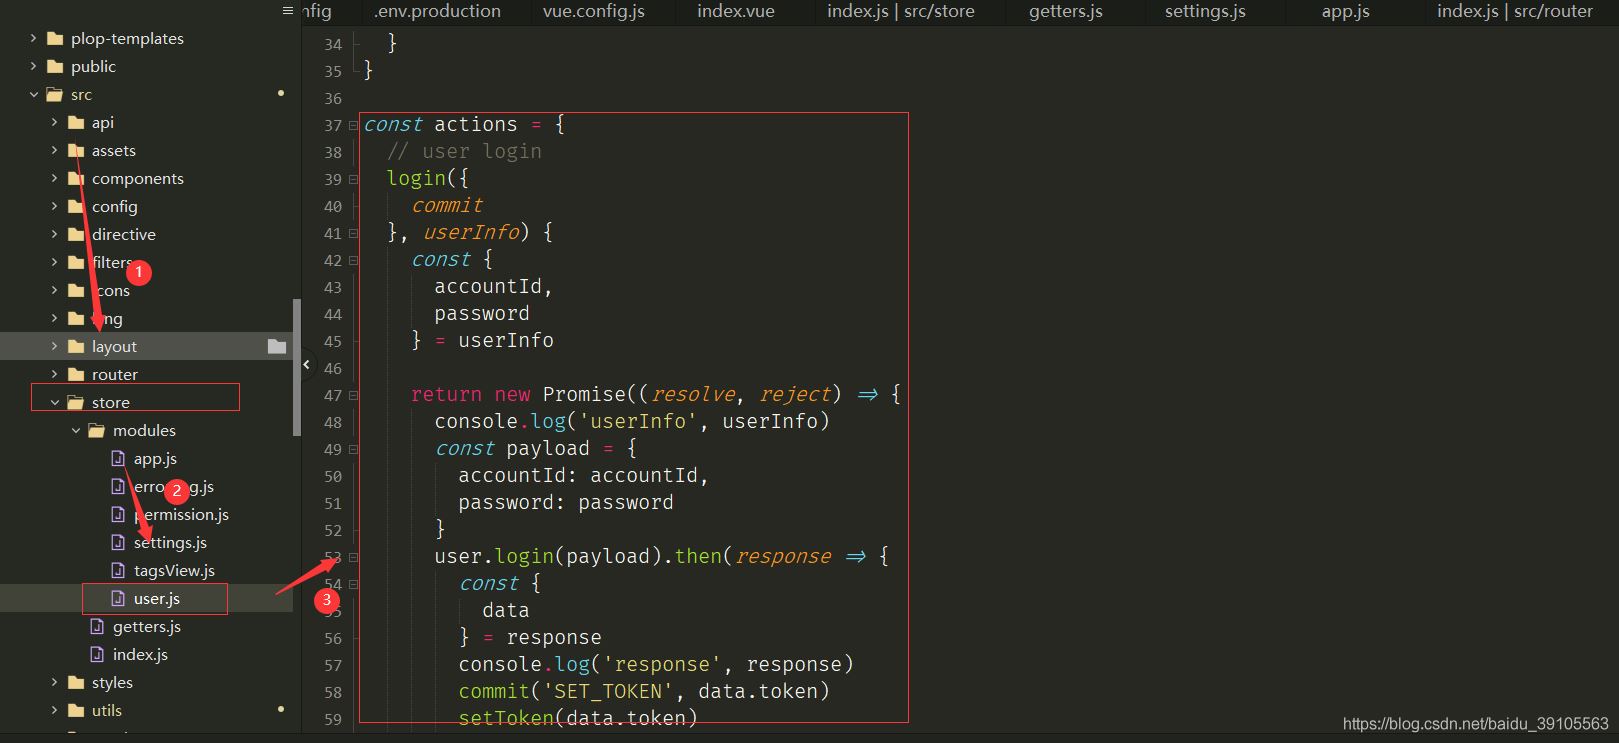
找到action下的login方法,修改代碼如下
const actions = {
  // user login
  login({
    commit
  }, userInfo) {
    const {
      accountId,
      password
    } = userInfo

    return new Promise((resolve, reject) => {
      console.log('userInfo', userInfo)
      //服務器需要的登錄參數
      const payload = {
        accountId: accountId,
        password: password
      }
      //請求服務器
      user.login(payload).then(response => {
        const {
          data
        } = response
        console.log('response', response)
        commit('SET_TOKEN', data.token)
        setToken(data.token)
        resolve()
      }).catch(error => {
        reject(error)
      })
    })
  },
找到getInfo方法,修改代碼如下,因為獲取用戶信息接口沒寫,所以數據直接寫死,根據自己的做調整
getInfo({
    commit,
    state
  }) {
    return new Promise((resolve, reject) => {
      /**
       * 這里請求用戶信息和權限,目前接口沒做,只注釋了,data寫死
       * */
      // user.getInfo(state.token).then(response => {
      // const {
      //   data
      // } = response
      const {
        data
      } = {
        data: {
          roles: ['admin'],
          introduction: 'Administrator',
          avatar: 'https://cloud.xiaoxingbobo.top/nongzhibang/20210429/1107491622257669573',
          name: 'administrator'
        }
      }

      if (!data) {
        reject('Verification failed, please Login again.')
      }

      const {
        roles,
        name,
        avatar,
        introduction,
        token
      } = data

      // roles must be a non-empty array
      if (!roles || roles.length <= 0) {
        reject('getInfo: roles must be a non-null array!')
      }

      commit('SET_ROLES', roles)
      commit('SET_NAME', name)
      commit('SET_AVATAR', avatar)
      commit('SET_INTRODUCTION', introduction)
      commit('SET_TOKEN', token)
      resolve(data)
      // }).catch(error => {
      //   reject(error)
      // })
    })
  },
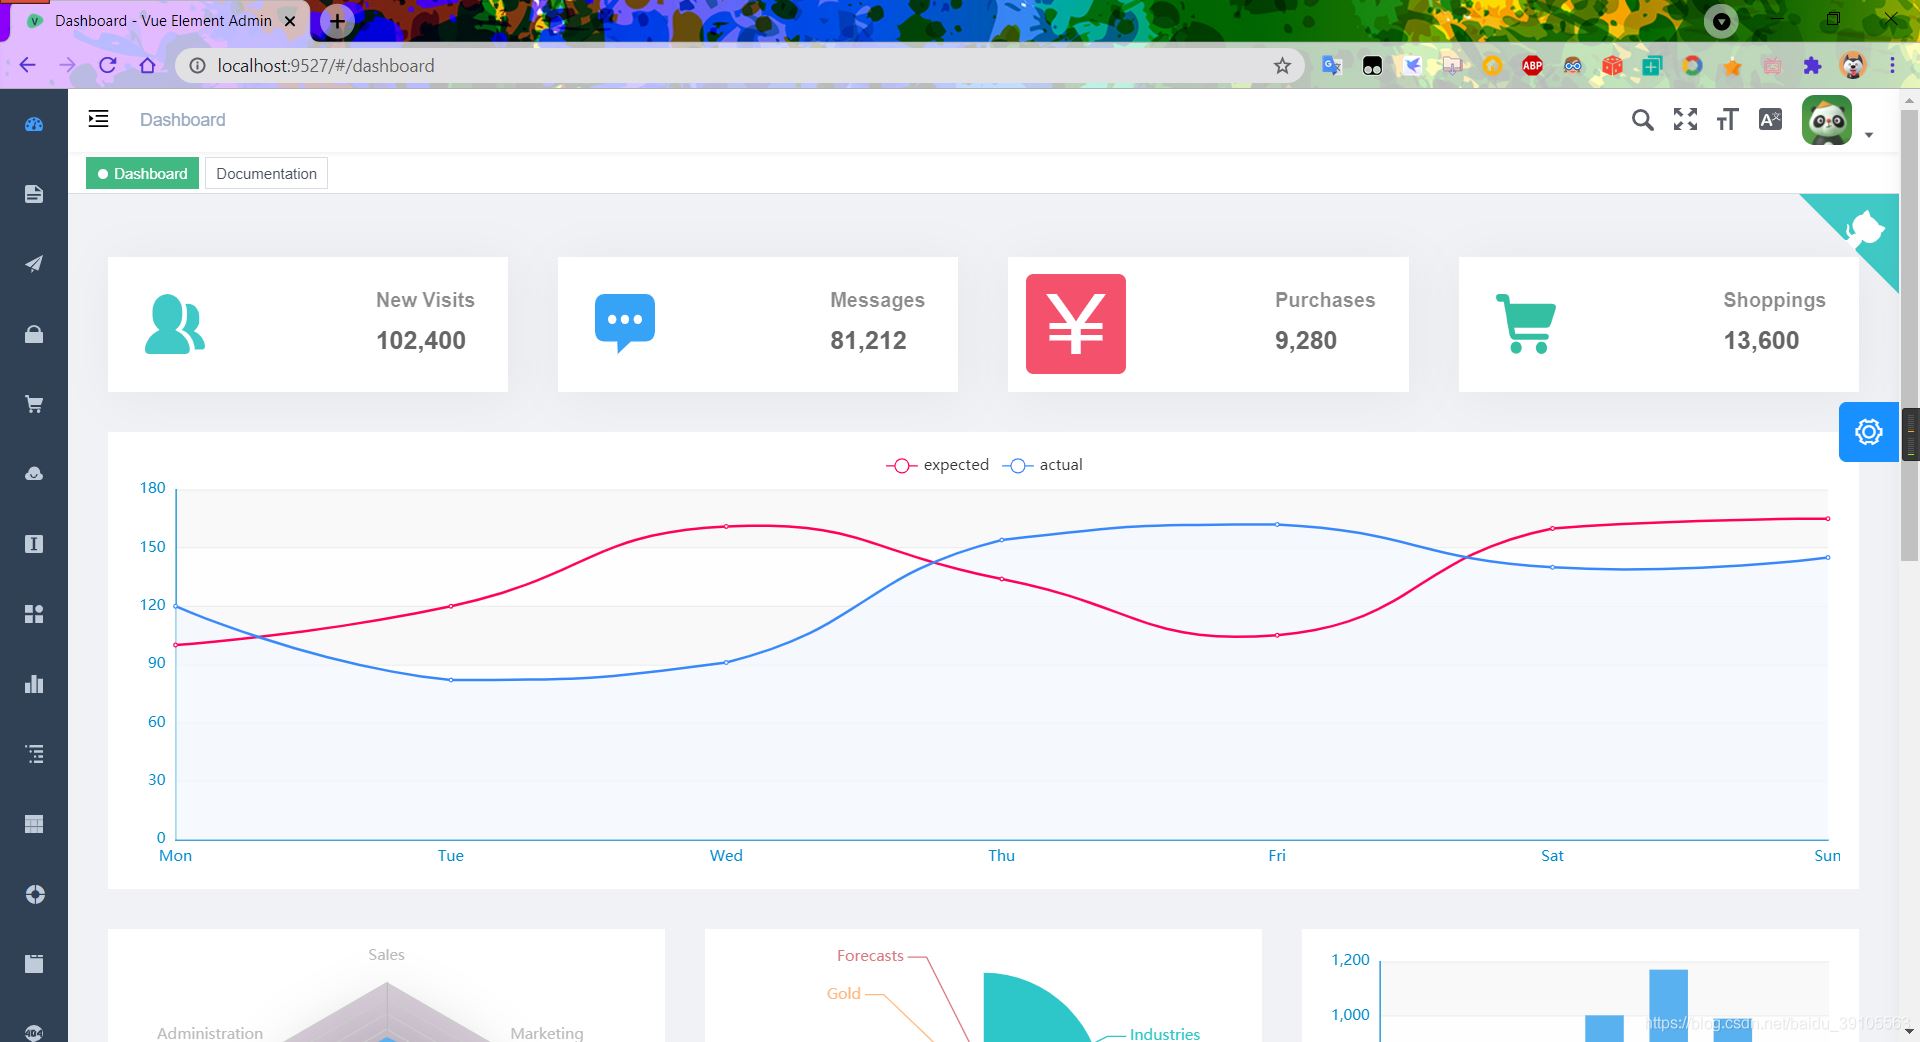
這樣就搞定了Vue-Element-Admin,可以登錄到首頁了
“如何用Vue-Element-Admin集成自己的接口實現登錄跳轉”的內容就介紹到這里了,感謝大家的閱讀。如果想了解更多行業相關的知識可以關注億速云網站,小編將為大家輸出更多高質量的實用文章!
免責聲明:本站發布的內容(圖片、視頻和文字)以原創、轉載和分享為主,文章觀點不代表本網站立場,如果涉及侵權請聯系站長郵箱:is@yisu.com進行舉報,并提供相關證據,一經查實,將立刻刪除涉嫌侵權內容。