您好,登錄后才能下訂單哦!
您好,登錄后才能下訂單哦!
如何使用spring cloud Bus刷新配置,相信很多沒有經驗的人對此束手無策,為此本文總結了問題出現的原因和解決方法,通過這篇文章希望你能解決這個問題。
當我們的業務系統越來越龐大復雜的時候,各種配置也會隨之增多。配置文件只要一修改,會對commonservice-config配置中心先停止服務,然后再重新啟動,最后使配置生效。
如果服務少,我們可以手動方式來啟動,但是對業務和系統的穩定性肯定有一定的影響。
針對以上問題,commonservice-config服務端和業務微服務分別做了相關的配置,服務端負責將git(svn或本地文件系統)中存儲的配置文件進行配置化(我們使用的是本地配置方案,方便直接將配置文件更新到linux上),
業務微服務通過配置從服務端配置中心獲取相關配置,如果配置文件變動了,通過刷新業務微服務的方式,將最新的配置信息獲取。
spring cloud Bus通過一個輕量級消息代理連接分布式系統的節點。這可以用于廣播狀態更改(如配置更改)或其他管理指令。
接下來,我們就來實施通過spring cloud Bus方案,動態刷新服務端配置,具體步驟如下:
1. commonservice-config服務配置可以參考之前的鏈接:
2. 業務微服務配置(以honghu-member-servcie會員服務為例):
<span style="font-size: 16px;">        <dependency>
            <groupId>org.springframework.boot</groupId>
            <artifactId><span style="font-size: 16px;">spring-boot-starter-actuator</span></artifactId>
        </dependency>

    <dependency>
         <groupId>org.springframework.cloud</groupId>
             <artifactId><span style="font-size: 16px;">spring-cloud-starter-bus-amqp</span></artifactId>
    </dependency></span>
yml文件配置:
span style="font-size: 16px;">server:
  port: 5012  spring:
  application:
    name: honghu-member-client
  profiles:
    active: dev,discoveryClient
  cloud:
    config:
      discovery:
        enabled: true
        service-id: commonservice-config-server
      <span style="font-size: 16px;"><strong>name: honghu-member
      profile: dev
    bus:
      trace:
        enabled: true  #開啟消息跟蹤  </strong>
  <strong>rabbitmq:
    host: 192.168.1.254
    port: 5672
    username: honghu
    password: honghu</strong>  </span>
eureka:
  client:
    serviceUrl:
      defaultZone: http://honghu:123456@localhost:8761/eureka/
  instance:
    prefer-ip-address: true  logging:
  level:
    root: INFO
    org.springframework.security: INFO
management:
  security:
    enabled: false  security:
  basic:
    enabled: false</span>
編寫一個測試類(MemberController.java),用來獲取配置項
<span style="font-size: 16px;">package com.honghu.cloud.controller;
  import org.springframework.beans.factory.annotation.Value;  import org.springframework.cloud.context.config.annotation.RefreshScope;  import org.springframework.web.bind.annotation.GetMapping;  import org.springframework.web.bind.annotation.RestController;

<strong>@RefreshScope</strong>  @RestController  public class MemberController {

    @Value("${profile}")
    private String profile;

    @GetMapping("/profile")
    public String getProfile() {
        return this.profile;
    }
}</span>
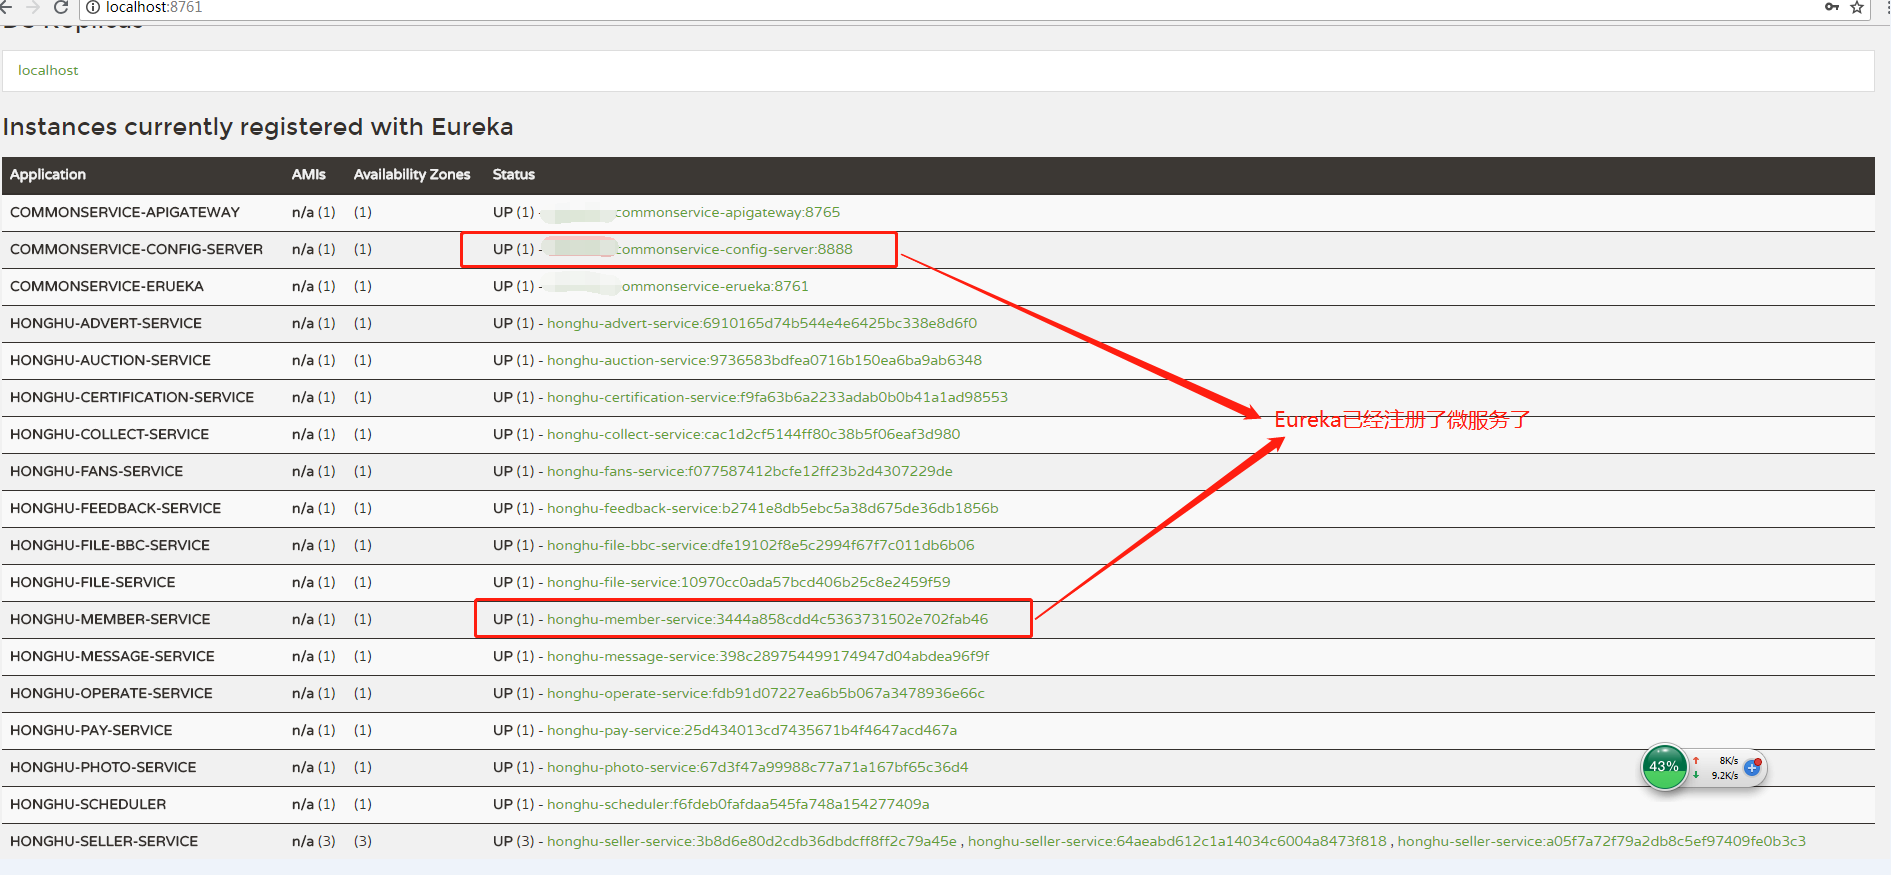
3. 查看注冊中心,commonservice-config、honghu-member-service服務是否已經注冊

4. 訪問一下profile,獲取profile對應的配置信息(原配置):
訪問http://localhost:7071/profile ==》 訪問結果:123456
5. 修改config配置中心的配置文件,將profile=123456修改為honghu123456
再次訪問http://localhost:7071/profile ==》 訪問結果:123456
6. 使用spring cloud bus 刷新方案(使用post man測試工具進行測試)
再次訪問http://localhost:7071/profile ==》 訪問結果:honghu123456
到此,整個commonservice-config配置中心動態刷新方案整理完畢
看完上述內容,你們掌握如何使用spring cloud Bus刷新配置的方法了嗎?如果還想學到更多技能或想了解更多相關內容,歡迎關注億速云行業資訊頻道,感謝各位的閱讀!
免責聲明:本站發布的內容(圖片、視頻和文字)以原創、轉載和分享為主,文章觀點不代表本網站立場,如果涉及侵權請聯系站長郵箱:is@yisu.com進行舉報,并提供相關證據,一經查實,將立刻刪除涉嫌侵權內容。