您好,登錄后才能下訂單哦!
您好,登錄后才能下訂單哦!
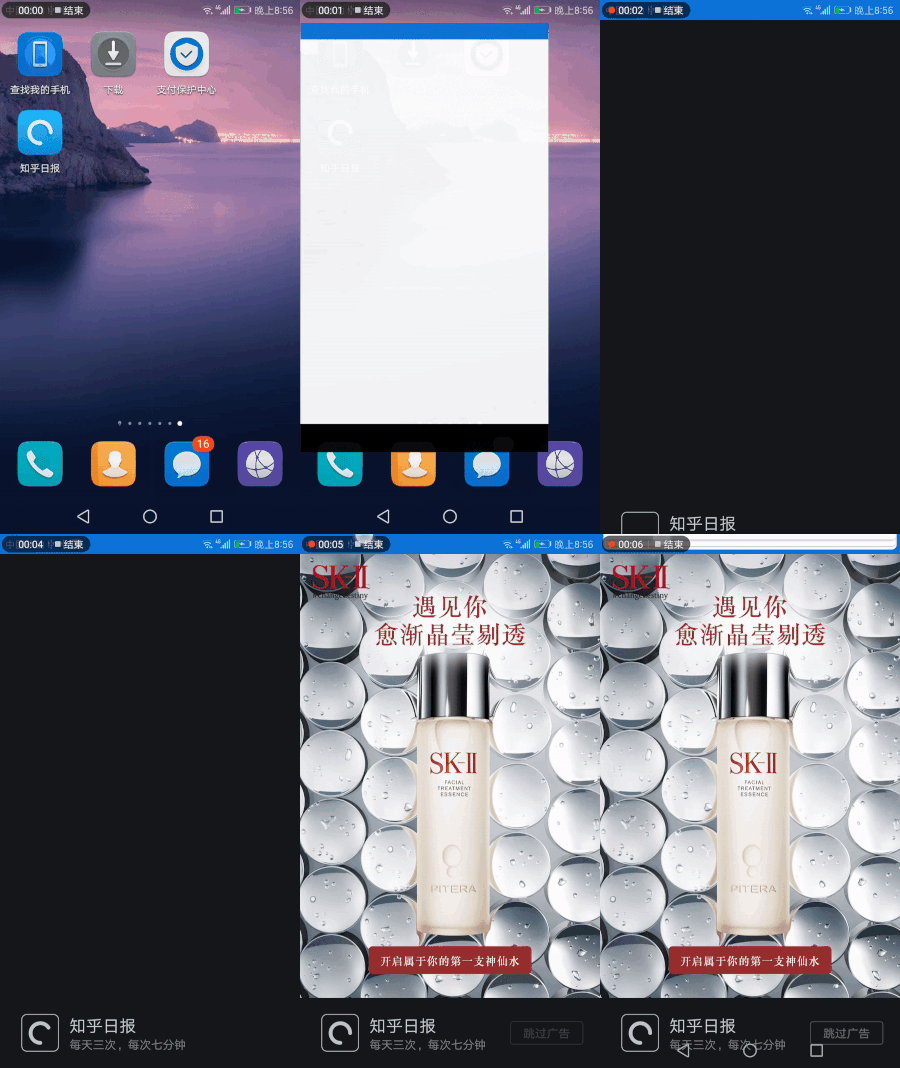
先看看知乎日報開屏頁的效果,非常漂亮的開屏效果

ezgif.com-resize (2).gif
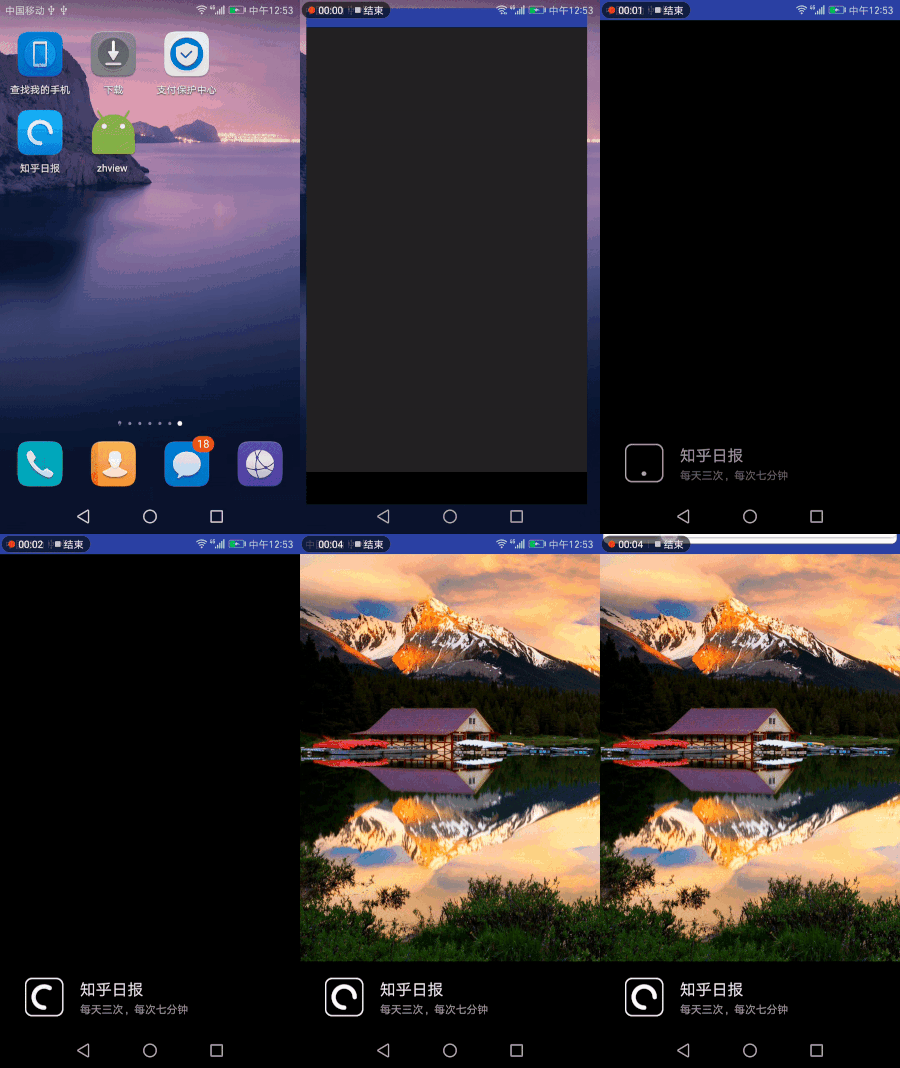
然后我來一個

ezgif.com-resize (1).gif
也不錯~感覺可以以假亂真了~
很簡單,直接開始。
實現這個效果先制定個三步走策略
底部布局上滑展示
直接上代碼吧,屬性動畫基本使用
private void startAnimation() {
    //位移動畫,從底部滑出,Y方向移動,mHeight是底部布局的高度
    ObjectAnimator translationAnimator= ObjectAnimator.ofFloat(rv_bottom, "translationY", mHeight, 0f);
    //設置時長
    translationAnimator.setDuration(1000);
    //透明度漸變動畫
    ObjectAnimator alphaAnimatorator = ObjectAnimator.ofFloat(rv_bottom, "alpha", 0f,1f);
    //設置時長
    alphaAnimatorator.setDuration(2500);
    //添加監聽器,位移結束后,畫圓弧開始
    translationAnimator.addListener(new Animator.AnimatorListener() {
      @Override
      public void onAnimationStart(Animator animation) {

      }

      @Override
      public void onAnimationEnd(Animator animation) {
        zhview.startAnimation();
      }

      @Override
      public void onAnimationCancel(Animator animation) {

      }

      @Override
      public void onAnimationRepeat(Animator animation) {

      }
    });
    AnimatorSet set = new AnimatorSet();
    //兩個動畫一起執行
    set.play(translationAnimator).with(alphaAnimatorator);
    //go
    set.start();
  }
在位移動畫結束的時候,調用了自定義的view的方法,開始了畫弧的操作。
畫個知弧
接下來開始畫畫~ 自定義一個view,重寫ondraw方法,開畫之前先初始化一個合適的畫筆。
 private void initPaint() {
    mPaint1 = new Paint();
    //設置畫筆顏色
    mPaint1.setColor(Color.WHITE);
    // 設置畫筆的樣式為圓形
    mPaint1.setStrokeCap(Paint.Cap.ROUND);
    // 設置畫筆的填充樣式為描邊
    mPaint1.setStyle(Paint.Style.STROKE);
    //抗鋸齒
    mPaint1.setAntiAlias(true);
    //設置畫筆寬度
    mPaint1.setStrokeWidth(mBorderWidth2);

    mPaint2 = new Paint();
    mPaint2.setColor(Color.WHITE);
    mPaint2.setStyle(Paint.Style.STROKE);
    mPaint2.setAntiAlias(true);
    mPaint2.setStrokeWidth(mBorderWidth3);
  }
mPaint1用來畫弧,設置填充樣式為描邊,這樣起碼我們就能輕松畫一個圓環了。其實要畫的知弧就是一個圓環被啃去了一塊的感覺~ 但被啃的地方很光滑,所以需要一個圓頭的畫筆 。
mPaint2用來畫外面的圓角矩形環,設置也差不多。
@Override
  protected void onDraw(Canvas canvas) {
    super.onDraw(canvas);
    canvas.drawColor(Color.BLACK);
    //矩形輪廓,圓弧在內部,給予一定的內邊距
    RectF rectF1 = new RectF(mBorderWidth2/2+dipToPx(8), mBorderWidth2/2+dipToPx(8), getWidth() -mBorderWidth2/2-dipToPx(8),getWidth()-mBorderWidth2/2-dipToPx(8) );
    //畫圓弧 參數1:矩形輪廓 參數2:起始位置 參數3:掃過的范圍,初始為0 參數4:是否連接圓心
    canvas.drawArc(rectF1, 90, mCurrentRadian, false, mPaint1);
    //矩形輪廓
    RectF rectF2 = new RectF(mBorderWidth3/2,mBorderWidth3/2,getWidth()-mBorderWidth3/2,getWidth()-mBorderWidth3/2);
    //畫圓角矩形邊框 參數2 3設置x,y方向的圓角corner 都要設置
    canvas.drawRoundRect(rectF2,dipToPx(8),dipToPx(8),mPaint2);

  }
代碼量很少,但要明確環的畫法,不論是畫圓環還是圓角矩形環,需要先確定一個基準矩形。基準矩形的位置和大小確定環的位置和大小。畫弧的方法canvas.drawArc中的參數2 3設置了開始畫弧的位置和畫弧的范圍。看一下運行效果,圓弧的起始畫點在圓心的正下方,X軸正方向為0度,所以起始畫點為90度。
接下來就使用不斷增大畫弧的范圍的方式來完成動畫的實現。上代碼
private void startAnimationDraw() {
    //圓弧掃過范圍為270度
    ValueAnimator valueAnimator=new ValueAnimator().ofFloat(0,270);
    //動畫持續時間
    valueAnimator.setDuration(mDuration);
    //設置插值器,中間快兩頭慢
    valueAnimator.setInterpolator(new AccelerateDecelerateInterpolator());
    //添加狀態監聽器
    valueAnimator.addUpdateListener(new ValueAnimator.AnimatorUpdateListener() {
      @Override
      public void onAnimationUpdate(ValueAnimator animation) {
        //不斷增大圓弧掃過的范圍,并重繪來實現動畫效果
        mCurrentRadian= (float) animation.getAnimatedValue();
        invalidate();
      }
    });
    valueAnimator.start();
  }
使用ValueAnimator.ofFloat創建一個值為0-270的動畫,添加狀態監聽,在動畫執行的過程中不斷增大掃過的范圍并重繪視圖從而實現了畫弧的動畫效果。
整個過程就是canvas配合屬性動畫的方式完成了動態繪圖,一點也不復雜。
顯示圖片
這里我使用的是Glide加載的本地圖片,設置了延遲加載把握圖片加載時機,獲得更好的開屏效果
 //延時加載圖片
        new Handler().postDelayed(new Runnable() {
          @Override
          public void run() {
            Glide.with(MainActivity.this).
                load(R.drawable.timg).
                centerCrop().
                skipMemoryCache(true).
                diskCacheStrategy(DiskCacheStrategy.NONE).
                crossFade(500).
                into(image)
            ;
          }
        },2000);
這里個人認為知乎也是用某種方式預先把圖片下載到本地完成來把握精確地加載時機,不知道是不是這樣。。
最后貼一下代碼
activity
public class MainActivity extends AppCompatActivity {
  private RelativeLayout rv_bottom;
  private Zhview zhview;
  private float mHeight;
  private ImageView image;

  @Override
  protected void onCreate(Bundle savedInstanceState) {
    super.onCreate(savedInstanceState);
    setContentView(R.layout.activity_main);
    rv_bottom= (RelativeLayout) this.findViewById(R.id.rv_bottom);
    zhview= (Zhview) this.findViewById(R.id.zhview);
    image= (ImageView) this.findViewById(R.id.image);
    rv_bottom.post(new Runnable() {
      @Override
      public void run() {
        //獲得底部的高度
        mHeight=rv_bottom.getHeight();
        //開始動畫
        startAnimation();
        //延時加載圖片
        new Handler().postDelayed(new Runnable() {
          @Override
          public void run() {
            Glide.with(MainActivity.this).
                load(R.drawable.timg).
                centerCrop().
                skipMemoryCache(true).
                diskCacheStrategy(DiskCacheStrategy.NONE).
                crossFade(500).
                into(image)
            ;
          }
        },2000);
      }
    });
  }

  private void startAnimation() {
    //位移動畫,從底部滑出,Y方向移動
    ObjectAnimator translationAnimator= ObjectAnimator.ofFloat(rv_bottom, "translationY", mHeight, 0f);
    //設置時長
    translationAnimator.setDuration(1000);
    //透明度漸變動畫
    ObjectAnimator alphaAnimatorator = ObjectAnimator.ofFloat(rv_bottom, "alpha", 0f,1f);
    //設置時長
    alphaAnimatorator.setDuration(2500);
    //添加監聽器,位移結束后,畫圓弧開始
    translationAnimator.addListener(new Animator.AnimatorListener() {
      @Override
      public void onAnimationStart(Animator animation) {

      }

      @Override
      public void onAnimationEnd(Animator animation) {
        zhview.startAnimation();
      }

      @Override
      public void onAnimationCancel(Animator animation) {

      }

      @Override
      public void onAnimationRepeat(Animator animation) {

      }
    });
    AnimatorSet set = new AnimatorSet();
    //兩個動畫一起執行
    set.play(translationAnimator).with(alphaAnimatorator);
    //go
    set.start();
  }
}
自定義view
public class Zhview extends View {
  private Paint mPaint1; //圓弧畫筆
  private Paint mPaint2; //外框畫筆
  //圓弧寬度
  private int mBorderWidth2=dipToPx(5);
  //外框寬度
  private int mBorderWidth3=dipToPx(1.5f);
  //掃過的范圍
  private float mCurrentRadian=0;
  //動畫持續時長
  private int mDuration=1500;

  public Zhview(Context context) {
    this(context,null);
  }

  public Zhview(Context context, @Nullable AttributeSet attrs) {
    this(context, attrs,0);

  }

  public Zhview(Context context, @Nullable AttributeSet attrs, int defStyleAttr) {
    super(context, attrs, defStyleAttr);
    //初始化畫筆
    initPaint();
  }

  private void initPaint() {
    mPaint1 = new Paint();
    //設置畫筆顏色
    mPaint1.setColor(Color.WHITE);
    // 設置畫筆的樣式為圓形
    mPaint1.setStrokeCap(Paint.Cap.ROUND);
    // 設置畫筆的填充樣式為描邊
    mPaint1.setStyle(Paint.Style.STROKE);
    //抗鋸齒
    mPaint1.setAntiAlias(true);
    //設置畫筆寬度
    mPaint1.setStrokeWidth(mBorderWidth2);

    mPaint2 = new Paint();
    mPaint2.setColor(Color.WHITE);
    mPaint2.setStyle(Paint.Style.STROKE);
    mPaint2.setAntiAlias(true);
    mPaint2.setStrokeWidth(mBorderWidth3);
  }

  @Override
  protected void onDraw(Canvas canvas) {
    super.onDraw(canvas);
    canvas.drawColor(Color.BLACK);
    //矩形輪廓,圓弧在內部,給予一定的內邊距
    RectF rectF1 = new RectF(mBorderWidth2/2+dipToPx(8), mBorderWidth2/2+dipToPx(8), getWidth() -mBorderWidth2/2-dipToPx(8),getWidth()-mBorderWidth2/2-dipToPx(8) );
    //畫圓弧 參數1:矩形輪廓 參數2:起始位置 參數3:掃過的范圍,初始為0 參數4:是否連接圓心
    canvas.drawArc(rectF1, 90, mCurrentRadian, false, mPaint1);
    //矩形輪廓
    RectF rectF2 = new RectF(mBorderWidth3/2,mBorderWidth3/2,getWidth()-mBorderWidth3/2,getWidth()-mBorderWidth3/2);
    //畫圓角矩形邊框 參數2 3設置x,y方向的圓角corner 都要設置
    canvas.drawRoundRect(rectF2,dipToPx(8),dipToPx(8),mPaint2);

  }

  private void startAnimationDraw() {
    //圓弧掃過范圍為270度
    ValueAnimator valueAnimator=new ValueAnimator().ofFloat(0,270);
    //動畫持續時間
    valueAnimator.setDuration(mDuration);
    //設置插值器,中間快兩頭慢
    valueAnimator.setInterpolator(new AccelerateDecelerateInterpolator());
    //添加狀態監聽器
    valueAnimator.addUpdateListener(new ValueAnimator.AnimatorUpdateListener() {
      @Override
      public void onAnimationUpdate(ValueAnimator animation) {
        //不斷增大圓弧掃過的范圍,并重繪來實現動畫效果
        mCurrentRadian= (float) animation.getAnimatedValue();
        invalidate();
      }
    });
    valueAnimator.start();
  }
  //開始動畫
  public void startAnimation(){
    startAnimationDraw();
  }
  private int dipToPx(float dip) {
    float density = getContext().getResources().getDisplayMetrics().density;
    return (int) (dip * density + 0.5f * (dip >= 0 ? 1 : -1));
  }
}
布局文件
<?xml version="1.0" encoding="utf-8"?>
<RelativeLayout xmlns:android="http://schemas.android.com/apk/res/android"
  xmlns:app="http://schemas.android.com/apk/res-auto"
  xmlns:tools="http://schemas.android.com/tools"
  android:layout_width="match_parent"
  android:layout_height="match_parent"
  android:background="@android:color/black"
  tools:context="com.zhview.MainActivity">

  <ImageView
    android:id="@+id/image"
    android:layout_width="match_parent"
    android:layout_height="match_parent"
    android:layout_above="@+id/rv_bottom" />

  <RelativeLayout
    android:id="@+id/rv_bottom"
    android:layout_width="match_parent"
    android:layout_height="wrap_content"
    android:layout_alignParentBottom="true"
    android:padding="20dp">

    <com.zhview.Zhview
      android:id="@+id/zhview"
      android:layout_width="46dp"
      android:layout_height="46dp"
      android:layout_marginLeft="10dp" />

    <TextView
      android:id="@+id/tv_title"
      android:layout_width="wrap_content"
      android:layout_height="wrap_content"
      android:layout_marginLeft="20dp"
      android:layout_toRightOf="@+id/zhview"
      android:text="知乎日報"
      android:textColor="@android:color/white"
      android:textSize="19sp"

      />

    <TextView
      android:layout_width="wrap_content"
      android:layout_height="wrap_content"
      android:layout_alignBottom="@+id/zhview"
      android:layout_marginLeft="20dp"
      android:layout_toRightOf="@+id/zhview"
      android:text="每天三次,每次七分鐘"
      android:textColor="@android:color/darker_gray"
      android:textSize="13sp" />
  </RelativeLayout>
</RelativeLayout>
我個人挺喜歡這些實現起來不復雜但體驗非常好的設計,見到了就努力實現一下,然后邊學邊分享,要是跟我一樣感興趣的話可以關注我一下哦~
完整代碼地址https://github.com/yanyiqun001/zhview
以上就是本文的全部內容,希望對大家的學習有所幫助,也希望大家多多支持億速云。
免責聲明:本站發布的內容(圖片、視頻和文字)以原創、轉載和分享為主,文章觀點不代表本網站立場,如果涉及侵權請聯系站長郵箱:is@yisu.com進行舉報,并提供相關證據,一經查實,將立刻刪除涉嫌侵權內容。