您好,登錄后才能下訂單哦!
您好,登錄后才能下訂單哦!
首先要明確一下CentOS6啟動的過程
POST -> BootSequence(BIOS) -> Bootloader(MBR) -> Kernel(ramdisk) -> rootfs -> switchroot -> /sbin/init -> (/etc/inittab,/etc/init/*.conf) -> 設置默認運行級別 -> 系統初始化腳本 ->關閉或啟動對應級別下的服務 -> 啟動終端
1、POST不用管,硬件的事
2、BootSequence,手動選擇某個硬盤啟動即可
3、Bootloader即stage1.0階段,使用grub-install生成
stage1.5階段也用grub-install生成
4、stage2.0階段即內核文件vmlinuz和ramdisk鏡像從源系統復制一份
然后需要grub文件,CentOS6就手動寫一份吧,格式如下:
default=#:設定默認啟動的菜單項;落單項(title)編號從0開始
timeout=#:指定菜單等待選項選擇的時長
splashimage=(hd#,#)/PATH/TO/XPM_PIC_FILE:指定菜單背景圖片
hiddenmenu:隱藏菜單
title TITLE:定義菜單標題
    root(hd#,#)grub查找stage2及kernel文件所在的設備分區:為grub的根
    kernel /PATH/TO/VMLINUZ_FILE:啟動的內核
    initrd /PATH/TO/INITRAMFS_FILE:內核匹配的ramfs文件
    password [--md5] STRING:菜單編輯認證
5、復制幾個命令,開啟也別啟動/sbin/init,直接啟動/bin/bash行了
腳本:copycmd-拷貝命令及其依賴庫
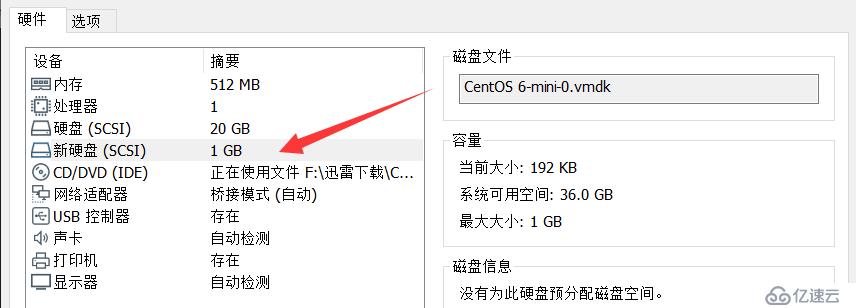
swap分區可以不要,剛開始啟動不起來,我還以為是缺少swap分區,后來發現,是因為selinux問題,grub.conf里面kernel哪一行加上selinux=0即可
[root@localhost ~]# for i in `seq 0 2`;do echo - - - >/sys/class/scsi_host/host$i/scan;done
[root@localhost ~]# lsblk /dev/sdb -f
NAME FSTYPE LABEL UUID MOUNTPOINT
sdb
#一個boot分區,一個根分區算了
[root@localhost ~]# fdisk /dev/sdb
Command (m for help): n
p
Partition number (1-4): 1
First cylinder (1-130, default 1):
Last cylinder, +cylinders or +size{K,M,G} (1-130, default 130): +300M
Command (m for help): n
p
Partition number (1-4):
Partition number (1-4): 2
Last cylinder, +cylinders or +size{K,M,G} (40-130, default 130): +100M
Command (m for help): t
Partition number (1-4): 2
Hex code (type L to list codes): 82
Command (m for help): n
p
Partition number (1-4): 3
Last cylinder, +cylinders or +size{K,M,G} (54-130, default 130):
Command (m for help): w
The partition table has been altered!
#創建文件系統
[root@localhost ~]# mkfs.ext4 /dev/sdb1
[root@localhost ~]# mkswap /dev/sdb2
[root@localhost ~]# mkfs.ext4 /dev/sdb3
[root@localhost ~]# lsblk -f /dev/sdb
NAME   FSTYPE LABEL UUID                                 MOUNTPOINT
sdb
├─sdb1 ext4         54632ecc-7b84-400e-9c44-bc01edf500b5
├─sdb2 swap         6ca8ef8e-3753-447e-ba89-569b6258ea25
└─sdb3 ext4         a80dd4f2-d9f6-4eb0-909a-54d1ac06fd6b
#臨時掛
[root@localhost ~]# mkdir /mnt/{boot,sysroot}
[root@localhost ~]# mount /dev/sdb1 /mnt/boot/
[root@localhost ~]# mount /dev/sdb3 /mnt/sysroot/
[root@localhost ~]# grub-install --root-directory=/mnt /dev/sdb
Probing devices to guess BIOS drives. This may take a long time.
Installation finished. No error reported.
This is the contents of the device map /mnt/boot/grub/device.map.
Check if this is correct or not. If any of the lines is incorrect,
fix it and re-run the script `grub-install'.

(fd0)   /dev/fd0
(hd0)   /dev/sda
(hd1) /dev/sdb[root@localhost ~]# cp /boot/vmlinuz-2.6.32-754.el6.x86_64 /mnt/boot/vmlinuz
[root@localhost ~]# cp /boot/initramfs-2.6.32-754.el6.x86_64.img /mnt/boot/initramfs.img手寫grub.conf,照著/boot/grub/grub.conf
注意:selinux=0不啟用selinux,init=/bin/bash表示開機使用/bin/bash,不使用/sbin/init
[root@localhost ~]# cat /mnt/boot/grub/grub.conf
default=0
timeout=5
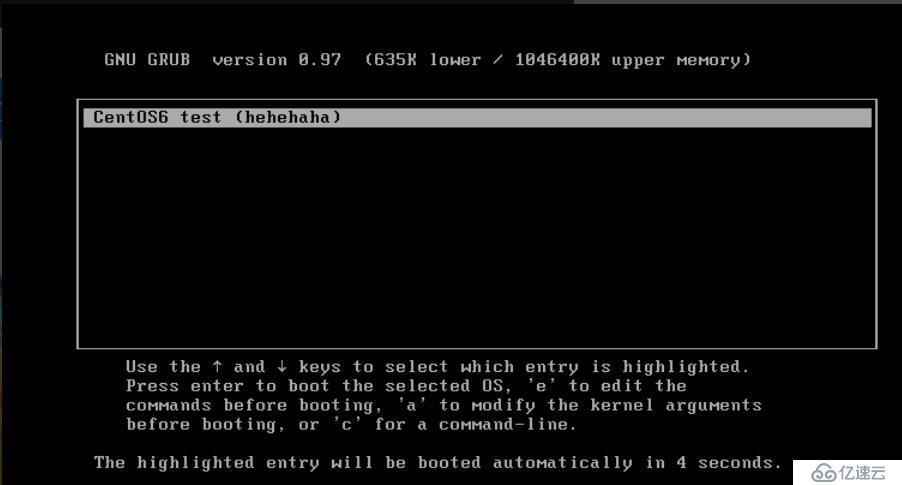
title CentOS6 test (hehehaha)
kernel /vmlinuz ro root=/dev/sda3 selinux=0 init=/bin/bash
initrd /initramfs.img腳本:copycmd-拷貝命令及其依賴庫
[root@localhost sysroot]# mkdir home tmp root usr lib lib64 proc etc mnt bin sbin dev opt var sys
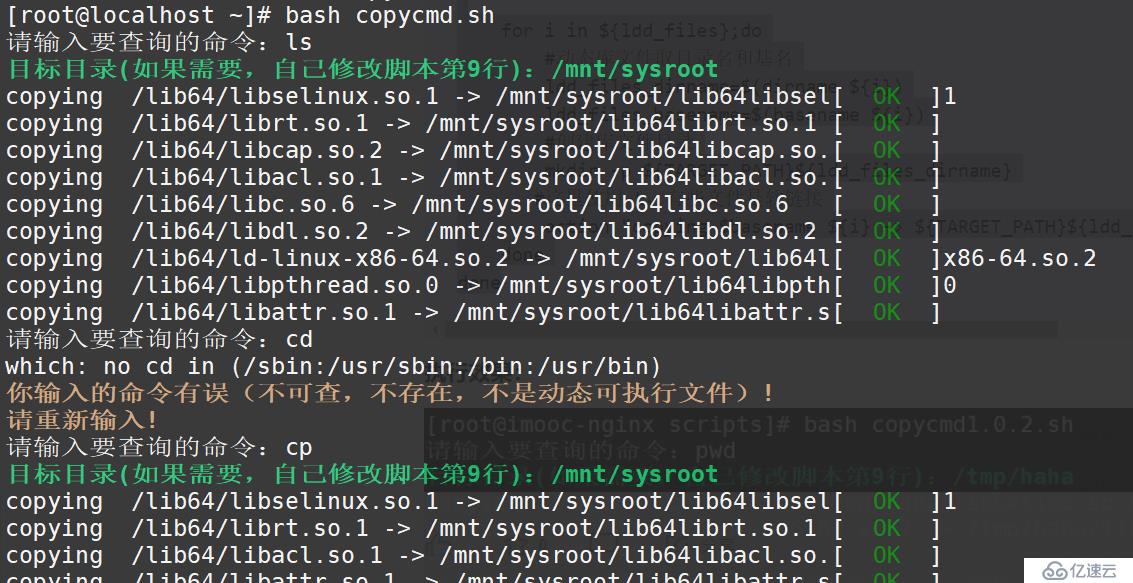
切根試試:
[root@localhost ~]# chroot /mnt/sysroot/
bash-4.1# ls
bin  etc   lib    mnt  proc  sbin  tmp  var
dev  home  lib64  opt  root  sys   usr
bash-4.1# pwd
/
bash-4.1# cd root
bash-4.1# pwd
/root
順便復制個網卡驅動
[root@localhost ~]# ethtool -i eth0
driver: e1000
version: 7.3.21-k8-NAPI
firmware-version:
bus-info: 0000:02:01.0
supports-statistics: yes
supports-test: yes
supports-eeprom-access: yes
supports-register-dump: yes
supports-priv-flags: no
[root@localhost ~]# find / -name e1000.ko
/lib/modules/2.6.32-754.el6.x86_64/kernel/drivers/net/e1000/e1000.ko
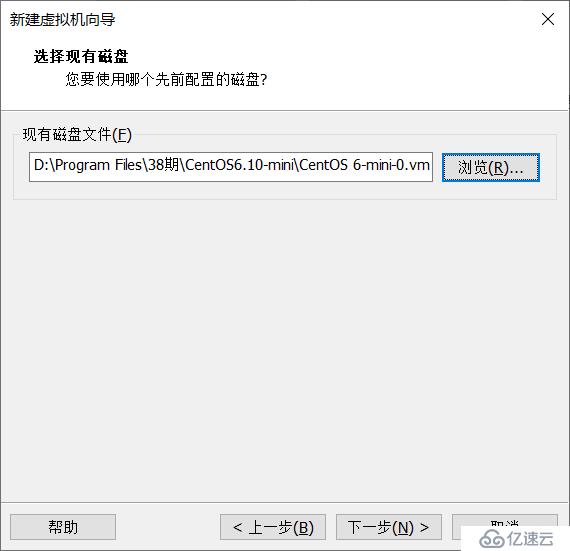
[root@localhost ~]# cp /lib/modules/2.6.32-754.el6.x86_64/kernel/drivers/net/e1000/e1000.ko /mnt/sysroot/lib/自定義創建虛擬機
神奇的grub界面:
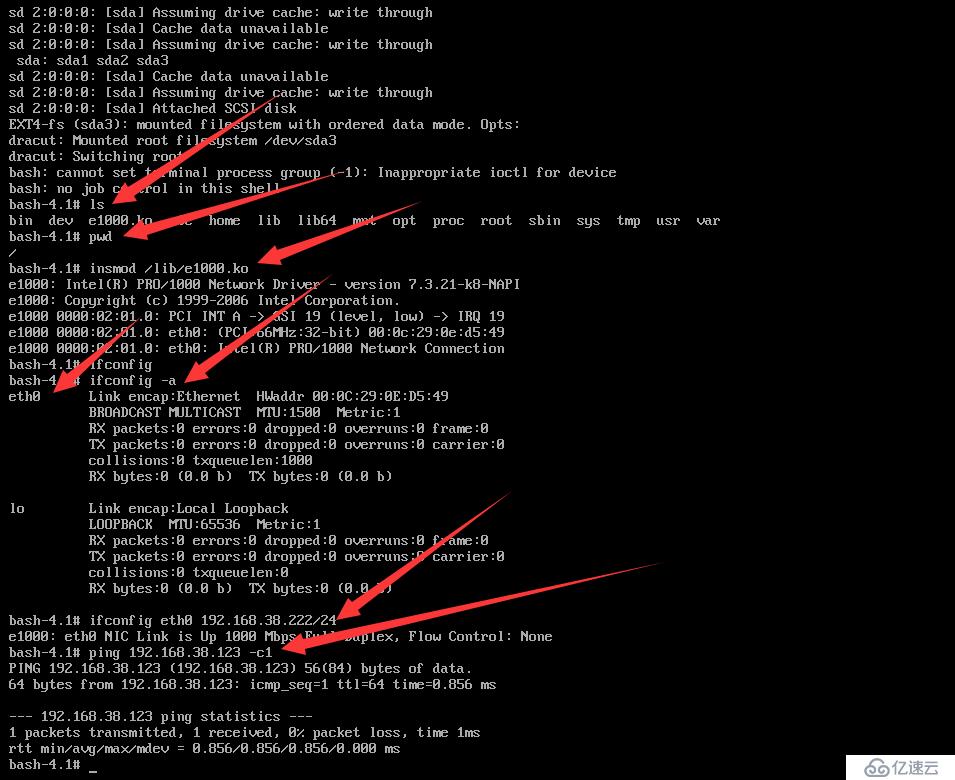
進去之后,加載網卡,配IP,ping一下別的虛擬機
LFS:構建最小Linux文檔:https://lctt.github.io/LFS-BOOK/
免責聲明:本站發布的內容(圖片、視頻和文字)以原創、轉載和分享為主,文章觀點不代表本網站立場,如果涉及侵權請聯系站長郵箱:is@yisu.com進行舉報,并提供相關證據,一經查實,將立刻刪除涉嫌侵權內容。