您好,登錄后才能下訂單哦!
您好,登錄后才能下訂單哦!
這篇文章主要為大家展示了“Angular4.0動畫操作的示例分析”,內容簡而易懂,條理清晰,希望能夠幫助大家解決疑惑,下面讓小編帶領大家一起研究并學習一下“Angular4.0動畫操作的示例分析”這篇文章吧。
具體如下:
粗略的記錄一下angular4的動畫
先看一下angular中文網關于這個給的例子。
有兩個組件home,about。 路徑配置什么的這里就不細說了,之前的博文有說過,我就貼一下代碼,很好理解的,
需要import的東西我先說一下,我只貼了使用動畫要用的東西,其他的我省略了,
app.module.ts
import { BrowserModule } from '@angular/platform-browser';
import {BrowserAnimationsModule} from '@angular/platform-browser/animations';
@NgModule({
  ...
 imports: [
 BrowserModule,
 BrowserAnimationsModule,
 AppRouting
 ],
 ...
})
在這個簡單的例子里我要對app.component.html里的內容進行animate,所以我的
app.component.ts
@Component({
 selector: 'app-root',
 templateUrl: './app.component.html',
 styleUrls: ['./app.component.css'],
 animations: [] // 這里代碼我省略了,先說一下結構,后面說具體實現。
})
以上就是需要寫動畫實現的基本結構,下面貼實現這個例子的代碼。為了方便閱讀,我把代碼解釋就貼在代碼旁邊
例一:
這是路由配置:
import {RouterModule, Routes} from '@angular/router';
import {HomeComponent} from "./home/home.component";
import {AboutComponent} from "./about/about.component";
const routes: Routes = [
 { path: '', redirectTo: 'home', pathMatch: 'full' },
 { path: 'home', component: HomeComponent, data: { state: 'home' } },
 { path: 'about', component: AboutComponent, data: { state: 'about' } }
];
export const AppRouting = RouterModule.forRoot(routes, {
 useHash: true
});
app.component.html
<nav>
 <a routerLink="home" routerLinkActive="active">Home</a>
 <a routerLink="about" routerLinkActive="active">About</a>
</nav>
<main [@routerTransition] = "gg(o)">
 <router-outlet #o="outlet"></router-outlet>
</main>
<div [@queryAnimation]="goAnimate()">
 <div class="content">
 Blah blah blah
 </div>
 <h2>Title</h2>
</div>
 <!--
 [@routerTransition]="gg(o)" ,api:transition declares the sequence of animation steps that will be run when the provided stateChangeExpr value is satisfied. stateChangeExpr即等號左邊即動畫名稱,注意中括號和@符不能省略,等號右邊是一個函數,也可以是變量,滿足條件便可以讓動畫進行,一個動畫可以多次使用
 -->
app.component.ts
import { Component } from '@angular/core';
import {routerTransition} from './router.animation';
import {animate, group, query, stagger, style, transition, trigger} from "@angular/animations";
@Component({
 selector: 'app-root',
 templateUrl: './app.component.html',
 styleUrls: ['./app.component.css'],
 animations: [
 trigger('routerTransition', [ // 第一個參數是動畫名稱 stateChangeExpr
  transition('* <=> *', [ // 指定什么時候執行動畫,狀態的來源可以是簡單的對象屬性,也可以是由方法計算出來的值。重點是,我們得能從組件模板中讀取它。官網上有提供一些通配符,[傳送門](https://angular.cn/api/animations/transition)
  query(':enter, :leave', style({ position: 'fixed', width: '100%' }), { optional: true }),
  query('.block', style({ opacity: 0 }), { optional: true }),
  group([ // block executes in parallel
      query(':enter', [style({ transform: 'translateX(100%)' }),
      animate('0.5s ease-in-out', style({ transform: 'translateX(0%)' }))], { optional: true }),
      query(':leave', [style({ transform: 'translateX(0%)' }),
      animate('0.5s ease-in-out', style({ transform: 'translateX(-100%)' }))], { optional: true })
     ]),
   query(':enter .block', stagger(400, [style({ transform: 'translateY(100px)' }),
      animate('1s ease-in-out', style({ transform: 'translateY(0px)', opacity: 1 })),
    ]), { optional: true }),
  ])
 ]),
]
})
export class AppComponent {
 public exp = '';
 gg(outlet) { // 傳遞進入的組件的信息
 console.log(outlet.activatedRouteData.state);
 return outlet.activatedRouteData.state;
 }
}
效果動圖在最后。
比對著官網給的API,總結一下動畫部分~
我是按自己的理解說的,有不對的地方還請多多指教,共勉!O(∩_∩)O~
stateChangeExpr
即動畫名稱,它的屬性值可以是字符串也可以是函數,若是函數,則每次狀態發生改變都會重新執行,若函數返回true,則對應的動畫就會執行。

transition
它里面的動畫只在滿足條件時執行,過了這個點它就變回原始樣式了,
state
可以保持動畫樣式
:enter 、 :leave
即對應void => * 、 * => void 狀態
例子二
app.component.html
<div [@queryAnimation]="goAnimate()">
 <h2>Title</h2>
 <div class="content">
 Blah blah blah
 </div>
</div>
app.component.ts
import { Component } from '@angular/core';
import {animate, group, query, stagger, state, style, transition, trigger} from "@angular/animations";
@Component({
 selector: 'app-root',
 templateUrl: './app.component.html',
 styleUrls: ['./app.component.css'],
 animations: [
 trigger('queryAnimation', [
  transition('* => *', [
   query('h2', style({ opacity: 0 , color: 'red'})),
   query('.content', style({ opacity: 0, color: 'green', width: '100px', height: '100px', border: '1px solid red' })),
   query('h2', animate(1000, style({ opacity: 1, color: ' blue' }))),
   query('.content', animate(1000, style({ opacity: 1, width: '50px', height: '100px', border: '10px solid green'})),
    {optional: true}),
 ]),
  transition(':leave', [
  style({color: 'pink'}),
  animate(2000)
  ])
]),
]
})
export class AppComponent {
 public gg: string;
 constructor() {
 }
 goAnimate() {
 return true;
 }
}
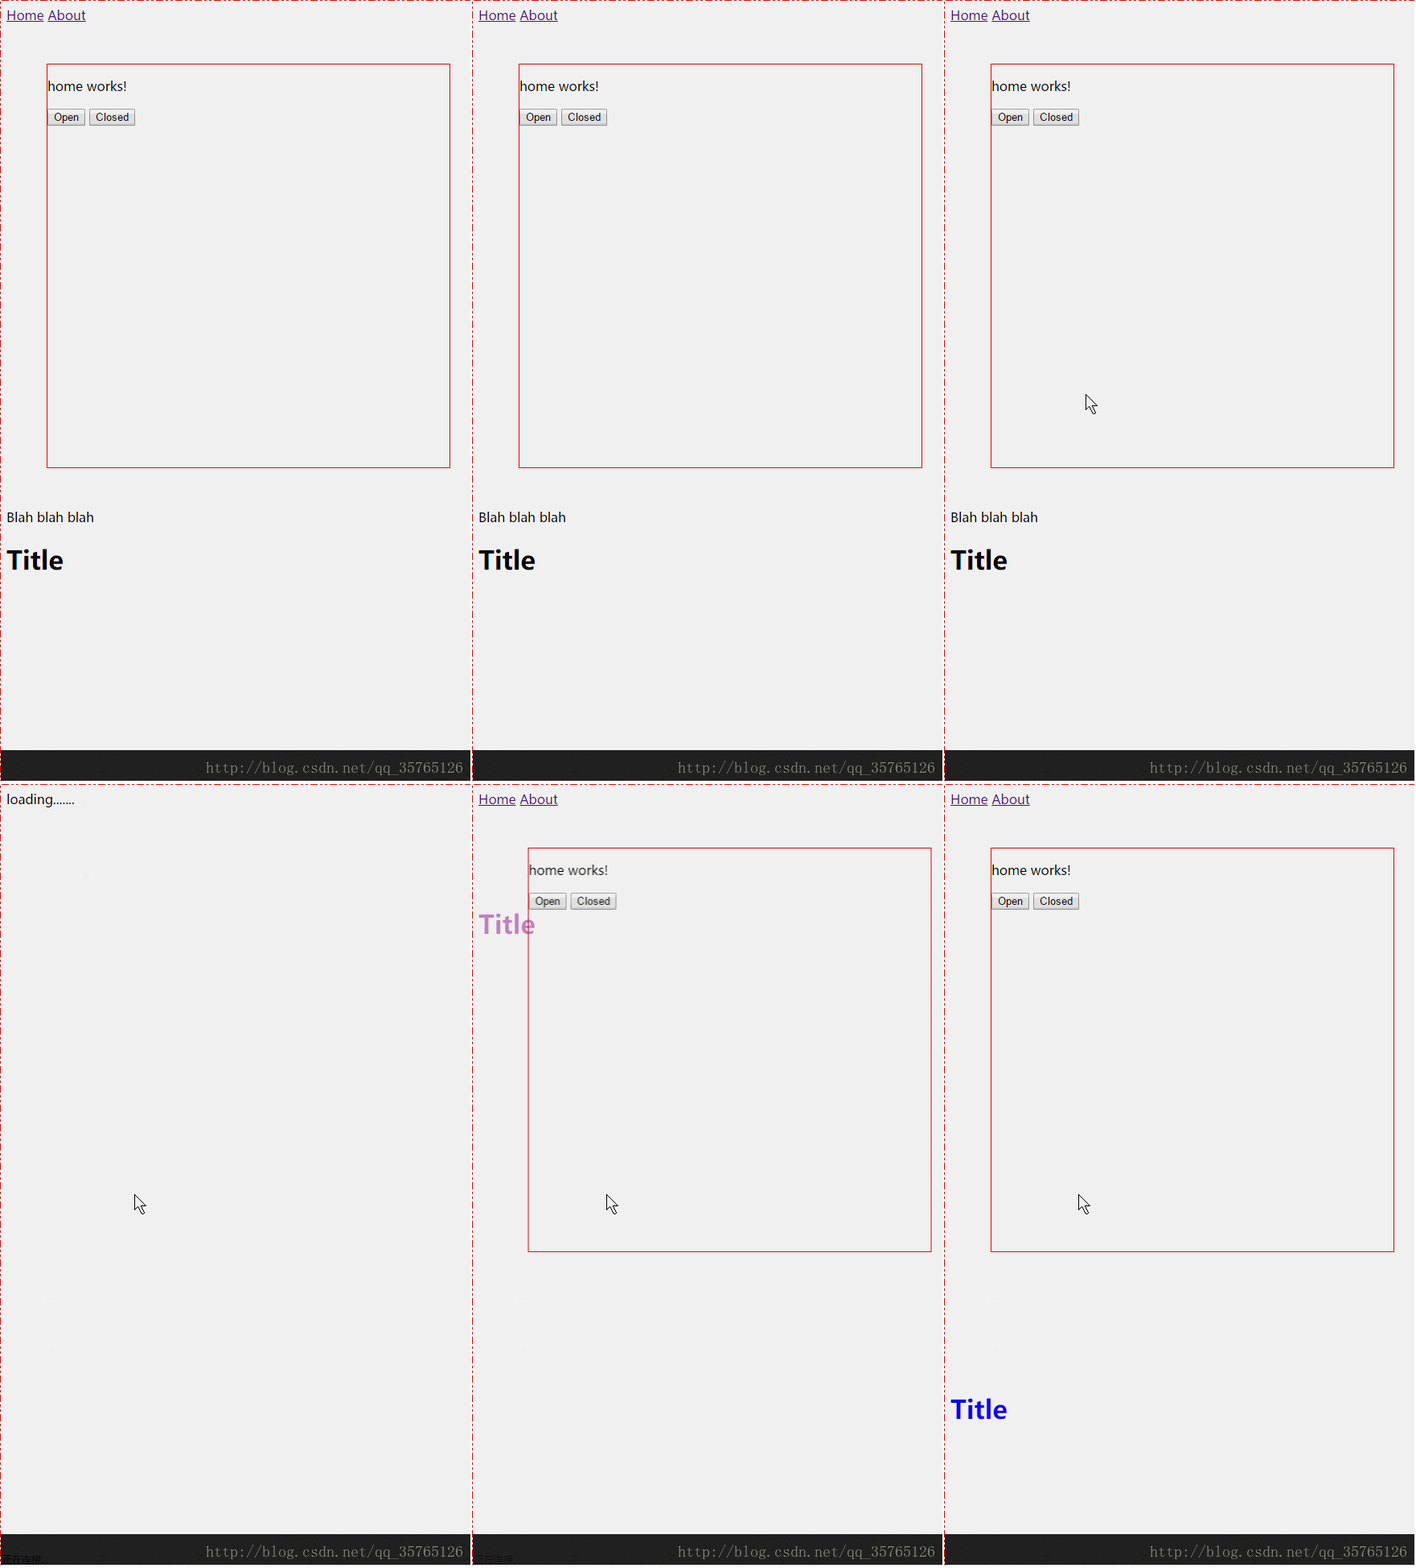
這個gif有點卡,但是可以大概看出路由切換時是有動畫的。這是上面兩個例子的效果圖
state只能放在trigger里,不能擱在transition里
以上是“Angular4.0動畫操作的示例分析”這篇文章的所有內容,感謝各位的閱讀!相信大家都有了一定的了解,希望分享的內容對大家有所幫助,如果還想學習更多知識,歡迎關注億速云行業資訊頻道!
免責聲明:本站發布的內容(圖片、視頻和文字)以原創、轉載和分享為主,文章觀點不代表本網站立場,如果涉及侵權請聯系站長郵箱:is@yisu.com進行舉報,并提供相關證據,一經查實,將立刻刪除涉嫌侵權內容。