您好,登錄后才能下訂單哦!
您好,登錄后才能下訂單哦!
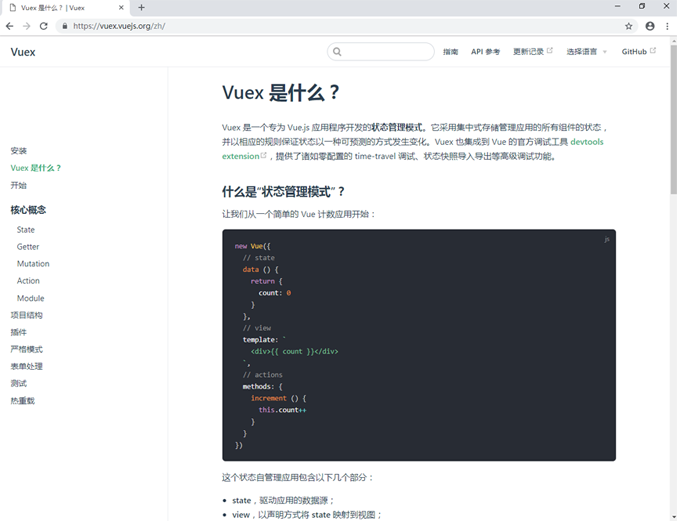
Vuex 是一個專為 Vue.js 應用程序開發的狀態管理模式。它采用集中式存儲管理應用的所有組件的狀態,并以相應的規則保證狀態以一種可預測的方式發生變化。
基礎知識這里不再重述,學習的話請自行到官網學習https://vuex.vuejs.org/zh/
文檔最后有具體使用的實例,不想看基礎的就直接下調頁面~

這里主要簡單講一講Nuxt里怎么使用vuex,
Nuxt.js 內置引用了vuex模塊,所以不需要額外安裝。
Nuxt.js 會嘗試找到應用根目錄下的store目錄,如果該目錄存在,它將做以下的事情:
vuex模塊vuex模塊 加到 vendors 構建配置中去Vue根實例的store配置項Nuxt.js 支持兩種使用store的方式,你可以擇一使用:
store/index.js返回一個 Vuex.Store 實例store目錄下的每個.js文件會被轉換成為狀態樹指定命名的子模塊(當然,index是根模塊)普通方式
使用普通方式的狀態樹,需要添加store/index.js文件,并對外暴露一個 Vuex.Store 實例:
import Vue from 'vue'
import Vuex from 'vuex'

Vue.use(Vuex)

const store = () => new Vuex.Store({

 state: {
  counter: 0
 },
 mutations: {
  increment (state) {
   state.counter++
  }
 }
})

export default store
現在我們可以在組件里面通過this.$store來使用狀態樹
<template>
   <button @click="$store.commit('increment')">{{ $store.state.counter }}</button>
</template>
模塊方式
狀態樹還可以拆分成為模塊,store目錄下的每個.js文件會被轉換成為狀態樹指定命名的子模塊
使用狀態樹模塊化的方式,store/index.js不需要返回 Vuex.Store 實例,而應該直接將state、mutations和actions暴露出來:
export const state = () => ({
 counter: 0
})

export const mutations = {
 increment (state) {
  state.counter++
 }
}
其他的模塊文件也需要采用類似的方式,如store/todos.js文件:
export const state = () => ({
 list: []
})

export const mutations = {
 add (state, text) {
  state.list.push({
   text: text,
   done: false
  })
 },
 remove (state, { todo }) {
  state.list.splice(state.list.indexOf(todo), 1)
 },
 toggle (state, todo) {
  todo.done = !todo.done
 }
}
在頁面組件pages/todos.vue, 可以像下面這樣使用todos模塊:
<template>
 <ul>
  <li v-for="todo in todos">
   <input type="checkbox" :checked="todo.done" @change="toggle(todo)">
   <span :class="{ done: todo.done }">{{ todo.text }}</span>
  </li>
  <li><input placeholder="What needs to be done?" @keyup.enter="addTodo"></li>
 </ul>
</template>

<script>
import { mapMutations } from 'vuex'

export default {
 computed: {
  todos () { return this.$store.state.todos.list }
 },
 methods: {
  addTodo (e) {
   this.$store.commit('todos/add', e.target.value)
   e.target.value = ''
  },
  ...mapMutations({
   toggle: 'todos/toggle'
  })
 }
}
</script>

<style>
.done {
 text-decoration: line-through;
}
</style>
模塊方法也適用于頂級定義,而無需在store目錄中實現子目錄
state 示例,您需要創建一個文件store/state.js并添加以下內容:
export default () => ({
 counter: 0
})
并且相應的 mutations 在文件store/mutations.js中:
export default {
 increment (state) {
  state.counter++
 }
}
模塊文件
您可以將模塊文件分解為單獨的文件:state.js,actions.js,mutations.js和getters.js。如果您使用index.js來維護state,getters,actions和mutations,同時具有單個單獨的操作文件,那么仍然可以正確識別該文件。
項目結構
vuex 并不限制你的代碼結構。但是,它規定了一些需要遵守的規則:
只要你遵守以上規則,如何組織代碼隨你便。如果你的 store 文件太大,只需將 action、mutation 和 getter 分割到單獨的文件。
對于大型應用,我們會希望把 Vuex 相關代碼分割到模塊中。下面是項目結構示例:
├── index.html
├── main.js
├── api
│  └── ... # 抽取出API請求
├── components
│  ├── App.vue
│  └── ...
└── store
  ├── index.js     # 我們組裝模塊并導出 store 的地方
  ├── actions.js    # 根級別的 action
  ├── mutations.js   # 根級別的 mutation
  └── modules
    ├── cart.js    # 購物車模塊
    └── products.js  # 產品模塊
下面用是實例說一下怎么使用
一、在Nuxt項目的store目錄下新建一個index.js文件,這樣項目就啟用了vuex
import Vue from 'vue'
import Vuex from 'vuex'

Vue.use(Vuex)

const store = () => new Vuex.Store({

 state: {
  counter: 0
 },
 mutations: {
  increment (state) {
   state.counter++
  }
 }
})

export default store
一般這個文件我們只作為vuex的入口文件,不在這里面寫業務代碼,其他的功能寫在其他的vuex文件中,在index中導入一下即可
二、在store文件夾里再新建一個filter.js文件,在index.js中引入一下,這個文件來寫我們的業務代碼
filter.js文件
const state = ({
 value: 'Hello World',
 list: [1, 2, 3, 4, 5]
});
const getters = {
 include: (state) => (val) => {
  return state.list.indexOf(val) > -1;
 }
 }
;
const mutations = {
 SET_VALUE(state, value) {
  state.value = value;
 }
};
const actions = {
 async getInfo({state, commit}, val) {
  commit('SET_VALUE', val);
 }
};

export default {
 namespaced: true,
 state,
 getters,
 actions,
 mutations
};
這個文件中輸出時候的namespaced屬性,如果為true時,使用這個文件的方法時,需要標注namespace,不寫或為false時,則可以直接使用,這里建議使用namespaced,因為大型項目可能有很多復雜的業務,可能命名沖突,使用namespaced可以把方法區分開,避免很多問題
index.js文件
import Vue from 'vue';
import Vuex from 'vuex';
import filter from './filter';

Vue.use(Vuex);

const store = () => new Vuex.Store({
 state: {
 },
 mutations: {
 },
 modules: {
  filter
 }
});

export default store
在index.js文件中import一下我們的filter.js文件,然后在modules中引入即可使用
三、在vue文件中使用vuex
index.vue
<template>
 <section class="p-10">
  <h2> {{ value }} </h2>
  <h2> {{ result }} </h2>
  <el-button type="danger" @click="change">點擊</el-button>
 </section>
</template>

<script>
 import { mapState, mapMutations, mapActions, mapGetters } from 'vuex';
export default {
 data() {
  return {
   result: false
  };
 },
 computed: {
  ...mapGetters('filter', [
   'include'
  ]),
  ...mapState({
   value: state => state.filter.value
  })
 },
 methods: {
  ...mapMutations('filter', [
   'SET_VALUE'
  ]),
  ...mapActions('filter', [
   'getInfo'
  ]),
  change() {
   // this.result = this.include(1);
   // this.getInfo('你好');
   // this.SET_VALUE('HELLO');
  }
 },
 mounted() {
 },
 beforeDestroy() {
 }
};
</script>
1.在vue文件中,首先通過import { mapState, mapMutations, mapActions, mapGetters } from 'vuex' 來引入我們需要的模塊,按需引用,只需要引入本頁面用到的模塊即可
2.mapGetters和mapState需要在頁面的計算屬性computed中引入,mapMutations和mapActions需要在methods中引入,此時要注意模塊的命名空間,如果vuex文件導出時標注了namespaced,我們使用時也需要寫出才可以找到,反之則不需要
3.首先是mapState,使用mapState時,我有兩種方法來取,兩種方式都可以,這個方法是從store中取出這個變量,然后顯示在此頁面上,store變動的話,此頁面也會跟著動態改變
...mapState({
   value: state => state.filter.value
  })
...mapState('filter', {
   value: state => state.value
  })
4.mapGetters類似于store的計算屬性,我們可以通過mapGetters的方法在store里進行計算,然后返回我們需要的結果即可
上面例子就是點擊按鈕的時候傳了一個數字到store里,然后判斷store里的list是否包含這個數字,然后返回結果到頁面,頁面根據返回值重新刷新數據
5.MapMutation是更改store中狀態的唯一方法,Vuex 中的 mutation 非常類似于事件:每個 mutation 都有一個字符串的事件類型 (type)和 一個回調函數 (handler)。這個回調函數就是我們實際進行狀態更改的地方,并且它會接受 state 作為第一個參數
上面的例子是點擊按鈕時,直接通過mutation 的方法修改了store里的數據,然后把數據同步到頁面
6.mapAction類似于mutation, 但是Action提交的是mutation,而不是直接變更狀態,Action可以包含任意異步操作,我們一般把異步獲取數據的方法都放在這里,然后在回調函數里使用mutation里的方法把異步獲取的數據保存在store里,然后把store里的數據傳到頁面
上面的例子是點擊按鈕時調用了action里的異步方法,然后在方法的回調函數里修改了store的數據,一般這里是把請求的結果進行保存,這里是省略了請求API方法
以上就是本文的全部內容,希望對大家的學習有所幫助,也希望大家多多支持億速云。
免責聲明:本站發布的內容(圖片、視頻和文字)以原創、轉載和分享為主,文章觀點不代表本網站立場,如果涉及侵權請聯系站長郵箱:is@yisu.com進行舉報,并提供相關證據,一經查實,將立刻刪除涉嫌侵權內容。