溫馨提示×
您好,登錄后才能下訂單哦!
點擊 登錄注冊 即表示同意《億速云用戶服務條款》
您好,登錄后才能下訂單哦!
小編給大家分享一下如何使用Html制作簡單登錄頁面,希望大家閱讀完這篇文章之后都有所收獲,下面讓我們一起去探討吧!
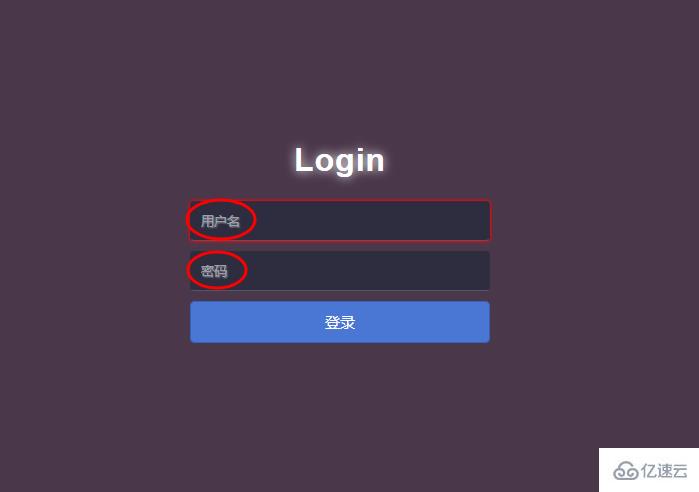
Html制作簡單而漂亮的登錄頁面
html源碼:
<!DOCTYPE html>
<html lang="en">
<head>
    <meta charset="UTF-8">
    <title>Login</title>
    <link rel="stylesheet" type="text/css" href="Login.css"/>
</head>
<body>
    <p id="login">
        <h2>Login</h2>
        <form method="post">
            <input type="text" required="required" placeholder="用戶名" name="u"></input>
            <input type="password" required="required" placeholder="密碼" name="p"></input>
            <button class="but" type="submit">登錄</button>
        </form>
    </p>
</body>
</html>
css代碼:
html{
    width: 100%;
    height: 100%;
    overflow: hidden;
    font-style: sans-serif;
}
body{
    width: 100%;
    height: 100%;
    font-family: 'Open Sans',sans-serif;
    margin: 0;
    background-color: #4A374A;
}
#login{
    position: absolute;
    top: 50%;
    left:50%;
    margin: -150px 0 0 -150px;
    width: 300px;
    height: 300px;
}
#login h2{
    color: #fff;
    text-shadow:0 0 10px;
    letter-spacing: 1px;
    text-align: center;
}
h2{
    font-size: 2em;
    margin: 0.67em 0;
}
input{
    width: 278px;
    height: 18px;
    margin-bottom: 10px;
    outline: none;
    padding: 10px;
    font-size: 13px;
    color: #fff;
    text-shadow:1px 1px 1px;
    border-top: 1px solid #312E3D;
    border-left: 1px solid #312E3D;
    border-right: 1px solid #312E3D;
    border-bottom: 1px solid #56536A;
    border-radius: 4px;
    background-color: #2D2D3F;
}
.but{
    width: 300px;
    min-height: 20px;
    display: block;
    background-color: #4a77d4;
    border: 1px solid #3762bc;
    color: #fff;
    padding: 9px 14px;
    font-size: 15px;
    line-height: normal;
    border-radius: 5px;
    margin: 0;
}
總結
代碼如下:
<input type="text" required="required" **placeholder="用戶名"** name="u"></input>
<input type="password" required="required" **placeholder="密碼"** name="p"></input>
placeholder="用戶名"的作用:占位符

以上就是本文的全部內容,希望對大家的學習有所幫助,更多相關內容請關注億速云!
看完了這篇文章,相信你對“如何使用Html制作簡單登錄頁面”有了一定的了解,如果想了解更多相關知識,歡迎關注億速云行業資訊頻道,感謝各位的閱讀!
免責聲明:本站發布的內容(圖片、視頻和文字)以原創、轉載和分享為主,文章觀點不代表本網站立場,如果涉及侵權請聯系站長郵箱:is@yisu.com進行舉報,并提供相關證據,一經查實,將立刻刪除涉嫌侵權內容。