溫馨提示×
您好,登錄后才能下訂單哦!
點擊 登錄注冊 即表示同意《億速云用戶服務條款》
您好,登錄后才能下訂單哦!
這期內容當中小編將會給大家帶來有關如何進行Mapper多表關聯查詢,文章內容豐富且以專業的角度為大家分析和敘述,閱讀完這篇文章希望大家可以有所收獲。
select p.id, p.create_time, p.update_time, p.create_user, p.update_user, p.project_name, p.test_user,
    p.dev_user, p.simple_desc, p.other_desc, p.project_code, p.belong_env_id, p.status_id,u.status_name,u.description from projectinfo_temp p LEFT JOIN usestatus u on p.status_id = u.id
@ToString
public class ProjectinfoTemp {

    private Integer id;

    private Date createTime;

    private Date updateTime;

    private String createUser;

    private String updateUser;

    private String projectName;

    private String testUser;

    private String devUser;

    private String simpleDesc;

    private String otherDesc;

    private String projectCode;

    private Integer belongEnvId;

    private Integer statusId;
    /**
     *  關聯狀態表 激活狀態
     */
private Usestatus usestatus;/**
*
* @author liwen406
* @date 2019-04-21 09:12
*/
@ToString
public class Usestatus {
private Integer id;
private String statusName;
private String description;模仿寫法
<sql id="WithBase_Column_List" >
p.id, p.create_time, p.update_time, p.create_user, p.update_user, p.project_name, p.test_user,
p.dev_user, p.simple_desc, p.other_desc, p.project_code, p.belong_env_id, p.status_id,u.status_name,u.description
</sql>
<select id="selectByExample" resultMap="BaseResultMap" parameterType="com.apitest.pojo.ProjectinfoTempExample" >
    select
    <if test="distinct" >
      distinct
    </if>
    <include refid="Base_Column_List" />
    from projectinfo_temp
    <if test="_parameter != null" >
      <include refid="Example_Where_Clause" />
    </if>
    <if test="orderByClause != null" >
      order by ${orderByClause}
    </if>
  </select>

  <select id="selectByExamplestart" resultMap="WithBaseResultMap"  >
    select
    <if test="distinct" >
      distinct
    </if>
    <include refid="WithBase_Column_List" />
    from projectinfo_temp p LEFT JOIN usestatus u on p.status_id = u.id
    <if test="_parameter != null" >
      <include refid="Example_Where_Clause" />
    </if>
    <if test="orderByClause != null" >
      order by ${orderByClause}
    </if>
</select><div class="x_content">
<table id="datatable" class="table table-striped table-bordered">
<thead>
<tr>
<th class="table-title">應用編號</th>
<th class="table-title">應用名稱</th>
<th class="table-title">測試負責人</th>
<th class="table-title">開發負責人</th>
<th class="table-title">模塊/接口/用例</th>
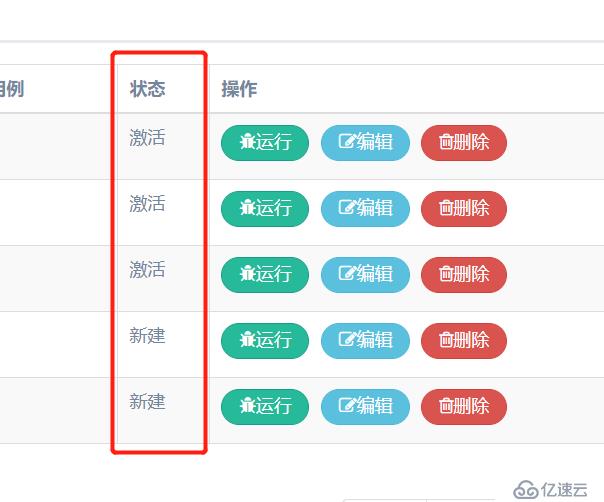
<th class="table-title">狀態</th>
<th class="table-title">操作</th>
</tr>
</thead>
<tbody>
<tr th:each="pagefo:${pageInfo.list}">
<td th:text="${pagefo.projectCode}"></td>
<td th:text="${pagefo.projectName}"></td>
<td th:text="${pagefo.testUser}"></td>
<td th:text="${pagefo.devUser}"></td>
<td th:text="${pagefo.belongEnvId}"></td>
<td th:text="${pagefo.usestatus.statusName}"></td>
<td>
<a type="button" class="fa fa-bug btn btn-round btn-success"
th:href="@{/run/}+${pagefo.projectCode}">運行</a>
<a type="button" class="fa fa-edit btn btn-round btn-info"
th:href="@{/cache/editProjectInf/}+${pagefo.projectCode}">編輯</a>
<a type="button" class="fa fa-trash-o btn btn-round btn-danger"
th:href="@{/deleteProjectinfoTemp/}+${pagefo.projectCode}">刪除</a>
</td>
</tr>
</tbody>
</table>
<div class="box-footer">
<div class="pull-left">
<div class="form-group form-inline">
<span th:text="'共'+${pageInfo.getPages()}+'頁'"></span>,
<span th:text="'當前為'+${pageInfo.getPageNum()}+'頁'"></span>
<span th:text="'總'+${pageInfo.getTotal()}+'條記錄'"></span>
</div>
</div>
<div class="box-tools pull-right">
<ul class="pagination">
<li><a th:href="@{/cache/project_list_cache(start=0)}"
aria-label="Previous">[首 頁]</a></li>
<li><a th:href="@{/cache/project_list_cache(start=${pageInfo.pageNum-1})}">[上一頁]</a>
</li>
<li><a th:href="@{/cache/project_list_cache(start=${pageInfo.pageNum+1})}">[下一頁]</a>
</li>
<li><a th:href="@{/cache/project_list_cache(start=${pageInfo.pages})}"
aria-label="Next">[尾 頁]</a></li>
</ul>
</div>
</div>
</div>
上述就是小編為大家分享的如何進行Mapper多表關聯查詢了,如果剛好有類似的疑惑,不妨參照上述分析進行理解。如果想知道更多相關知識,歡迎關注億速云行業資訊頻道。
免責聲明:本站發布的內容(圖片、視頻和文字)以原創、轉載和分享為主,文章觀點不代表本網站立場,如果涉及侵權請聯系站長郵箱:is@yisu.com進行舉報,并提供相關證據,一經查實,將立刻刪除涉嫌侵權內容。