您好,登錄后才能下訂單哦!
您好,登錄后才能下訂單哦!
這篇文章主要介紹“SpringBoot如何使用WebSocket實現點對點消息”的相關知識,小編通過實際案例向大家展示操作過程,操作方法簡單快捷,實用性強,希望這篇“SpringBoot如何使用WebSocket實現點對點消息”文章能幫助大家解決問題。
一、添加依賴,配置
使用 Spring Security 里的用戶。
<dependency>
    <groupId>org.springframework.boot</groupId>
    <artifactId>spring-boot-starter-security</artifactId>
</dependency>
我們現在需要配置用戶信息和權限配置。
@Configuration
public class WebSecurityConfig extends WebSecurityConfigurerAdapter {
    // 指定密碼的加密方式
    @SuppressWarnings("deprecation")
    @Bean
    PasswordEncoder passwordEncoder(){
        // 不對密碼進行加密
        return NoOpPasswordEncoder.getInstance();
    }

    // 配置用戶及其對應的角色
    @Override
    protected void configure(AuthenticationManagerBuilder auth) throws Exception {
        auth.inMemoryAuthentication()
                .withUser("admin").password("123").roles("ADMIN","USER")
                .and()
                .withUser("hangge").password("123").roles("USER");
    }

    // 配置 URL 訪問權限
    @Override
    protected  void configure(HttpSecurity http) throws Exception {
        http.authorizeRequests() // 開啟 HttpSecurity 配置
                .anyRequest().authenticated() // 用戶訪問所有地址都必須登錄認證后訪問
                .and().formLogin().permitAll(); // 開啟表單登錄
    }
}
二、編寫WebSocket 配置
@Configuration
@EnableWebSocketMessageBroker
public class WebSocketConfig implements WebSocketMessageBrokerConfigurer {

    @Override
    public void configureMessageBroker(MessageBrokerRegistry config) {
        // 設置消息代理的前綴,如果消息的前綴為"/queue",就會將消息轉發給消息代理(broker)
        // 再由消息代理廣播給當前連接的客戶端
        //也可設置多個 broker,如:config.enableSimpleBroker("/topic","/queue");
        config.enableSimpleBroker("/queue");
        // 下面方法可以配置一個或多個前綴,通過這些前綴過濾出需要被注解方法處理的消息。
        // 例如這里表示前綴為"/app"的destination可以通過@MessageMapping注解的方法處理
        // 而其他 destination(例如"/topic""/queue")將被直接交給 broker 處理
        config.setApplicationDestinationPrefixes("/app");
    }

    @Override
    public void registerStompEndpoints(StompEndpointRegistry registry) {
        // 定義一個前綴為"/chart"的endpoint,并開啟 sockjs 支持。
        // sockjs 可以解決瀏覽器對WebSocket的兼容性問題,客戶端將通過這里配置的URL建立WebSocket連接
        registry.addEndpoint("/chat").withSockJS();
    }

}
三、編寫案例代碼
1、編寫實體
@Data
public class Chat {

    // 消息的目標用戶
    private String to;

    // 消息的來源用戶
    private String from;

    // 消息的主體內容
    private String content;

}
2、編寫Controller
@Controller
public class DemoController {

    @Autowired
    SimpMessagingTemplate messagingTemplate;

    // 處理來自"/app/chat"路徑的消息
    @MessageMapping("/chat")
    public void chat(Principal principal, Chat chat) {
        // 獲取當前登錄用戶的用戶名
        String from = principal.getName();
        // 將用戶設置給chat對象的from屬性
        chat.setFrom(from);
        // 再將消息發送出去,發送的目標用戶就是 chat 對象的to屬性值
        messagingTemplate.convertAndSendToUser(chat.getTo(),
                "/queue/chat", chat);
    }

}
四、編寫頁面
在 resources/static 目錄下創建 chat2.html 頁面作為點對點的聊天頁面。
連接成功后,訂閱的地址為“/user/queue/chat”,該地址比服務端配置的地址多了“/user”前綴,這是因為 SimpMessagingTemplate 類中自動添加了路徑前綴。
<!DOCTYPE html>
<html lang="en">
<head>
    <meta charset="UTF-8">
    <title>單聊</title>
    <script src="https://cdn.bootcdn.net/ajax/libs/jquery/3.3.1/jquery.min.js"></script>
    <script src="https://cdn.bootcdn.net/ajax/libs/sockjs-client/1.1.2/sockjs.min.js"></script>
    <script src="https://cdn.bootcdn.net/ajax/libs/stomp.js/2.3.3/stomp.min.js"></script>
    <script>
        var stompClient = null;

        // 建立一個WebSocket連接
        function connect() {
            // 首先使用 SockJS 建立連接
            var socket = new SockJS('/chat');
            // 然后創建一個STOMP實例發起連接請求
            stompClient = Stomp.over(socket);
            // 連接成功回調
            stompClient.connect({}, function (frame) {
                // 訂閱服務端發送回來的消息
                stompClient.subscribe('/user/queue/chat', function (chat) {
                    // 將服務端發送回來的消息展示出來
                    showGreeting(JSON.parse(chat.body));
                });
            });
        }

        // 發送消息
        function sendMsg() {
            stompClient.send("/app/chat", {},
                JSON.stringify({'content':$("#content").val(),
                    'to':$("#to").val()}));
        }

        // 將服務端發送回來的消息展示出來
        function showGreeting(message) {
            $("#chatsContent")
                .append("<div>" + message.from+":"+message.content + "</div>");
        }

        // 頁面加載后進行初始化動作
        $(function () {
            // 頁面加載完畢后自動連接
            connect();
            $( "#send" ).click(function() { sendMsg(); });
        });
    </script>
</head>
<body>
<div id="chat">
    <div id="chatsContent">
    </div>
    <div>
        請輸入聊天內容:
        <input type="text" id="content" placeholder="聊天內容">
        目標用戶:
        <input type="text" id="to" placeholder="目標用戶">
        <button id="send" type="button">發送</button>
    </div>
</div>
</body>
</html>
五、驗證結果
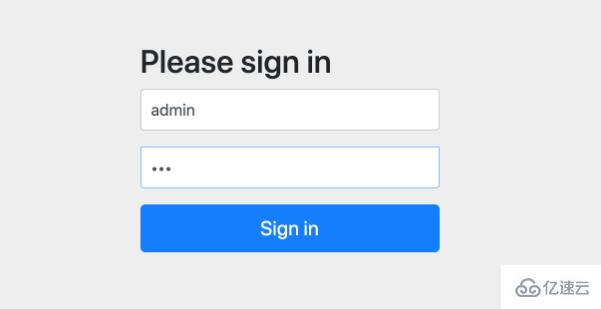
我們使用了 Spring Security 會自動跳轉到默認登錄頁面。

這里我們配置兩個用戶信息:admin/123,piao/123。


關于“SpringBoot如何使用WebSocket實現點對點消息”的內容就介紹到這里了,感謝大家的閱讀。如果想了解更多行業相關的知識,可以關注億速云行業資訊頻道,小編每天都會為大家更新不同的知識點。
免責聲明:本站發布的內容(圖片、視頻和文字)以原創、轉載和分享為主,文章觀點不代表本網站立場,如果涉及侵權請聯系站長郵箱:is@yisu.com進行舉報,并提供相關證據,一經查實,將立刻刪除涉嫌侵權內容。