您好,登錄后才能下訂單哦!
您好,登錄后才能下訂單哦!
本篇內容主要講解“selenium drag_and_drop不生效如何解決”,感興趣的朋友不妨來看看。本文介紹的方法操作簡單快捷,實用性強。下面就讓小編來帶大家學習“selenium drag_and_drop不生效如何解決”吧!
做自動化時發現用drag_and_drop模擬拖拽沒效果,頁面上只能看到元素source閃了一下,但是并沒有拖拽到元素target上(推測可能是我用系統頁面在拖拽時有個JS效果,但是drag_and_drop模擬拖拽的時候執行太快沒能觸發JS,所以沒有把這兩個元素拖拽到一起)。
通過不斷嘗試,終于解決了,這里記錄一下,希望其他人遇到類似情況時能有所啟發。方法1是我嘗試的過程;方法2是我看到的另一種方法,雖然試驗了下沒效果,但說不定對其他的拖拽場景是有效的。
從源碼可以看出drag_and_drop的源碼執行了兩個操作,既然直接用drag_and_drop不行,那調整下這兩個操作或許可行
    def drag_and_drop(self, source, target):
        """
        Holds down the left mouse button on the source element,
           then moves to the target element and releases the mouse button.
        :Args:
         - source: The element to mouse down.
         - target: The element to mouse up.
        """
        self.click_and_hold(source)
        self.release(target)
        return self
drag_and_drop里有兩個動作:click_and_hold(在source元素上單擊鼠標不松開),release(在target元素上釋放點擊狀態的鼠標)。中間加一個鼠標移動的動作是否可行呢?
我把拖拽的流程改成了:
        ActionChains(self.driver).click_and_hold(source).perform()
        ActionChains(self.driver).move_by_offset(x, y).perform()
        ActionChains(self.driver).release(target).perform()
試驗了一下,在執行move_by_offset動作的時候能觸發JS的效果,只不過位移的xy不準確,觸發不了另一個JS,只要計算好要偏移的位置就好了
最終的實現:
    def drag_and_drop(self):
        source = self.find_element_and_scroll_into_view(source_loc)
        target = self.find_element_and_scroll_into_view(target_loc)
        # 先移動一點 觸發js效果 觸發后元素變小 重新獲取元素以便能準確計算鼠標偏移量
        ActionChains(self.driver).click_and_hold(source).move_by_offset(5, 0).perform()
        drag_source = self.find_element(change_source_loc)

        x1, x2 = (drag_source.location.get("x"), drag_source.location.get("x") + drag_source.size.get("width"))
        y1, y2 = (drag_source.location.get("y"), drag_source.location.get("y") + drag_source.size.get("height"))
        source_middle_x = (x1 + x2) / 2
        source_middle_y = (y1 + y2) / 2
        x3, x4 = (target.location.get("x"), target.location.get("x") + target.size.get("width"))
        y3, y4 = (target.location.get("y") + 0.5 * target.size.get("height"), target.location.get("y") + target.size.get("height"))
        target_middle_x = (x3 + x4) / 2
        target_middle_y = (y3 + y4) / 2
        x = target_middle_x - source_middle_x
        y = target_middle_y - source_middle_y

        ActionChains(self.driver).move_by_offset(x, y).perform()
        ActionChains(self.driver).release(target).perform()
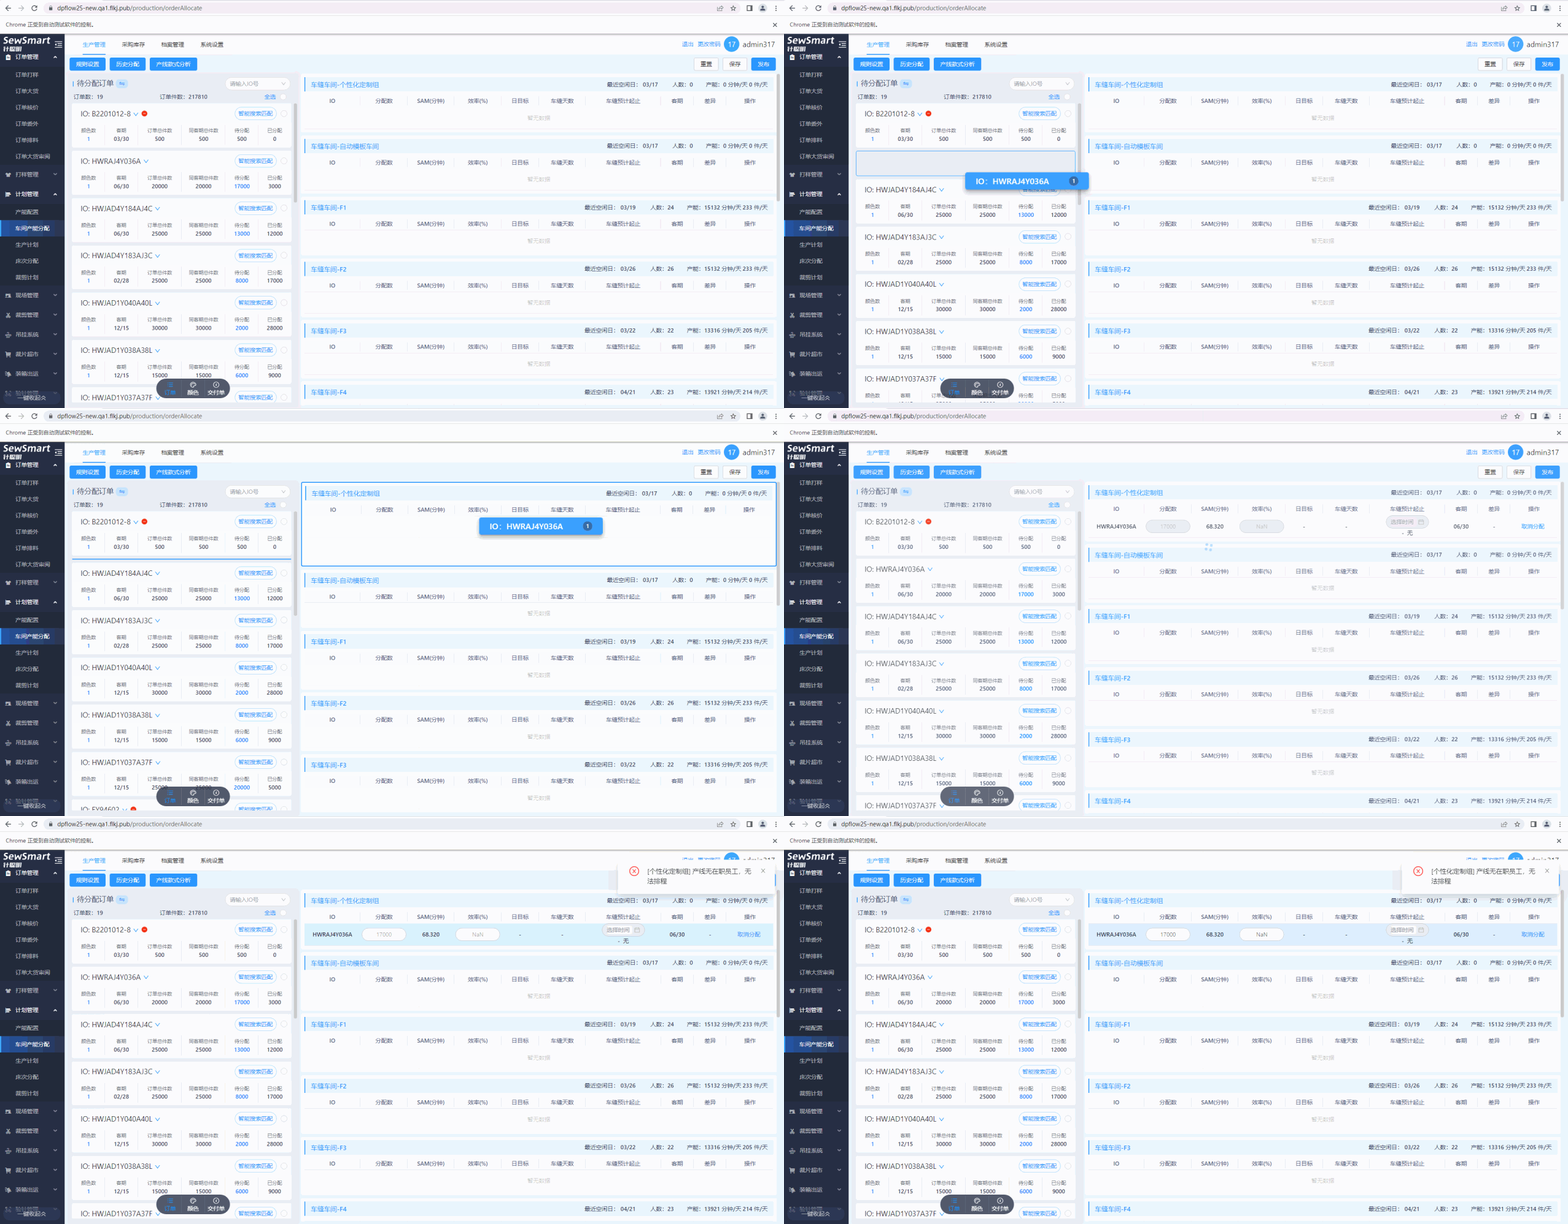
拖拽效果:

雖然我試了下沒效果,但是感覺是有用的,這里一并記錄下。
selenium的drag_and_drop方法在某些場景下無效,這是官方很久就已經知道的BUG,只不過沒有在源碼中修復,而是提供了單獨的包,因為David Burnes(核心 Selenium 提交者)認為拖放錯誤是一個webdriver網絡驅動問題,在Selenium中提供任何暫時避開網絡的方法并不是一個好主意。
安裝
pip install seletools
使用
from seletools.actions import drag_and_drop

source = driver.find_element(xxx)
target = driver.find_element(xxx)
drag_and_drop(driver, source, target)
到此,相信大家對“selenium drag_and_drop不生效如何解決”有了更深的了解,不妨來實際操作一番吧!這里是億速云網站,更多相關內容可以進入相關頻道進行查詢,關注我們,繼續學習!
免責聲明:本站發布的內容(圖片、視頻和文字)以原創、轉載和分享為主,文章觀點不代表本網站立場,如果涉及侵權請聯系站長郵箱:is@yisu.com進行舉報,并提供相關證據,一經查實,將立刻刪除涉嫌侵權內容。