您好,登錄后才能下訂單哦!
您好,登錄后才能下訂單哦!
本篇內容介紹了“elementUI怎么使用el-upload上傳文件”的有關知識,在實際案例的操作過程中,不少人都會遇到這樣的困境,接下來就讓小編帶領大家學習一下如何處理這些情況吧!希望大家仔細閱讀,能夠學有所成!
Element Upload官方文檔:el-upload
本地上傳想要回顯圖片視頻,使用on-success是沒辦法再在上傳后獲取到本地文件路徑后進行回顯的,因為只有在上傳的action成功,即不報錯的情況下才會調用,本地上傳用的action="#這個接口不存在,所以也不會上傳成功,更不會調用獲取到文件參數進行回顯

如果想要先在本地進行回顯,然后再上傳的話,需要使用on-change鉤子(還需:auto-upload ="false")獲取文件本地路徑,再生成一個formData傳給后端上傳文件的接口,

官方文檔中提供的上傳圖片接口https://jsonplaceholder.typicode.com/posts/現已無法使用

下面給大家總結幾種常用的上傳文件方法:
這種上傳單張圖片的運行場景一般是上傳頭像,沒有刪除功能,只能進行替換
<el-upload
  class="avatar-uploader"
  action="后端上傳接口"
  :show-file-list="false"
  :on-success="handleAvatarSuccess"
  :before-upload="beforeAvatarUpload">
  <img v-if="imageUrl" :src="imageUrl" class="avatar">
  <i v-else class="el-icon-plus avatar-uploader-icon"></i>
</el-upload>

<style>
 /deep/ .avatar-uploader .el-upload {
    border: 1px dashed #d9d9d9;
    border-radius: 6px;
    cursor: pointer;
    position: relative;
    overflow: hidden;
  }
  .avatar-uploader .el-upload:hover {
    border-color: #409EFF;
  }
  .avatar-uploader-icon {
    font-size: 28px;
    color: #8c939d;
    width: 178px;
    height: 178px;
    line-height: 178px;
    text-align: center;
  }
  .avatar {
    width: 178px;
    height: 178px;
    display: block;
  }
</style>

<script>
  export default {
    data() {
      return {
        imageUrl: ''
      };
    },
    methods: {
      // 上傳成功后的回顯
      handleAvatarSuccess(res, file) {
        this.imageUrl = URL.createObjectURL(file.raw);
      },
      // 上傳前對類型大小的驗證
      beforeAvatarUpload(file) {
        const isJPG = file.type === 'image/jpeg';
        const isLt2M = file.size / 1024 / 1024 < 2;

        if (!isJPG) {
          this.$message.error('上傳頭像圖片只能是 JPG 格式!');
        }
        if (!isLt2M) {
          this.$message.error('上傳頭像圖片大小不能超過 2MB!');
        }
        return isJPG && isLt2M;
      }
    }
  }
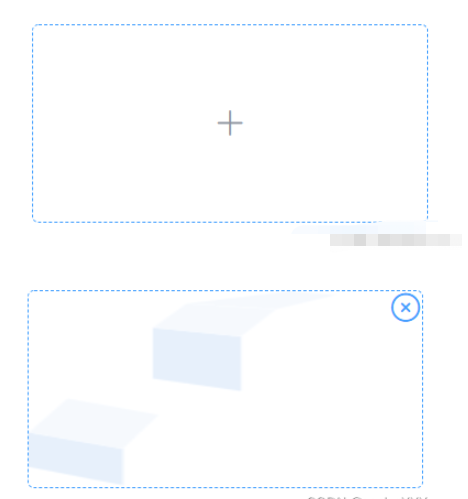
</script>可以手動上傳,也可以拖拽上傳,圖片可以在沒有后端上傳接口時進行回顯,可刪除
template:
<el-upload
          drag
          action="#"
          :show-file-list="false"
          :auto-upload="false"
          :on-change="uploadFile"
          accept="image/jpg,image/jpeg,image/png"
        >
          <i
            v-if="imageUrl1"
            class="el-icon-circle-close deleteImg"
            @click.stop="handleRemove1"
          ></i>
          <img v-if="imageUrl1" :src="imageUrl1" class="avatar" />

          <div v-else>
            <i
              class="el-icon-picture"

            ></i>
            <div class="el-upload__text1">上傳圖片</div>
            <div class="el-upload__text">* 建議尺寸比例2.2:1,不超過4m,</div>
            <div class="el-upload__text">格式為png、jpeg或jpg</div>
          </div>
        </el-upload>
<style scoped>
.deleteImg {
  font-size: 30px;
  position: absolute;
  top: 0;
  right: 0;
  z-index: 999;
}
</style>
data:
 data() {
      return {
        imageUrl1: ''
      };
    },
method:
 uploadFile(item) {
      console.log(item);

      let formData = new FormData();
      let file = item.raw;
      this.imageUrl1 = URL.createObjectURL(file);
      formData.append("file", file);
      // 傳formData給后臺就行
      // 比如
      // 接口(formData).then(res=>{
          // this.videoUrl=res.url
      // })
    },
    // 刪除只需清空imageUrl1即可
   handleRemove1(file, fileList) {
      // console.log(file, fileList);
      this.imageUrl1 = "";
    },
list-type="picture-card"hover會自動有預覽刪除菜單,不需自己寫樣式,綁定事件即可
<el-upload
  action="后端接口地址"
  list-type="picture-card"
  :on-preview="handlePictureCardPreview"
  :on-remove="handleRemove">
  <i class="el-icon-plus"></i>
</el-upload>
<el-dialog :visible.sync="dialogVisible">
  <img width="100%" :src="dialogImageUrl" alt="">
</el-dialog>
<script>
  export default {
    data() {
      return {
        dialogImageUrl: '',
        dialogVisible: false
      };
    },
    methods: {
      handleRemove(file, fileList) {
        console.log(file, fileList);
      },
      handlePictureCardPreview(file) {
        this.dialogImageUrl = file.url;
        this.dialogVisible = true;
      }
    }
  }
</script>
“elementUI怎么使用el-upload上傳文件”的內容就介紹到這里了,感謝大家的閱讀。如果想了解更多行業相關的知識可以關注億速云網站,小編將為大家輸出更多高質量的實用文章!
免責聲明:本站發布的內容(圖片、視頻和文字)以原創、轉載和分享為主,文章觀點不代表本網站立場,如果涉及侵權請聯系站長郵箱:is@yisu.com進行舉報,并提供相關證據,一經查實,將立刻刪除涉嫌侵權內容。