您好,登錄后才能下訂單哦!
您好,登錄后才能下訂單哦!
步驟:1.nagios的介紹
2.安裝服務端
3.安裝客戶端
4.服務端添加監控的主機
5.郵箱預警
nagios的介紹
Nagios是一款開源的免費網絡監視工具,能有效監控Windows、Linux和Unix的主機狀態,交換機路由器等網絡設置,打印機等。在系統或服務狀態異常時發出郵件或短信報警第一時間通知網站運維人員,在狀態恢復后發出正常的郵件或短信通知。
Nagios 可以監控的功能有: 1、監控網絡服務(SMTP、POP3、HTTP、NNTP、PING等); 2、監控主機資源(處理器負荷、磁盤利用率等);
3、簡單地插件設計使得用戶可以方便地擴展自己服務的檢測方法;
4、并行服務檢查機制;
5、具備定義網絡分層結構的能力,用"parent"主機定義來表達網絡主機間的關系,這種關系可被用來發現和明晰主機宕機或不可達狀態;
6、當服務或主機問題產生與解決時將告警發送給聯系人(通過EMail、短信、用戶定義方式);
7、具備定義事件句柄功能,它可以在主機或服務的事件發生時獲取更多問題定位;
8、自動的日志回滾;
9、可以支持并實現對主機的冗余監控;
10、可選的WEB界面用于查看當前的網絡狀態、通知和故障歷史、日志文件等;
nagios:監控服務,只告訴你有哪些服務不正常
服務端操作(192.168.0.25)
1.Centos6默認的yum源里沒有nagios相關的rpm包,但是我們可以安裝一個epel的擴展源:
安裝epel源
wget www.lishiming.net/data/p_w_upload/forum/epel-release-6-8_32.noarch.rpm
rpm -ivh epel-release-6-8_32.noarch.rpm
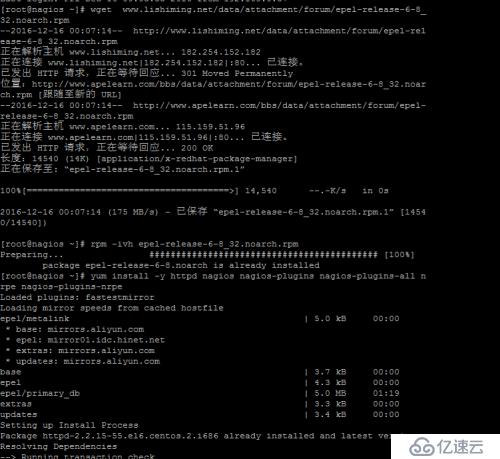
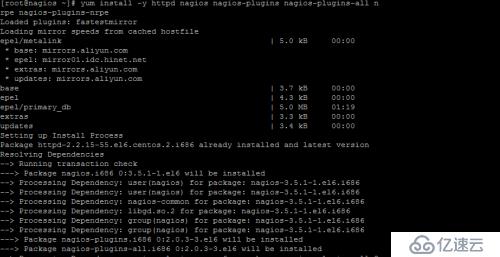
yum install -y httpd nagios nagios-plugins nagios-plugins-all nrpe nagios-plugins-nrpe
2.設置登錄nagios后臺的用戶和密碼:
htpasswd -c /etc/nagios/passwd nagiosadmin
password:123456

3.查看配置文件
vim /etc/nagios/nagios.cfg
nagios -v /etc/nagios/nagios.cfg 檢測配置文件
Total Warnings: 0
Total Errors: 0
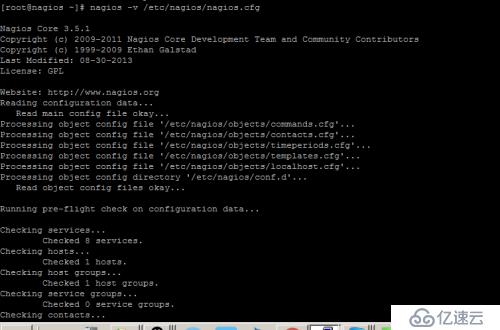
4.啟動服務:service httpd start; service nagios start

5.谷歌瀏覽器訪問: http://192.168.0.25/nagios
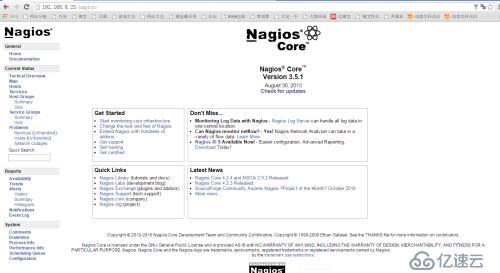
services 介紹

客戶端的操作(192.168.0.5)
1.安裝epel源
wget www.lishiming.net/data/p_w_upload/forum/epel-release-6-8_32.noarch.rpm
rpm -ivh epel-release-6-8_32.noarch.rpm
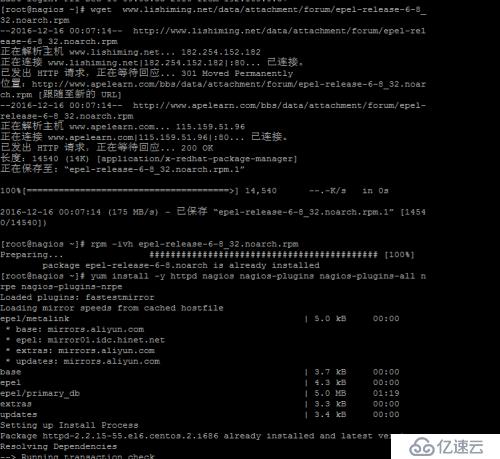
yum install -y httpd nagios nagios-plugins nagios-plugins-all nrpe nagios-plugins-nrpe
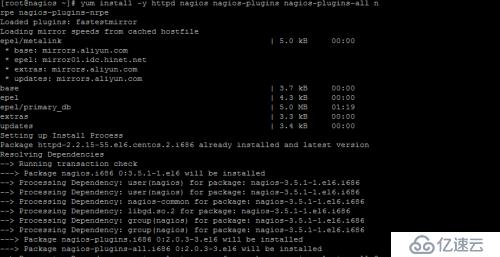
2.修改配置文件
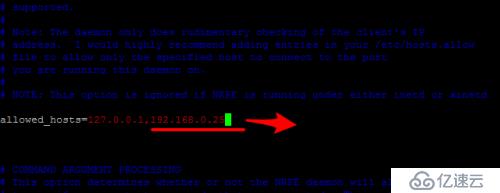
vim /etc/nagios/nrpe.cfg
找到“allowed_hosts=127.0.0.1” 改為 “allowed_hosts=127.0.0.1,192.168.0.25” 后面的ip為服務端ip;
找到” dont_blame_nrpe=0” 改為 “dont_blame_nrpe=1”

啟動客戶端 /etc/init.d/nrpe start
服務端操作監控中心(192.168.0.25)添加被監控主機(192.168.0.5)
1.新建監控的參數
cd /etc/nagios/conf.d/
vim 192.168.0.5.cfg (被監控的主機)
添加內容
define host{
use linux-server ; Name of host template to use
; This host definition will inherit all variables that are defined
; in (or inherited by) the linux-server host template definition.
host_name 192.168.0.5
alias 0.5
address 192.168.0.5
}
define service{
use generic-service
host_name 192.168.0.5
service_description check_ping
check_command check_ping!100.0,20%!200.0,50%
max_check_attempts 5
normal_check_interval 1
}
define service{
use generic-service
host_name 192.168.0.5
service_description check_ssh
check_command check_ssh
max_check_attempts 5
normal_check_interval 1
}
define service{
use generic-service
host_name 192.168.0.5
service_description check_http
check_command check_http
max_check_attempts 5
normal_check_interval 1
}
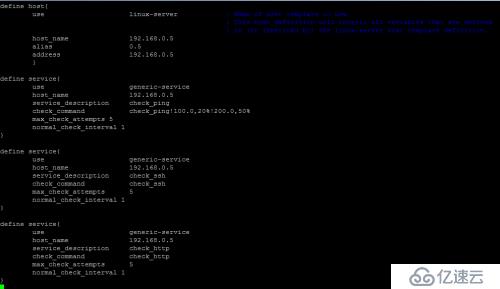
配置文件的簡單說明
我們定義的配置文件中一共監控了三個service:ssh, ping, http 這三個項目是使用本地的nagios工具去連接遠程機器,也就是說即使客戶端沒有安裝nagios-plugins以及nrpe也是可以監控到的。其他的一些service諸如負載、磁盤使用等是需要服務端通過nrpe去連接到遠程主機獲得信息,所以需要遠程主機安裝nrpe服務以及相應的執行腳本(nagios-plugins)
max_check_attempts 5 #當nagios檢測到問題時,一共嘗試檢測5次都有問題才會告警,如果該數值為1,那么檢測到問題立即告警
normal_check_interval 1#重新檢測的時間間隔,單位是分鐘,默認是3分鐘
notification_interval 60 #在服務出現異常后,故障一直沒有解決,nagios再次對使用者發出通知的時間。單位是分鐘。如果你認為,所有的事件只需要一次通知就夠了,可以把這里的選項設為0。
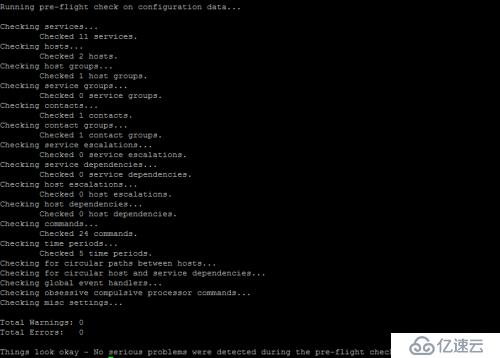
2.檢測是否有錯
nagios -v /etc/nagios/nagios.cfg
3.重啟服務
service nagios restart
打開瀏覽器查看nagios的Hosts 和services


nagios 中check_http 拒絕連接 錯誤解決辦法

客戶端啟動服務即可
/etc/init.d/nginx start
添加服務
服務端操作
1.修改配置文件
vim /etc/nagios/objects/commands.cfg
增加:define command{
command_name check_nrpe
command_line $USER1$/check_nrpe -H $HOSTADDRESS$ -c $ARG1$
}
如何查看check_load文件
客戶端打開配置文件 vi /etc/nagios/nrpe.cfg
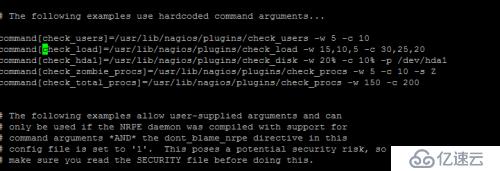
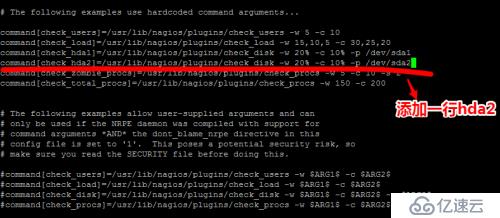
沒有hda1 把/dev/hda1修改為/dev/sda1

在添加一行
2.服務端繼續編輯
vim /etc/nagios/conf.d/192.168.0.5.cfg
增加如下內容:
define service{
use generic-service
host_name 192.168.0.5
service_description check_load
check_command check_nrpe!check_load
max_check_attempts 5
normal_check_interval 1
}
define service{
use generic-service
host_name 192.168.0.5
service_description check_disk_sda1

3.服務端重新啟動服務
service nagios restart
客戶端編輯
check_nrpe!check_load :這里的check_nrpe就是在commands.cfg剛剛定義的,check_load是遠程主機上的一個檢測腳本
在遠程主機上vim /etc/nagios/nrpe.cfg 搜索check_load,這行就是在服務端上要執行的腳本了,我們可以手動執行這個腳本
把check_hda1更改一下:/dev/hda1 改為 /dev/sda1
再加一行command[check_hda2]=/usr/lib/nagios/plugins/check_disk -w 20% -c 10% -p /dev/sda2
#主服務器上的 service_description check_disk_hda2
#改為 service_description check_disk_sda2
客戶端上重啟一下nrpe服務: service nrpe restart
服務端也重啟一下nagios服務: service nagios restart
服務端查看日志
tail /var/log/nagios/nagios.log
配置圖形顯示 pnp4nagios
(1)安裝
yum install pnp4nagios rrdtool
(2)配置主配置文件
vim /etc/nagios/nagios.cfg //修改如下配置
process_performance_data=1
host_perfdata_command=process-host-perfdata
service_perfdata_command=process-service-perfdata
enable_environment_macros=1
(3)修改commands.cfg
vim /etc/nagios/objects/commands.cfg
//注釋掉原有對process-host-perfdata和process-service-perfdata,重新定義
define command {
command_name process-service-perfdata
command_line /usr/bin/perl /usr/libexec/pnp4nagios/process_perfdata.pl
}
define command {
command_name process-host-perfdata
command_line /usr/bin/perl /usr/libexec/pnp4nagios/process_perfdata.pl -d HOSTPERFDATA
}
(4)修改配置文件templates.cfg
vim /etc/nagios/objects/templates.cfg
define host {
name hosts-pnp
register 0
action_url /pnp4nagios/index.php/graph?host=$HOSTNAME$&srv=_HOST_
process_perf_data 1
}
define service {
name srv-pnp
register 0
action_url /pnp4nagios/index.php/graph?host=$HOSTNAME$&srv=$SERVICEDESC$
process_perf_data 1
}
(5)修改host和service配置
vim /etc/nagios/conf.d/192.168.0.25.cfg
把 “define host{ define service{ } (6) 重啟和啟動各個服務: service npcd start (7) 訪問測試 ip/pnp4nagios/ 配置郵件告警 1.修改參數 vim /etc/nagios/objects/contacts.cfg 先定義組和用戶 添加一些內容 define contactgroup{ contactgroup_name admins alias Nagios Administrators members nagiosadmin } #group的作用是用來區分不同的用戶 define contact{ contact_name 123 use generic-contact alias lz email lizheng103@163.com } define contact{ contact_name 456 use generic-contact alias aaa email lizheng520mj@163.com } define contactgroup{ #定義的組名,里面包含的用戶 contactgroup_name common alias common members 123,456 } 想要哪個服務報警,就需要添加一行代碼 打開 vim /etc/nagios/conf.d/192.168.0.19.cfg 如果需要給load做警告, 需要告警的服務里面加上contactgroup define service{ use generic-service host_name 192.168.0.19 service_description check_load check_command check_nrpe!check_load max_check_attempts 5 normal_check_interval 1 contact_groups common #需要添加的代碼 notification_period 24*7 notification_options c,r } 10. 幾個重要參數說明 notification_options: 這個參數定義了發送提醒包括的情況:d = 狀態為DOWN, u = 狀態為UNREACHABLE , r = 狀態恢復為OK , f = flapping。,n=不發送提醒。 |
免責聲明:本站發布的內容(圖片、視頻和文字)以原創、轉載和分享為主,文章觀點不代表本網站立場,如果涉及侵權請聯系站長郵箱:is@yisu.com進行舉報,并提供相關證據,一經查實,將立刻刪除涉嫌侵權內容。