您好,登錄后才能下訂單哦!
您好,登錄后才能下訂單哦!
話不多說,直接上碼:xml文件,簡單的線性布局
<?xml version="1.0" encoding="utf-8"?>
<LinearLayout xmlns:android="http://schemas.android.com/apk/res/android"
android:layout_width="fill_parent"
android:layout_height="fill_parent"
android:orientation="vertical">
<LinearLayout
android:layout_width="fill_parent"
android:layout_height="wrap_content"
android:orientation="horizontal"
android:gravity="center">
</LinearLayout>
<Button
android:layout_width="wrap_content"
android:layout_height="wrap_content"
android:id="@+id/button3"
android:text="下一張"
android:layout_gravity="right" />
<ImageView
android:id="@+id/p_w_picpath2"
android:layout_width="fill_parent"
android:layout_height="fill_parent"
android:src="@drawable/cat"
android:scaleType="fitCenter"
/>
</LinearLayout>
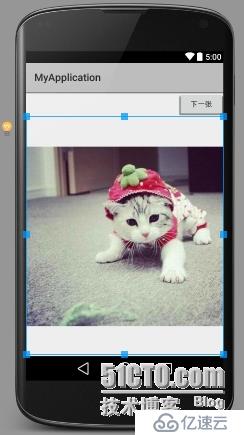
效果圖
package com.example.administrator.myapplication;
import android.app.Activity;
import android.content.DialogInterface;
import android.os.Bundle;
import android.view.View;
import android.view.Window;
import android.widget.Button;
import android.widget.ImageView;
/**
* Created by Administrator on 2015/6/6.
*/
public class Textp_w_picpathActivity extends Activity{
//定義一個訪問照片的數組
int[] p_w_picpaths=new int[]{
R.drawable.cat,
R.drawable.dog,
R.drawable.happen,
R.drawable.hashiqi,
R.drawable.what,
R.drawable.name,
};
//定義默認顯示的照片
int currentImg=2;
protected void onCreate(Bundle savedInstanceState) {
super.onCreate(savedInstanceState);
requestWindowFeature(Window.FEATURE_NO_TITLE);//隱藏TITLE
setContentView(R.layout.p_w_picpathview);
final ImageView p_w_picpath2=(ImageView)findViewById(R.id.p_w_picpath2);
final Button next=(Button)findViewById(R.id.button3);
//定義查看下一張圖片的監聽器
next.setOnClickListener(new View.OnClickListener() {
@Override
public void onClick(View v) {
//控制Image View顯示下一張照片
p_w_picpath2.setImageResource(
p_w_picpaths[++currentImg % p_w_picpaths.length]
);
}
});
}}
免責聲明:本站發布的內容(圖片、視頻和文字)以原創、轉載和分享為主,文章觀點不代表本網站立場,如果涉及侵權請聯系站長郵箱:is@yisu.com進行舉報,并提供相關證據,一經查實,將立刻刪除涉嫌侵權內容。