溫馨提示×
您好,登錄后才能下訂單哦!
點擊 登錄注冊 即表示同意《億速云用戶服務條款》
您好,登錄后才能下訂單哦!
這篇文章主要介紹“Python+Tkinter連接本地MySQL數據庫怎么實現注冊登錄”,在日常操作中,相信很多人在Python+Tkinter連接本地MySQL數據庫怎么實現注冊登錄問題上存在疑惑,小編查閱了各式資料,整理出簡單好用的操作方法,希望對大家解答”Python+Tkinter連接本地MySQL數據庫怎么實現注冊登錄”的疑惑有所幫助!接下來,請跟著小編一起來學習吧!


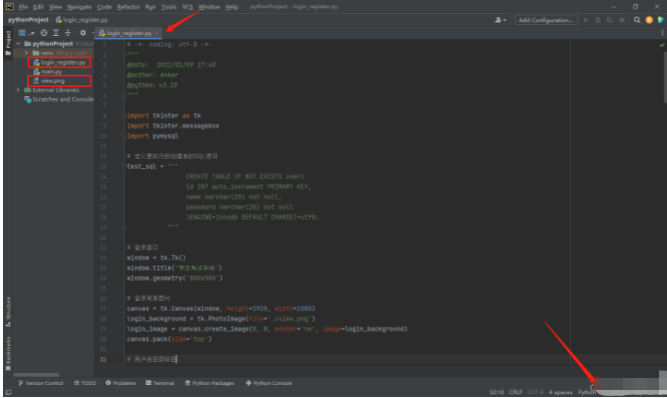
項目結構:

源代碼:
# -*- coding: utf-8 -*-
"""
@date:  2022/01/09 17:40
@author: Anker
@python:v3.10
"""

import tkinter as tk
import tkinter.messagebox
import pymysql

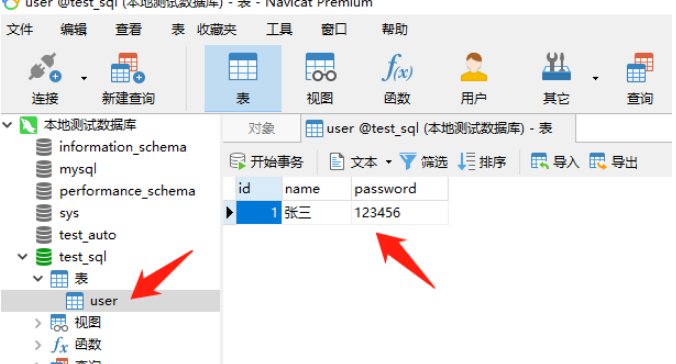
# 定義要執行的創建表的SQL語句
test_sql = """
                CREATE TABLE IF NOT EXISTS user(
                id INT auto_increment PRIMARY KEY,
                name varchar(20) not null,
                password varchar(20) not null
                )ENGINE=innodb DEFAULT CHARSET=utf8;
           """

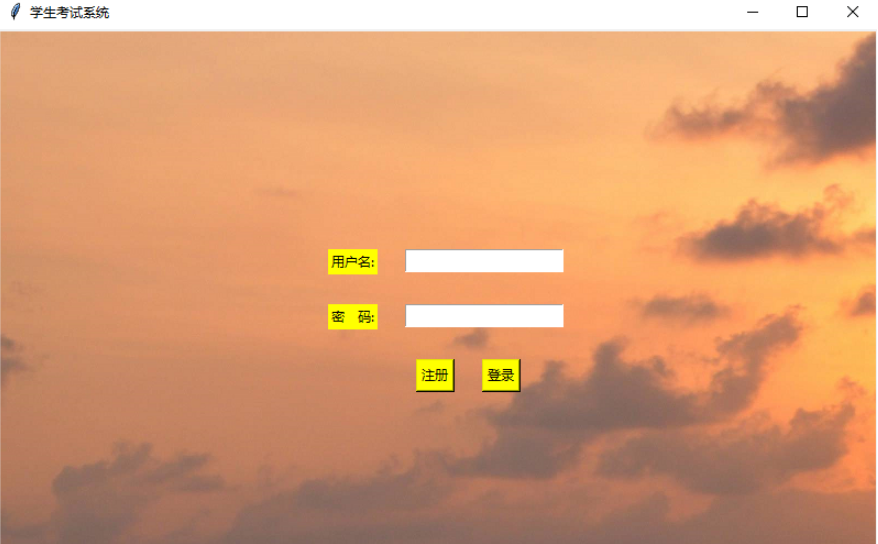
# 登錄窗口
window = tk.Tk()
window.title('學生考試系統')
window.geometry('800x500')

# 登錄背景圖片
canvas = tk.Canvas(window, height=1920, width=1080)
login_background = tk.PhotoImage(file='./view.png')
login_image = canvas.create_image(0, 0, anchor='nw', image=login_background)
canvas.pack(side='top')

# 用戶名密碼標簽
tk.Label(window, text='用戶名:', bg='yellow').place(x=300, y=200)
tk.Label(window, text='密   碼:', bg='yellow').place(x=300, y=250)

# 用戶名輸入框
var_user_name = tk.StringVar()
entry_user_name = tk.Entry(window, textvariable=var_user_name)
entry_user_name.place(x=370, y=200)

# 密碼輸入框
var_user_pwd = tk.StringVar()
entry_user_pwd = tk.Entry(window, textvariable=var_user_pwd, show='*')
entry_user_pwd.place(x=370, y=250)


# 登錄函數
def user_login():
    # 輸入框獲取用戶名密碼
    user_name = var_user_name.get()
    user_password = var_user_pwd.get()
    # 連接test_sql數據庫
    conn = pymysql.connect(host="localhost", user="root", password="123456", database="test_sql", charset="utf8")
    curs = conn.cursor()
    # 執行SQL語句,創建user數據表
    curs.execute(test_sql)
    # 執行SQL語句,從user數據表中查詢name和password字段值
    curs.execute("SELECT name,password FROM user")
    # 將數據庫查詢的結果保存在result中
    result = curs.fetchall()
    # fetchone()函數它的返回值是單個的元組, 也就是一行記錄, 如果沒有結果, 那就會返回null
    # fetchall()函數它的返回值是多個元組, 即返回多個行記錄, 如果沒有結果, 返回的是()
    # assert result, "數據庫無該用戶信息"   # 添加斷言,判斷數據庫有無該用戶信息,沒有就直接斷言錯誤

    # 登錄賬號操作
    name_list = [it[0] for it in result]    # 從數據庫查詢的result中遍歷查詢元組中第一個元素name
    # 判斷用戶名或密碼不能為空
    if not(user_name and user_password):
        tk.messagebox.showwarning(title='警告', message='用戶名或密碼不能為空')
    # 判斷用戶名和密碼是否匹配
    elif user_name in name_list:
        if user_password == result[name_list.index(user_name)][1]:
            tk.messagebox.showinfo(title='歡迎您', message='       登錄成功!\r\n當前登錄賬號為:' + user_name)
            selection()
        else:
            tk.messagebox.showerror(title='錯誤', message='密碼輸入錯誤')
    # 賬號不在數據庫中,則彈出是否注冊的框
    else:
        is_signup = tk.messagebox.askyesno(title='提示', message='該賬號不存在,是否現在注冊?')
        if is_signup:
            user_register()


# 注冊函數
def user_register():
    # 確認注冊函數
    def register_confirm():
        # 獲取輸入框內的內容
        name = new_name.get()
        password = new_password.get()
        password_confirm = new_password_confirm.get()
        # 先在本地手動創建一個test_sql數據庫,然后連接該數據庫
        conn = pymysql.connect(host="localhost", user="root", password="123456", database="test_sql", charset="utf8")
        curs = conn.cursor()

        # 注冊賬號操作
        try:
            # 執行SQL語句,創建user數據表
            curs.execute(test_sql)
            # 向user數據表中插入語句
            insert_sql = "INSERT INTO user(name, password) VALUES ('%s', '%s')" % (name, password)
            # 讀取user數據表中的name和password字段值
            read_sql = f'''select * from user where name = "{name}" and password = "{password}" '''
            user_data = curs.execute(read_sql)
            # 判斷注冊賬號和密碼
            if not (name and password):
                tk.messagebox.showwarning(title='警告', message='注冊賬號或密碼不能為空')
            elif password != password_confirm:
                tk.messagebox.showwarning(title='警告', message='兩次密碼輸入不一致,請重新輸入')
            else:
                if user_data.real:
                    tk.messagebox.showwarning(title='警告', message='該注冊賬號已存在')
                else:
                    curs.execute(insert_sql)
                    tk.messagebox.showinfo(title='恭喜您', message='      注冊成功!\r\n注冊賬號為:' + name)
                    print("數據插入成功")
            # 提交到數據庫執行
            conn.commit()
            curs.close()
        except IOError:
            print("數據插入失敗")
            conn.rollback()
        # 關閉數據庫連接
        conn.close()
        window_sign_up.destroy()

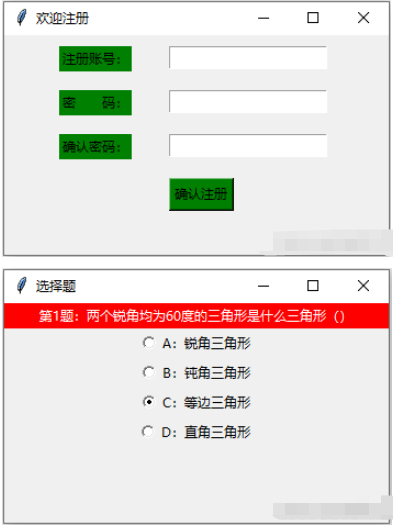
    # 注冊窗口
    window_sign_up = tk.Toplevel(window)
    window_sign_up.geometry('350x200')
    window_sign_up.title('歡迎注冊')

    # 注冊賬號及標簽、輸入框
    new_name = tk.StringVar()
    tk.Label(window_sign_up, bg='green', text='注冊賬號:').place(x=50, y=10)
    tk.Entry(window_sign_up, textvariable=new_name).place(x=150, y=10)

    # 注冊密碼及標簽、輸入框
    new_password = tk.StringVar()
    tk.Label(window_sign_up, bg='green', text='密      碼:').place(x=50, y=50)
    tk.Entry(window_sign_up, textvariable=new_password, show='*').place(x=150, y=50)

    # 重復密碼及標簽、輸入框
    new_password_confirm = tk.StringVar()
    tk.Label(window_sign_up, bg='green', text='確認密碼:').place(x=50, y=90)
    tk.Entry(window_sign_up, textvariable=new_password_confirm, show='*').place(x=150, y=90)

    # 確認注冊按鈕及位置
    bt_confirm_sign_up = tk.Button(window_sign_up, bg='green', text='確認注冊', command=register_confirm)
    bt_confirm_sign_up.place(x=150, y=130)


# 選擇題函數
def selection():

    def wrong():
        tk.messagebox.showerror(title='錯誤', message='抱歉,您答錯了')

    def right():
        tk.messagebox.showinfo(title='提示', message='恭喜您,答對了')

    # 選擇題窗口
    window_options = tk.Toplevel(window)
    window_options.geometry('350x200')
    window_options.title('選擇題')
    # 在圖形界面上創建一個標簽label用以顯示并放置
    var = tk.StringVar()  # 定義一個var用來將radiobutton的值和Label的值聯系在一起.
    lab = tk.Label(window_options, bg='red', fg='white', width=50)
    lab.pack()
    lab.config(text='第1題:兩個銳角均為60度的三角形是什么三角形()' + var.get())
    # 創建3個radiobutton選項,其中variable=var, value='A'表示:當鼠標選中其中一個選項,把value的值A放到變量var中,然后賦值給variable
    radio1 = tk.Radiobutton(window_options, text='A:銳角三角形', variable=var, value='A', command=wrong)
    radio1.pack()
    radio2 = tk.Radiobutton(window_options, text='B:鈍角三角形', variable=var, value='B', command=wrong)
    radio2.pack()
    radio3 = tk.Radiobutton(window_options, text='C:等邊三角形', variable=var, value='C', command=right)
    radio3.pack()
    radio4 = tk.Radiobutton(window_options, text='D:直角三角形', variable=var, value='D', command=wrong)
    radio4.pack()


# 注冊和登錄按鈕
bt_register = tk.Button(window, bg='yellow', text='注冊', command=user_register)
bt_register.place(x=380, y=300)
bt_login = tk.Button(window, bg='yellow', text='登錄', command=user_login)
bt_login.place(x=440, y=300)

# 主循環
window.mainloop()
到此,關于“Python+Tkinter連接本地MySQL數據庫怎么實現注冊登錄”的學習就結束了,希望能夠解決大家的疑惑。理論與實踐的搭配能更好的幫助大家學習,快去試試吧!若想繼續學習更多相關知識,請繼續關注億速云網站,小編會繼續努力為大家帶來更多實用的文章!
免責聲明:本站發布的內容(圖片、視頻和文字)以原創、轉載和分享為主,文章觀點不代表本網站立場,如果涉及侵權請聯系站長郵箱:is@yisu.com進行舉報,并提供相關證據,一經查實,將立刻刪除涉嫌侵權內容。