溫馨提示×
您好,登錄后才能下訂單哦!
點擊 登錄注冊 即表示同意《億速云用戶服務條款》
您好,登錄后才能下訂單哦!
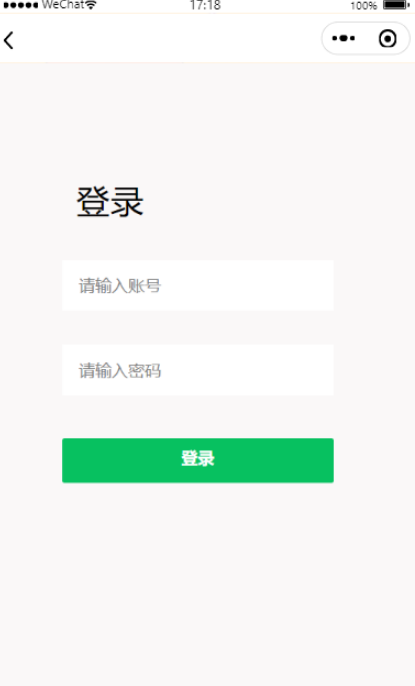
本篇內容介紹了“怎么用css實現微信小程序簡潔登錄頁面”的有關知識,在實際案例的操作過程中,不少人都會遇到這樣的困境,接下來就讓小編帶領大家學習一下如何處理這些情況吧!希望大家仔細閱讀,能夠學有所成!


3.1login.wxml
<view class="v1" >

 <!-- v2父容器  子view使用絕對布局 -->
   <view class="v2">
     <view class="dltext" >登錄</view>

     <!-- 手機號 -->
     <view class="phoneCs">
       <!-- <image src="/images/zhang.png" class="ph"></image> -->
       <input placeholder="請輸入賬號" type="number" bindinput="content" />
     </view>
     <!-- 密碼 -->
     <view class=passwordCs">
       <!-- <image src="/images/mi.png" class="ps"></image> -->
       <input placeholder="請輸入密碼" type="password" bindinput="password" />
     </view>
     <!-- 登錄按鈕 -->
     <view class="denglu">
       <button class="btn-dl" type="primary" bindtap="goadmin">登錄</button>
     </view>
   </view>
 </view>
3.2login.css
/* pages/login/login.wxss *//* 最大的父元素 */
.v1{
  display: block;
  position:absolute;
  width: 100%;
  background-color: rgb(250, 248, 248);
}
/* 白色區域 */
.v1 .v2{
  position: relative;
  margin-top: 150rpx;
  left: 100rpx;
  width: 545rpx;
  height: 600rpx;
  background-color: rgb(250, 248, 248);
  border-radius: 50rpx;
}
/* 白色區域內的登錄文本 */
.v1 .v2 .dltext{
  margin-top: 50rpx;
  position: absolute;
  margin-left:50rpx;
  width: 150rpx;
  height: 100rpx;
  font-size: 60rpx;
  font-family: Helvetica;
  color: #000000;
  line-height: 100rpx;
  letter-spacing: 2rpx;
}
/* 手機圖片+輸入框+下劃線的父容器view */
.v1 .v2 .phoneCs{
  margin-top: 200rpx;
  margin-left: 25rpx;
  position: absolute;
  display: flex;
  width:480rpx ;
  height: 90rpx ;
  background-color: white;

}
/* 手機圖標 */
.v1 .v2 .phoneCs .ph{
  margin-top: 5rpx;
  margin-left: 30rpx;
  width: 55rpx;
  height: 55rpx;
}
/* 手機號輸入框 */
.v1 .v2 .phoneCs input{
  width: 400rpx;
  font-size: 30rpx ;
  margin-top: 25rpx;
  margin-left: 30rpx;
}
/* 密碼圖標+輸入框+小眼睛圖標+下劃線父容器view */
.v1 .v2 .passwordCs{
  margin-top: 350rpx;
  margin-left: 25rpx;
  position: absolute;
  display: flex;
  width:480rpx ;
  height: 90rpx ;
  background-color: white;

}
/* 密碼圖標 */
.v1 .v2 .passwordCs .ps{
  margin-top: 5rpx;
  margin-left: 30rpx;
  width: 55rpx;
  height: 55rpx;
}
/* 眼睛 圖標*/
.v1 .v2 .passwordCs .eye{
  margin-top: 5rpx;
  margin-left: 65rpx;
  width: 55rpx;
  height: 55rpx;
}
/* 密碼輸入框 */
.v1 .v2 .passwordCs input{
  width: 400rpx;
  font-size: 30rpx ;
  margin-top: 25rpx;
  margin-left: 30rpx;
}
/* 登錄按鈕容器view */
.v1 .v2 .denglu{
  width: 480rpx;
  height: 80rpx;
  position: absolute;
  margin-top:515rpx;
  margin-left:25rpx;

}
/* 登錄按鈕 */
.v1 .v2 .denglu button{
  padding: 0rpx;
  line-height: 70rpx;
  font-size: 30rpx;
  width: 100%;
  height: 100%;
  border-radius: 5rpx;
}
3.3login.js
//index.js
//獲取應用實例
const app = getApp()
 let username=''
 let password=''
Page({
  data: {
    username: '',
    password: '',
    clientHeight:''
  },
  onLoad(){
    var that=this
    wx.getSystemInfo({
      success: function (res) {
        console.log(res.windowHeight)
          that.setData({
              clientHeight:res.windowHeight
        });
      }
    })
  },
  //協議
  goxieyi(){
   wx.navigateTo({
     url: '/pages/oppoint/oppoint',
   })
  },
  //獲取輸入款內容
  content(e){
    username=e.detail.value
  },
  password(e){
    password=e.detail.value
  },
  //登錄事件
  goadmin(){
    let flag = false  //表示賬戶是否存在,false為初始值
    if(username=='')
    {
      wx.showToast({
        icon:'none',
        title: '賬號不能為空',
      })
    }else if(password==''){
      wx.showToast({
        icon:'none',
        title: '密碼不能為空',
      })
    }else{
      wx.cloud.database().collection('adminShop')
      .get({
        success:(res)=>{
          console.log(res.data)
          let admin=res.data
          for (let i = 0; i < admin.length; i++) {  //遍歷數據庫對象集合
            if (username === admin[i].username) { //賬戶已存在
              flag=true;
              if (password !== admin[i].password) {  //判斷密碼正確與否
                wx.showToast({  //顯示密碼錯誤信息
                  title: '密碼錯誤!!',
                  icon: 'error',
                  duration: 2500
                });
               break;
              } else {
                wx.showToast({  //顯示登錄成功信息
                  title: '登陸成功!!',
                  icon: 'success',
                  duration: 2500
                })
                flag=true;
                wx.setStorageSync('admin', password)
               wx.navigateTo({
                 url: '/pages/admin/admin',
               })
                break;
              }
            }
          };
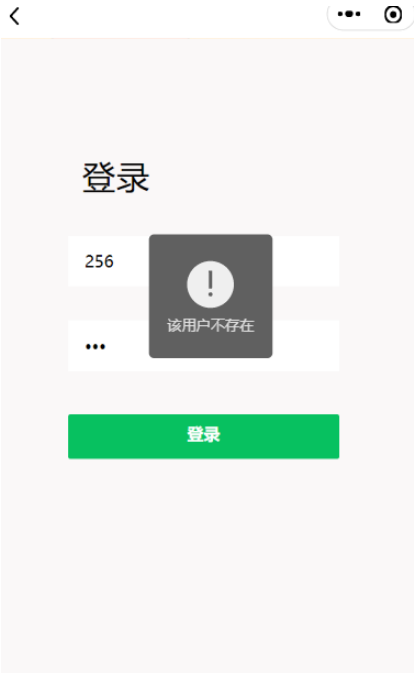
          if(flag==false)//遍歷完數據后發現沒有該賬戶
          {
            wx.showToast({
              title: '該用戶不存在',
              icon: 'error',
              duration: 2500
            })
          }
        }
      })
    }
  },
})
“怎么用css實現微信小程序簡潔登錄頁面”的內容就介紹到這里了,感謝大家的閱讀。如果想了解更多行業相關的知識可以關注億速云網站,小編將為大家輸出更多高質量的實用文章!
免責聲明:本站發布的內容(圖片、視頻和文字)以原創、轉載和分享為主,文章觀點不代表本網站立場,如果涉及侵權請聯系站長郵箱:is@yisu.com進行舉報,并提供相關證據,一經查實,將立刻刪除涉嫌侵權內容。