溫馨提示×
您好,登錄后才能下訂單哦!
點擊 登錄注冊 即表示同意《億速云用戶服務條款》
您好,登錄后才能下訂單哦!
小編給大家分享一下微信小程序之制作登錄頁面的方法,相信大部分人都還不怎么了解,因此分享這篇文章給大家參考一下,希望大家閱讀完這篇文章后大有收獲,下面讓我們一起去了解一下吧!
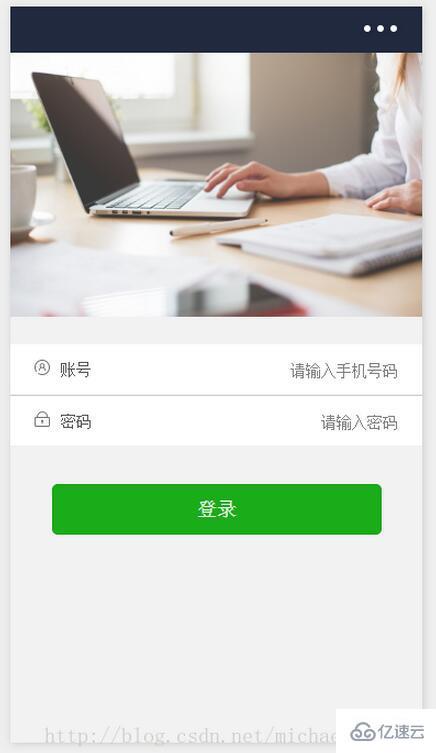
項目效果圖:

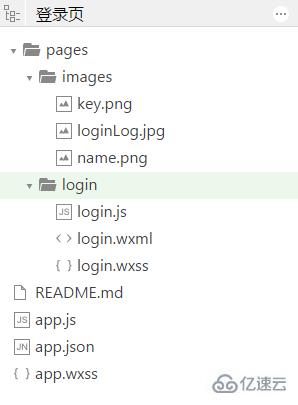
目錄結構:

圖片資源:
name.png

key.png

loginLog.jpg

login.wxml:
<view class="container">
 <view class="login-icon">
 <image class="login-img" src="../images/loginLog.jpg"></image>
 </view>
 <view class="login-from">

 <!--賬號-->
 <view class="inputView">
  <image class="nameImage" src="../images/name.png"></image>
  <label class="loginLab">賬號</label>
  <input class="inputText" placeholder="請輸入賬號" bindinput="phoneInput" />
 </view>
 <view class="line"></view>

 <!--密碼-->
 <view class="inputView">
  <image class="keyImage" src="../images/key.png"></image>
  <label class="loginLab">密碼</label>
  <input class="inputText" password="true" placeholder="請輸入密碼" bindinput="passwordInput" />
 </view>

 <!--按鈕-->
 <view class="loginBtnView">
  <button class="loginBtn" type="primary" size="{{primarySize}}" loading="{{loading}}" plain="{{plain}}" disabled="{{disabled}}" bindtap="login">登錄</button>
 </view>
 </view>
</view>
login.wxss:
page{
 height: 100%;
}

.container {
 height: 100%;
 display: flex;
 flex-direction: column;
 padding: 0;
 box-sizing: border-box;
 background-color: #f2f2f2
}

/*登錄圖片*/
.login-icon{
 flex: none;
}
.login-img{
 width: 750rpx;
}

/*表單內容*/
.login-from {
 margin-top: 20px;
 flex: auto;
 height:100%;
}

.inputView {
 background-color: #fff;
 line-height: 44px;
}
/*輸入框*/
.nameImage, .keyImage {
 margin-left: 22px;
 width: 14px;
 height: 14px
}

.loginLab {
 margin: 15px 15px 15px 10px;
 color: #545454;
 font-size: 14px
}
.inputText {
 flex: block;
 float: right;
 text-align: right;
 margin-right: 22px;
 margin-top: 11px;
 color: #cccccc;
 font-size: 14px
}

.line {
 width: 100%;
 height: 1px;
 background-color: #cccccc;
 margin-top: 1px;
}
/*按鈕*/
.loginBtnView {
 width: 100%;
 height: auto;
 background-color: #f2f2f2;
 margin-top: 0px;
 margin-bottom: 0px;
 padding-bottom: 0px;
}

.loginBtn {
 width: 80%;
 margin-top: 35px;
}
login.js:
Page({
 data: {
 phone: '',
 password:''
 },

// 獲取輸入賬號
 phoneInput :function (e) {
 this.setData({
  phone:e.detail.value
 })
 },

// 獲取輸入密碼
 passwordInput :function (e) {
 this.setData({
  password:e.detail.value
 })
 },

// 登錄
 login: function () {
 if(this.data.phone.length == 0 || this.data.password.length == 0){
  wx.showToast({
  title: '用戶名和密碼不能為空',
  icon: 'loading',
  duration: 2000
  })
}else {
 // 這里修改成跳轉的頁面
  wx.showToast({
  title: '登錄成功',
  icon: 'success',
  duration: 2000
  })
 }
 }
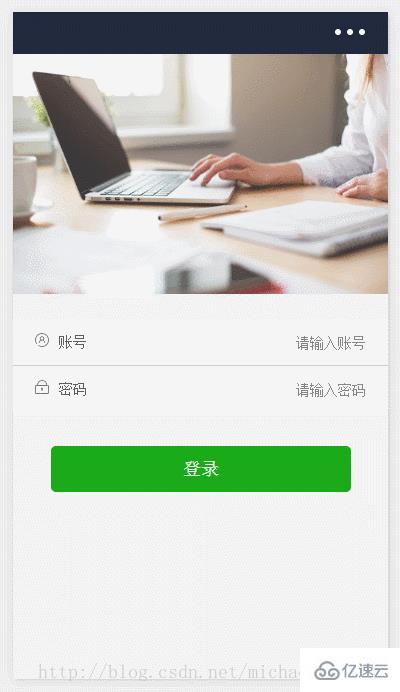
})運行結果:

以上是“微信小程序之制作登錄頁面的方法”這篇文章的所有內容,感謝各位的閱讀!相信大家都有了一定的了解,希望分享的內容對大家有所幫助,如果還想學習更多知識,歡迎關注億速云行業資訊頻道!
免責聲明:本站發布的內容(圖片、視頻和文字)以原創、轉載和分享為主,文章觀點不代表本網站立場,如果涉及侵權請聯系站長郵箱:is@yisu.com進行舉報,并提供相關證據,一經查實,將立刻刪除涉嫌侵權內容。