您好,登錄后才能下訂單哦!
您好,登錄后才能下訂單哦!
本篇內容介紹了“SpringBoot中的Bean初始化方法是什么”的有關知識,在實際案例的操作過程中,不少人都會遇到這樣的困境,接下來就讓小編帶領大家學習一下如何處理這些情況吧!希望大家仔細閱讀,能夠學有所成!
使用注解: @PostConstruct
效果:在Bean初始化之后(構造方法和@Autowired之后)執行指定操作。經常用在將構造方法中的動作延遲。
備注:Bean初始化時候的執行順序: 構造方法 -> @Autowired -> @PostConstruct
@Component
public class PostConstructTest1 {
    @Autowired
    PostConstructTest2 postConstructTest2;
    public PostConstructTest1() {
//        postConstructTest2.hello();
    }
    @PostConstruct
    public void init() {
        // some init function
    }
}
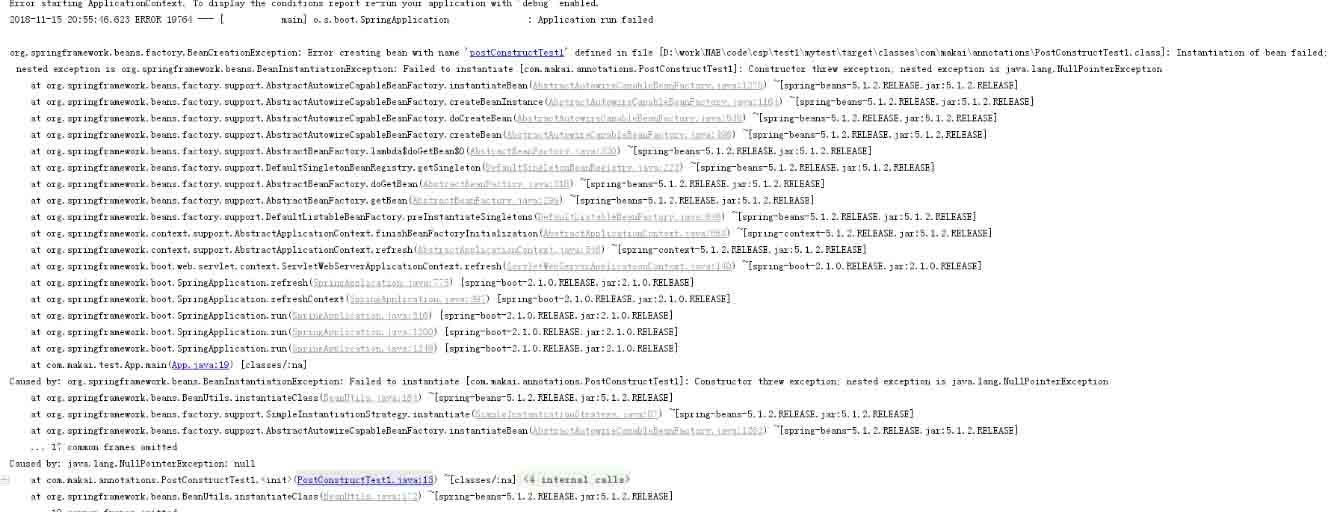
在Bean的初始化操作中,有時候會遇到調用其他Bean的時候報空指針錯誤。這時候就可以將調用另一個Bean的方法這個操作放到@PostConstruct注解的方法中,將其延遲執行。
@Component
    public class PostConstructTest1 {
        @Autowired
        PostConstructTest2 postConstructTest2;
        public PostConstructTest1() {
            postConstructTest2.hello();
        }
    }
@Component
public class PostConstructTest2 {
public void hello() {
System.out.println("hello, i am PostConstructTest2");
}
}
@Component
    public class PostConstructTest1 {
        @Autowired
        PostConstructTest2 postConstructTest2;
        public PostConstructTest1() {
            postConstructTest2.hello();
        }
    }
@Component
public class PostConstructTest1 {
@Autowired
PostConstructTest2 postConstructTest2;
public PostConstructTest1() {
// postConstructTest2.hello();
}
@PostConstruct
public void init() {
postConstructTest2.hello();
}
}
做過SpringBoot開發的話,肯定對@PostConstruct比較熟悉。在一個Bean組件中,標記了@PostConstruct的方法會在Bean構造完成后自動執行方法的邏輯。
先說下SpringBoot中Bean的加載過程,簡單點說就是SpringBoot會把標記了Bean相關注解(例如@Component、@Service、@Repository等)的類或接口自動初始化全局的單一實例,如果標記了初始化順序會按照用戶標記的順序,否則按照默認順序初始化。在初始化的過程中,執行完一個Bean的構造方法后會執行該Bean的@PostConstruct方法(如果有),然后初始化下一個Bean。
那么: 如果@PostConstruct方法內的邏輯處理時間較長,就會增加SpringBoot應用初始化Bean的時間,進而增加應用啟動的時間。因為只有在Bean初始化完成后,SpringBoot應用才會打開端口提供服務,所以在此之前,應用不可訪問。
為了模擬上面說的情況,在SpringBoot項目中建兩個組件類ComponentOne和ComponentTwo。耗時的初始化邏輯放在ComponentOne中,并設置ComponentOne的初始化順序在ComponentTwo之前。完整代碼如下:
@Component
@Order(Ordered.HIGHEST_PRECEDENCE)
public class ComponentOne {
    private Logger logger = LoggerFactory.getLogger(this.getClass());
    public ComponentOne() {
        this.logger.info("ComponentOne 初始化完成");
    }
    @PostConstruct
    public void init() {
        this.logger.info("ComponentOne 模擬耗時邏輯開始");
        try {
        	//這里休眠5秒模擬耗時邏輯
            Thread.sleep(1000 * 5);
        } catch (InterruptedException e) {
            logger.info("模擬邏輯耗時失敗", e);
        }
        this.logger.info("ComponentOne 模擬耗時邏輯完成");
    }
}
@Component
@Order(Ordered.HIGHEST_PRECEDENCE + 1)
public class ComponentTwo {
private Logger logger = LoggerFactory.getLogger(this.getClass());
public ComponentTwo() {
this.logger.info("ComponentTwo 初始化完成");
}
@PostConstruct
public void init() {
this.logger.info("ComponentTwo 初始化完成后處理");
}
}啟動應用,初始化部分日志如下:

“SpringBoot中的Bean初始化方法是什么”的內容就介紹到這里了,感謝大家的閱讀。如果想了解更多行業相關的知識可以關注億速云網站,小編將為大家輸出更多高質量的實用文章!
免責聲明:本站發布的內容(圖片、視頻和文字)以原創、轉載和分享為主,文章觀點不代表本網站立場,如果涉及侵權請聯系站長郵箱:is@yisu.com進行舉報,并提供相關證據,一經查實,將立刻刪除涉嫌侵權內容。