您好,登錄后才能下訂單哦!
您好,登錄后才能下訂單哦!
這篇文章主要介紹SpringBoot事件發布和監聽的示例分析,文中介紹的非常詳細,具有一定的參考價值,感興趣的小伙伴們一定要看完!
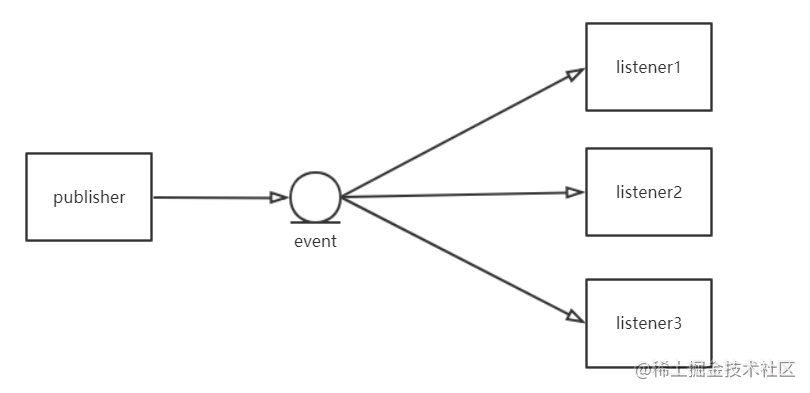
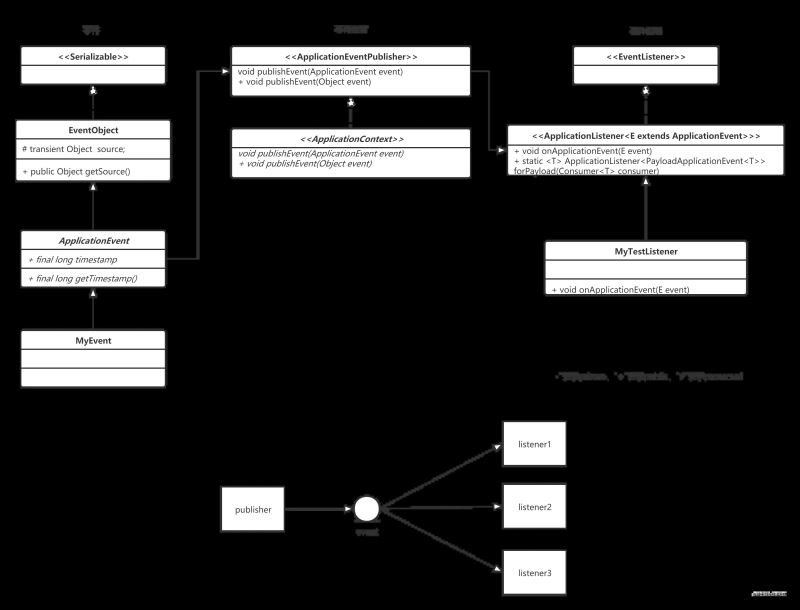
ApplicationEvent以及Listener是Spring為我們提供的一個事件監聽、訂閱的實現,內部實現原理是觀察者設計模式,設計初衷也是為了系統業務邏輯之間的解耦,提高可擴展性以及可維護性。事件發布者并不需要考慮誰去監聽,監聽具體的實現內容是什么,發布者的工作只是為了發布事件而已。事件監聽的作用與消息隊列有一點類似。

主要有三個部分組成:
發布者Publisher
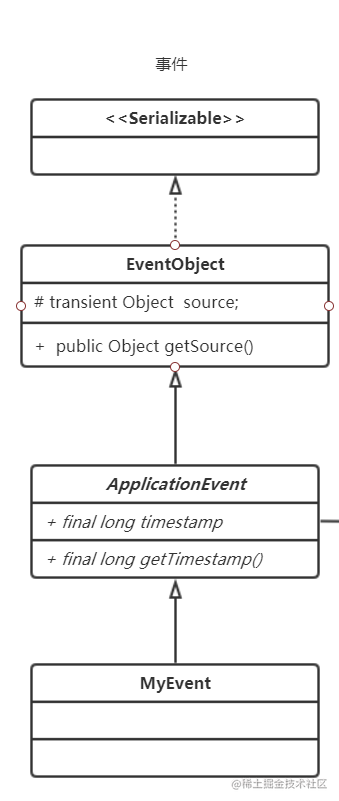
事件Event
監聽者Listener


我們自定義事件MyTestEvent繼承了ApplicationEvent,繼承后必須重載構造函數,構造函數的參數可以任意指定,其中source參數指的是發生事件的對象,一般我們在發布事件時使用的是this關鍵字代替本類對象,而user參數是我們自定義的注冊用戶對象,該對象可以在監聽內被獲取。
@Getter
public class MyTestEvent extends ApplicationEvent {
    private static final long serialVersionUID = 1L;
    private User user;

    public MyTestEvent(Object source, User user) {
        super(source);
        this.user = user;
    }
}
事件發布是由ApplicationContext對象管控的,我們發布事件前需要注入ApplicationContext對象調用publishEvent方法完成事件發布。
ApplicationEventPublisher applicationEventPublisher 雖然聲明的是ApplicationEventPublisher,但是實際注入的是applicationContext
@RestController
@RequestMapping("/test")
public class TestController {
    @Autowired
    ApplicationContext applicationContext;
    @Autowired
    ApplicationEventPublisher applicationEventPublisher;

    @GetMapping("testEvent")
    public void test() {
        applicationEventPublisher.publishEvent(new MyTestEvent("dzf-casfd-111", new User("dzf-625096527-111", "xiaoming", 19)));
        applicationEventPublisher.publishEvent(new MyTestEvent("dzf-49687489-111", new User("dzf-625096527-111", "xiaowang", 20)));
    }


}面向接口編程,實現ApplicationListener接口
@Component
public class MyTestListener implements ApplicationListener<MyTestEvent> {

    @Override
    public void onApplicationEvent(MyTestEvent myTestEvent) {
        System.out.println("MyTestListener : " + myTestEvent.getUser());
    }
}
使用@EventListener注解配置
@Component
public class MyTestListener2{

    @EventListener(MyTestEvent.class)
    public void onApplicationEvent(MyTestEvent myTestEvent) {
        System.out.println("MyTestListener2:" + myTestEvent.getUser());
    }
}
以上是“SpringBoot事件發布和監聽的示例分析”這篇文章的所有內容,感謝各位的閱讀!希望分享的內容對大家有幫助,更多相關知識,歡迎關注億速云行業資訊頻道!
免責聲明:本站發布的內容(圖片、視頻和文字)以原創、轉載和分享為主,文章觀點不代表本網站立場,如果涉及侵權請聯系站長郵箱:is@yisu.com進行舉報,并提供相關證據,一經查實,將立刻刪除涉嫌侵權內容。