您好,登錄后才能下訂單哦!
您好,登錄后才能下訂單哦!
Step1. 修改Nginx的log格式(改為JSON格式)
把nginx的log_format改為以下的參數(修改/etc/nginx/nginx.conf):
log_format main '{"@timestamp":"$time_iso8601","host":"$server_addr","clientip":"$remote_addr","size":$body_bytes_sent,"responsetime":$request_time,"upstreamtime":"$upstream_response_time","upstreamhost":"$upstream_addr","http_host":"$host","url":"$uri","xff":"$http_x_forwarded_for","referer":"$http_referer","agent":"$http_user_agent","status":"$status"}';
reload nginx后,看到access.log的格式如下:
{"@timestamp":"2017-12-13T17:29:49+08:00","host":"120.76.XX.XX","clientip":"120.76.XX.XXX","size":26963,"responsetime":0.000,"upstreamtime":"0.000","upstreamhost":"127.0.0.1:8080","http_host":"weixin.XXX.com","url":"/XXXXXXX/haowanyihao/thumb.png","xff":"111.22.65.171","referer":"-","agent":"WeChat/6.6.0.32 CFNetwork/811.4.18 Darwin/16.5.0","status":"200"}
Step2. 編寫python程式
# -- coding: utf-8 --
'''
  By Willson Luo at 2017/11/23 v1.0
'''
import pandas as pd
import json,time,datetime,iso8601
from elasticsearch import Elasticsearch
from geoip import geolite2
# connect to elasticsearch database
es = Elasticsearch( "localhost:9200" )
es = Elasticsearch(hosts=[{'host': 'localhost', 'port': '9200'}],httpauth=('elastic', 'xxxxx'))
# nginx column name
#title    = ['@timestamp','host','clientip','size','responsetime','upstreamtime','upstreamhost','httphost','url','xff','referer','agent','status']
# nginx access log
ngxlog  = 'access.log'
ngxdata = open(ngxlog).readlines()
# nginx data(json format)
ngxjson = {}
for a1 in range(len(ngxdata)):
    step1 = ngxdata[a1].strip().split("\"")
    abc = iso8601.parsedate(step1[3])
    bcd = abc.strftime('%Y-%m-%dT%H:%M:%S%Z')
    cde = abc.strftime('%Y%m%d')
    ngxindex   = 'logstash-weixin-nginx-access-'+ cde
    ngxjson['@timestamp'] = bcd
    ngxjson['host'] = step1[7]
    ngxjson['size'] = step1[14].replace(":","").replace(",","")
    ngxjson['responsetime'] = step1[16].replace(":","").replace(",","")
    ngxjson['upstreamtime'] = step1[19]
    ngxjson['upstreamhost'] = step1[23]
    if step1[35] == "-":
        ngxjson['clientip']  = step1[11]
        ngxjson['httphost'] = step1[27]
        ipaddr = step1[11]
    else:
        ngxjson['clientip']  = step1[35].split(",")[0]
        ngxjson['httphost'] = step1[39]
        ipaddr = step1[35].split(",")[0]
    if "Apple" in step1[43]:
        ngxjson['agent']="Apple"
    elif "WeChat" in step1[43]:
        ngxjson['agent']="WeChat"
    elif "curl" in step1[43]:
        ngxjson['agent']="Linux"
    elif "Alibaba" in step1[43]:
        ngxjson['agent']="Aliyun"
    elif "Android" in step1[43]:
        ngxjson['agent']="Android"
    elif "MSIE" in step1[43]:
        ngxjson['agent']="IE"
    elif "Firefox" in step1[43]:
        ngxjson['agent']="Firefox"
    elif "Windows" in step1[43]:
        ngxjson['agent']="Windows"
    elif "Apache-Http" in step1[43]:
        ngxjson['agent']="Apache"
    else:
        ngxjson['agent']= step1[43]
    ngxjson['status']= step1[47]
    location = geolite2.lookup(ipaddr).location
    match = geolite2.lookup(ipaddr).getinfodict()
    location = []
    location.append(match['location']['longitude'])
    location.append(match['location']['latitude'])
    geoip = {}
    geoip['location'] = location
    if match.haskey('city'):
        city = match['city']['names']['en']
    else:
        city = "-"
    if match.haskey('country'):
        country = match['country']['names']['en']
    else:
        country = "-"
    if match.haskey('subdivisions'):
        subdivisions = match['subdivisions'][0]['names']['en']
    else:
        subdivisions = "-"
    ngxjson['geoip']        = geoip
    ngxjson['country']      = country
    ngxjson['subdivisions'] = subdivisions
    ngxjson['city']         = city
    ngxjson['possition']    = country+"-"+subdivisions+"-"+city
    print a1,ngxjson
    es.index( index=ngxindex, doctype="logs", body=ngxjson )
Step3. 通過Kibana把數據呈現處理
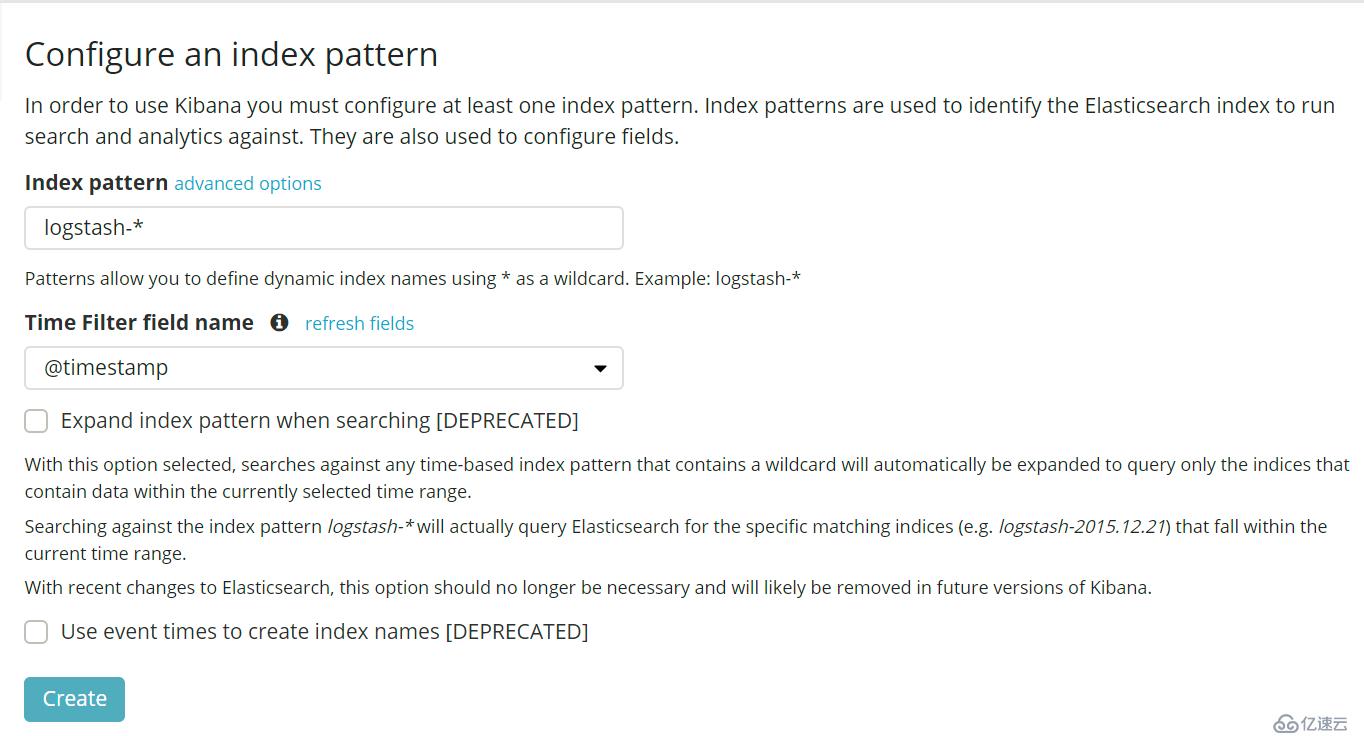
1> 先在Kibana把index匯入(一般第一步就讓你建立這個東西了)Kibana-->Management-->Kibana(Index Patterns)
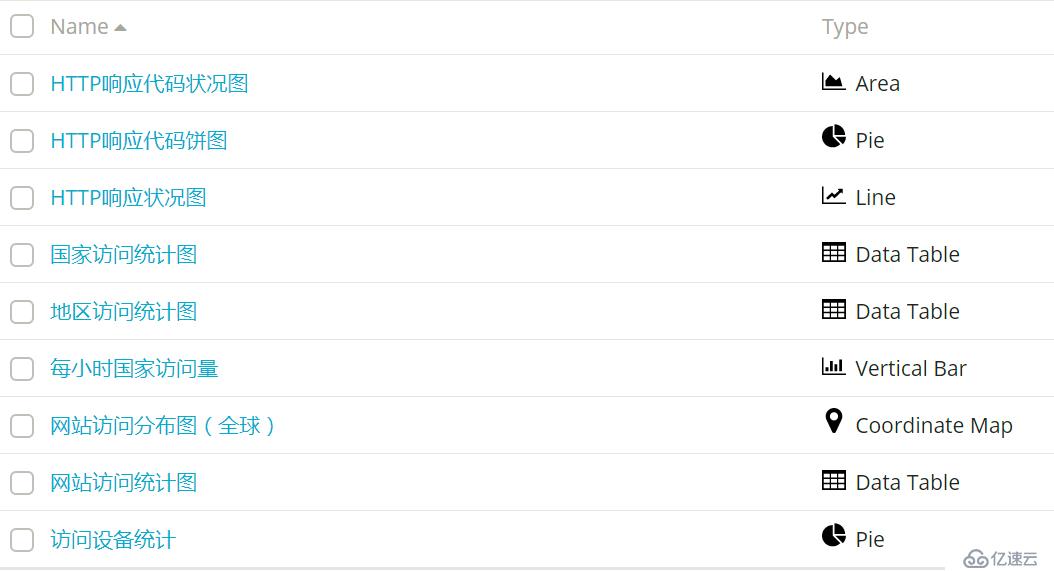
2> 構建可用視圖Kibana--> Visualize(這個東西比較見人見智)
Step4. 構建Dashboard(就是把Visualize的內容拖進來)
第一次寫Blog,估計錯漏不少,麻煩指正,謝謝
免責聲明:本站發布的內容(圖片、視頻和文字)以原創、轉載和分享為主,文章觀點不代表本網站立場,如果涉及侵權請聯系站長郵箱:is@yisu.com進行舉報,并提供相關證據,一經查實,將立刻刪除涉嫌侵權內容。