您好,登錄后才能下訂單哦!
您好,登錄后才能下訂單哦!
這篇文章主要講解了“Python Pygame圖像的基本使用方法”,文中的講解內容簡單清晰,易于學習與理解,下面請大家跟著小編的思路慢慢深入,一起來研究和學習“Python Pygame圖像的基本使用方法”吧!
游戲離不開坐標,我們來康康pygame中坐標是如何設立的吧~
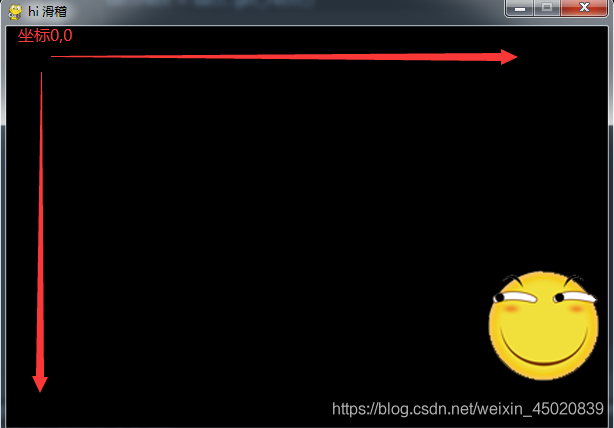
窗口左上角坐標(0,0),橫軸正向向右,縱軸正向向下
碰到邊框就返回(其實是小球碰撞實驗,我不愛用正經的小球,所以…)
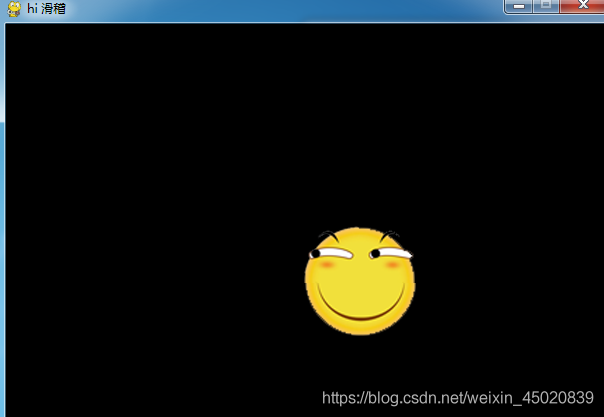
import pygame,sys

pygame.init()
size = width, height = 600, 400
speed = [1,1]
BLACK = 0, 0, 0
s = pygame.display.set_mode(size)
pygame.display.set_caption("hi 滑稽")

ball = pygame.image.load("img/361.png")
ballrect = ball.get_rect()

while True:
    for event in pygame.event.get():
        if event.type == pygame.QUIT:
            sys.exit()
    ballrect = ballrect.move(speed[0], speed[1])
    if ballrect.left < 0 or ballrect.right > width:
        speed[0] = - speed[0]
    if ballrect.top < 0 or ballrect.bottom > height:
        speed[1] = - speed[1]

    s.fill(BLACK)
    s.blit(ball, ballrect)
pygame.display.update()碰撞原理
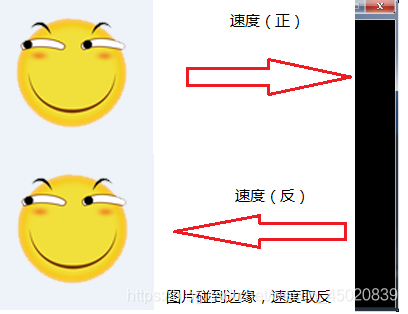
方法說明
| 方法 | 說明 |
|---|---|
| pygame.image.load(filename) | 將filename路徑下的圖像載入游戲,支持JPG、PNG、GIF(非動畫)等13種常用圖片格式 |
| get_rect() | 返回一個覆蓋圖像的矩形Rect對象 |
| move(x,y) | 矩形移動一個偏移量(x,y),即在橫軸方向移動x像素,縱軸方向移動y像素,xy為整數 |
| fill(color) | 顯示窗口背景填充為color顏色,采用RGB色彩體系 |
| blit(src, dest) | 將一個圖像繪制在另一個圖像上,即將src繪制到dest位置上。 |
載入圖片
pygame.init()
size = width, height = 600, 400       #設置了寬高,也可以在pygame.display.set_mode()設置
speed = [1,1]              #速度
BLACK = 0, 0, 0            #顏色黑色
s = pygame.display.set_mode(size)
pygame.display.set_caption("hi 滑稽")
ball = pygame.image.load("img/361.png")  #注意圖片路徑

ballrect = ball.get_rect()
surface對象和Rect對象
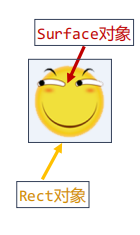
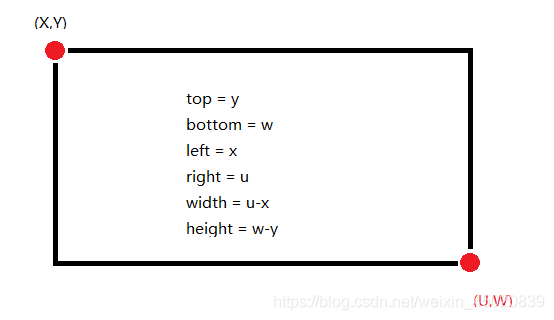
Rect對象屬性
Rect對象有一些重要屬性,例如:top,bottom,left,right表示上下左右width,height表示寬度、高度。
移動
ballrect = ballrect.move(speed[0], speed[1])      #  x1
    if ballrect.left < 0 or ballrect.right > width:    # x2
        speed[0] = - speed[0]
    if ballrect.top < 0 or ballrect.bottom > height:
        speed[1] = - speed[1]
x1:矩形移動一個偏移量(x,y),即在橫軸方向移動x像素,縱軸方向移動y像素,xy為整數x2:遇到左右兩側,橫向速度取反;遇到上下兩側,縱向速度取反。
感謝各位的閱讀,以上就是“Python Pygame圖像的基本使用方法”的內容了,經過本文的學習后,相信大家對Python Pygame圖像的基本使用方法這一問題有了更深刻的體會,具體使用情況還需要大家實踐驗證。這里是億速云,小編將為大家推送更多相關知識點的文章,歡迎關注!
免責聲明:本站發布的內容(圖片、視頻和文字)以原創、轉載和分享為主,文章觀點不代表本網站立場,如果涉及侵權請聯系站長郵箱:is@yisu.com進行舉報,并提供相關證據,一經查實,將立刻刪除涉嫌侵權內容。