您好,登錄后才能下訂單哦!
您好,登錄后才能下訂單哦!
下文主要給大家帶來操作CDH元數據庫MySQL主備詳細教程,希望這些內容能夠帶給大家實際用處,這也是我編輯操作CDH元數據庫MySQL主備詳細教程這篇文章的主要目的。好了,廢話不多說,大家直接看下文吧。
1.Master和Slave配置
2.構建主從復制
3.主從復制驗證
1.兩臺Linux云服務器(172.31.10.118(主)/172.31.5.190),操作系統為CentOS6.5
2.MySQL5.1.73
3.采用root用戶操作
1.兩個MySQL版本必須一致
2.兩個MySQL已安裝好,且沒有任何數據
3.主MySQL必須開啟bin-log日志
2.MySQL主從復制
2.1Master和Slave配置
配置文件說明:
log-bin:開啟二進制日志,日志文件前綴
server-id:數據庫服務的唯一標識確保標識不重復,一般設置為云服務器ip的末尾數
binlog-format:設置Mysql binlog記錄日志的格式(格式含:Statement、MIXED、ROW),MySQL默認使用的是Statement,推薦使用MIXED。
修改/etc/my.conf文件,增加如下配置
[root@ip-172-31-10-118 cloudera-scm-server]# vim /etc/my.cnf
[mysqld]
datadir=/var/lib/mysql
socket=/var/lib/mysql/mysql.sock
user=mysql
# Disabling symbolic-links is recommended to prevent assorted security risks
symbolic-links=0
log-bin=mysql-bin
server-id=118
binlog_format=MIXED

[mysqld_safe]
log-error=/var/log/mysqld.log
pid-file=/var/run/mysqld/mysqld.pid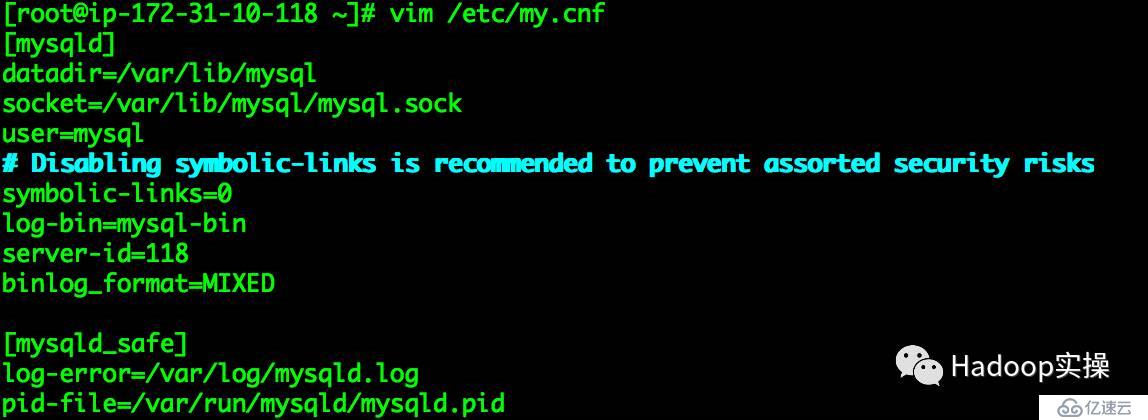
修改/etc/my.conf文件,增加如下配置
 [root@ip-172-31-5-190 ~]# vim /etc/my.cnf
[mysqld]
datadir=/var/lib/mysql
socket=/var/lib/mysql/mysql.sock
user=mysql
# Disabling symbolic-links is recommended to prevent assorted security risks
symbolic-links=0
log-bin=mysql-bin
server-id=190

[mysqld_safe]
log-error=/var/log/mysqld.log
pid-file=/var/run/mysqld/mysqld.pid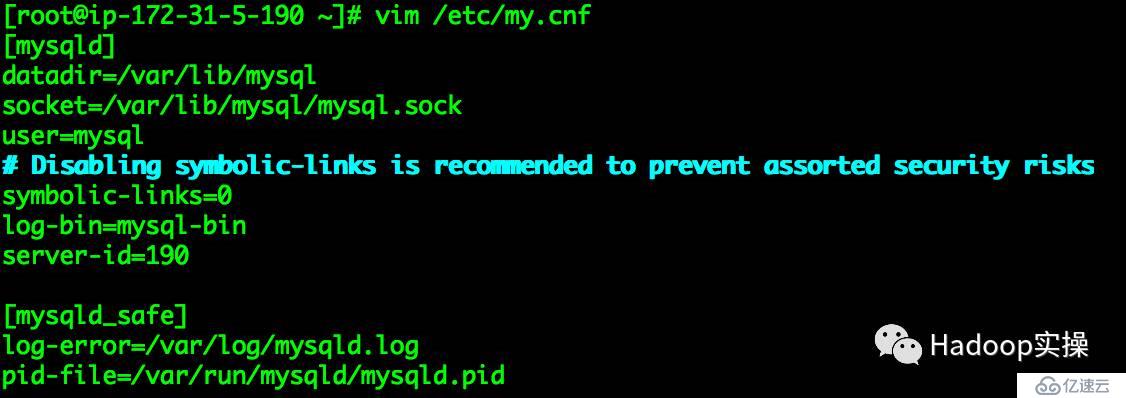
[root@ip-172-31-5-190 ~]# service mysqld restart
Stopping mysqld:                                           [  OK  ]
Starting mysqld:                                           [  OK  ]
[root@ip-172-31-5-190 ~]# 
2.1構建主從復制
用戶名:mysync 密碼:mysync
GRANT REPLICATION SLAVE ON *.* TO 'mysync'@'172.31.%' IDENTIFIED BY 'mysync';
FLUSH PRIVILEGES;
mysync用戶必須具有REPLICATION SLAVE權限。說明一下172.31.%,這個配置是指明mysync用戶所在云服務器,這里%是通配符,表示IP以172.31開頭的Server都可以使用mysync用戶登陸Master主云服務器。也可以指定固定IP。
命令行操作
[root@ip-172-31-10-118 ~]# mysql -uroot -p
Enter password:
Welcome to the MySQL monitor.  Commands end with ; or \g.
Your MySQL connection id is 11
Server version: 5.1.73-log Source distribution
Copyright (c) 2000, 2013, Oracle and/or its affiliates. All rights reserved.
Oracle is a registered trademark of Oracle Corporation and/or its
affiliates. Other names may be trademarks of their respective
owners.
Type 'help;' or '\h' for help. Type '\c' to clear the current input statement.
mysql> GRANT REPLICATION SLAVE ON *.* TO 'mysync'@'172.31.%' IDENTIFIED BY 'mysync';
Query OK, 0 rows affected (0.00 sec)
mysql> FLUSH PRIVILEGES;
Query OK, 0 rows affected (0.00 sec)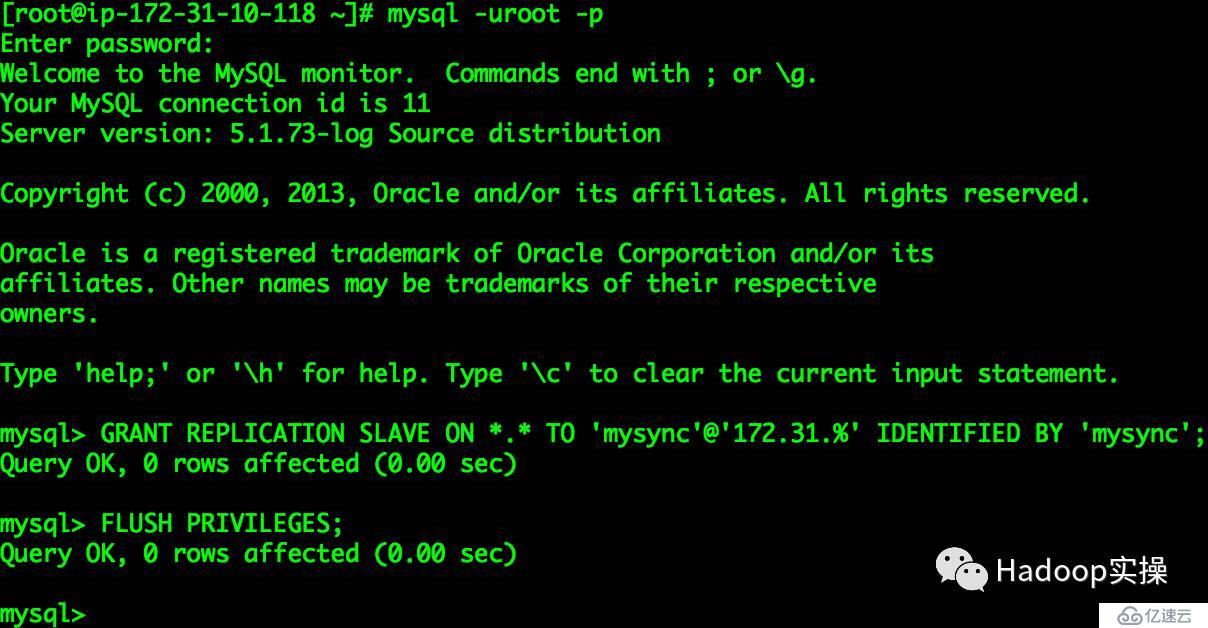
2.查看Master(172.31.10.118) MySQL二進制日志File與Position
mysql> show master status;
+------------------+----------+--------------+------------------+
| File             | Position | Binlog_Do_DB | Binlog_Ignore_DB |
+------------------+----------+--------------+------------------+
| mysql-bin.000003 |     1121 |              |                  |
+------------------+----------+--------------+------------------+
1 row in set (0.00 sec)

mysql> 
3.在Slave從MySQL上執行如下SQL
change master to
master_host='172.31.10.118',
master_user='mysync',
master_password='mysync',
master_log_file='mysql-bin.000003',
master_log_pos=1121;
命令行執行
[root@ip-172-31-5-190 ~]# mysql -uroot -p
...
Server version: 5.1.73-log Source distribution
...
mysql> change master to
    -> master_host='172.31.10.118',
    -> master_user='mysync',
    -> master_password='mysync',
    -> master_log_file='mysql-bin.000003',
    -> master_log_pos=1121;
Query OK, 0 rows affected (0.02 sec)

mysql> 
4.在Slave從MySQL上執行命令,啟動同步
mysql> start slave;
Query OK, 0 rows affected (0.00 sec)

mysql> 
5.在Slave MySQL上查看Slave狀態
mysql> show slave status \G
*************************** 1. row ***************************
               Slave_IO_State: Waiting for master to send event
                  Master_Host: 172.31.10.118
                  Master_User: mysync
                  Master_Port: 3306
                Connect_Retry: 60
              Master_Log_File: mysql-bin.000003
          Read_Master_Log_Pos: 1121
               Relay_Log_File: mysqld-relay-bin.000002
                Relay_Log_Pos: 251
        Relay_Master_Log_File: mysql-bin.000003
             Slave_IO_Running: Yes
            Slave_SQL_Running: Yes
              Replicate_Do_DB:
          Replicate_Ignore_DB:
           Replicate_Do_Table:
       Replicate_Ignore_Table:
      Replicate_Wild_Do_Table:
  Replicate_Wild_Ignore_Table:
                   Last_Errno: 0
                   Last_Error:
                 Skip_Counter: 0
          Exec_Master_Log_Pos: 1121
              Relay_Log_Space: 407
              Until_Condition: None
               Until_Log_File:
                Until_Log_Pos: 0
           Master_SSL_Allowed: No
           Master_SSL_CA_File:
           Master_SSL_CA_Path:
              Master_SSL_Cert:
            Master_SSL_Cipher:
               Master_SSL_Key:
        Seconds_Behind_Master: 0
Master_SSL_Verify_Server_Cert: No
                Last_IO_Errno: 0
                Last_IO_Error:
               Last_SQL_Errno: 0
               Last_SQL_Error:
1 row in set (0.00 sec)

mysql> 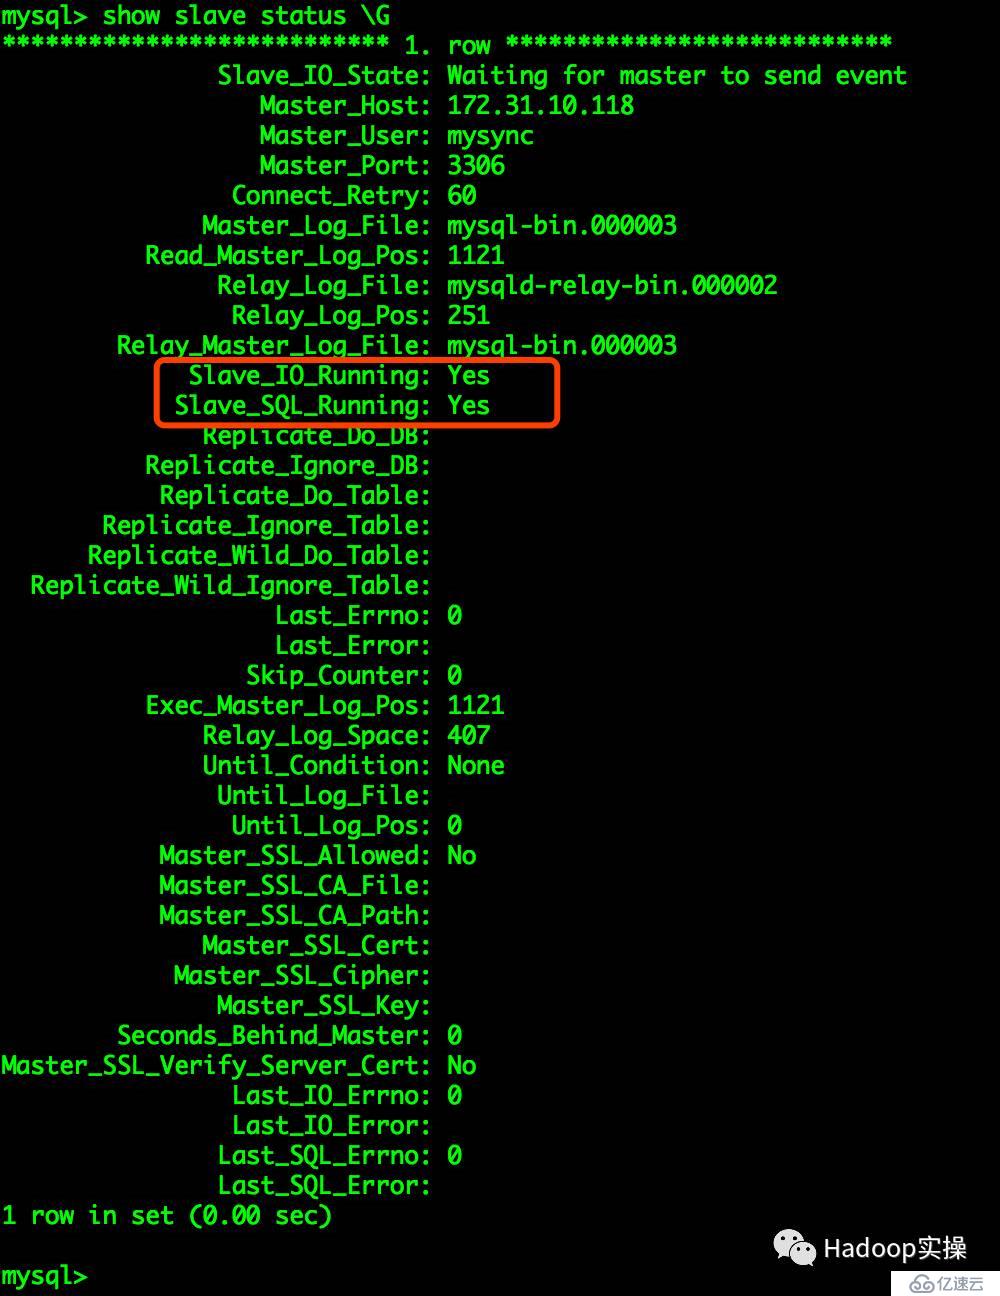
注意:上圖標注部分顯示為“Yes”則表示主從復制構建成功。
2.3主從復制驗證

2.登錄Slave從MySQL上執行SQL

3.在Master主MySQL上執行SQL
mysql> create database test;
Query OK, 1 row affected (0.00 sec)

mysql> use test;
Database changed
mysql> create table table1(id int, name varchar(32));
Query OK, 0 rows affected (0.01 sec)

mysql> show databases;
+--------------------+
| Database           |
+--------------------+
| information_schema |
| mysql              |
| test               |
+--------------------+
3 rows in set (0.00 sec)

mysql> show tables;
+----------------+
| Tables_in_test |
+----------------+
| table1         |
+----------------+
1 row in set (0.00 sec)

mysql> 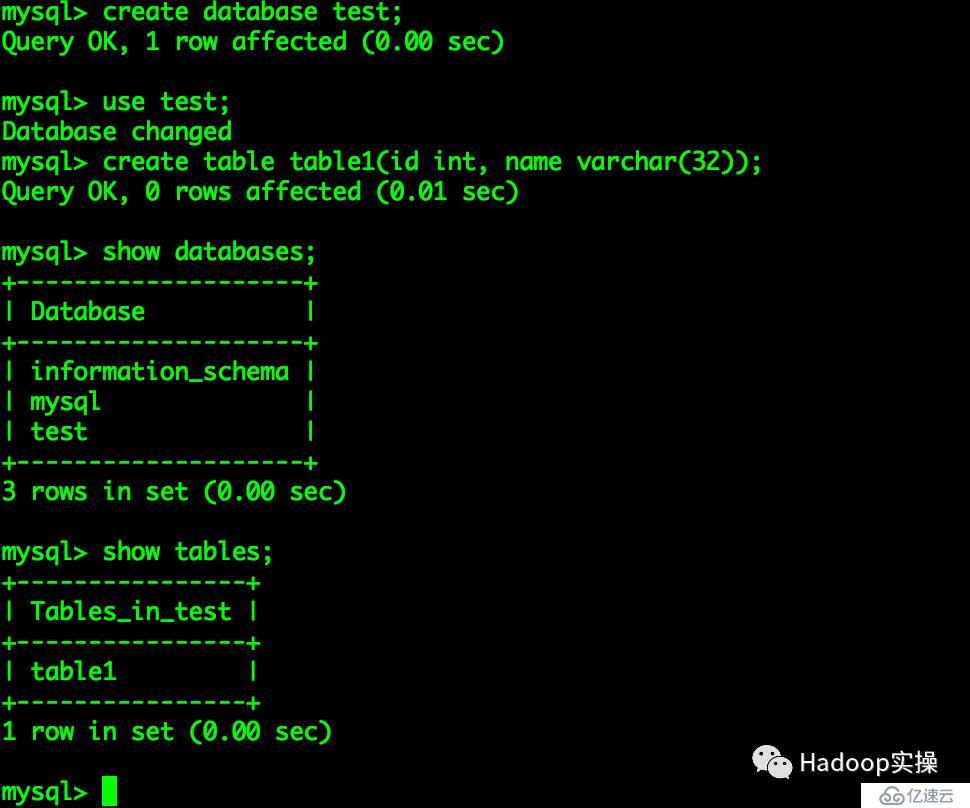
4.在Slave從MySQL上執行SQL查看
mysql> show databases;
+--------------------+
| Database           |
+--------------------+
| information_schema |
| mysql              |
| test               |
+--------------------+
3 rows in set (0.00 sec)

mysql> use test;
Reading table information for completion of table and column names
You can turn off this feature to get a quicker startup with -A

Database changed
mysql> show tables;
+----------------+
| Tables_in_test |
+----------------+
| table1         |
+----------------+
1 row in set (0.00 sec)

mysql> 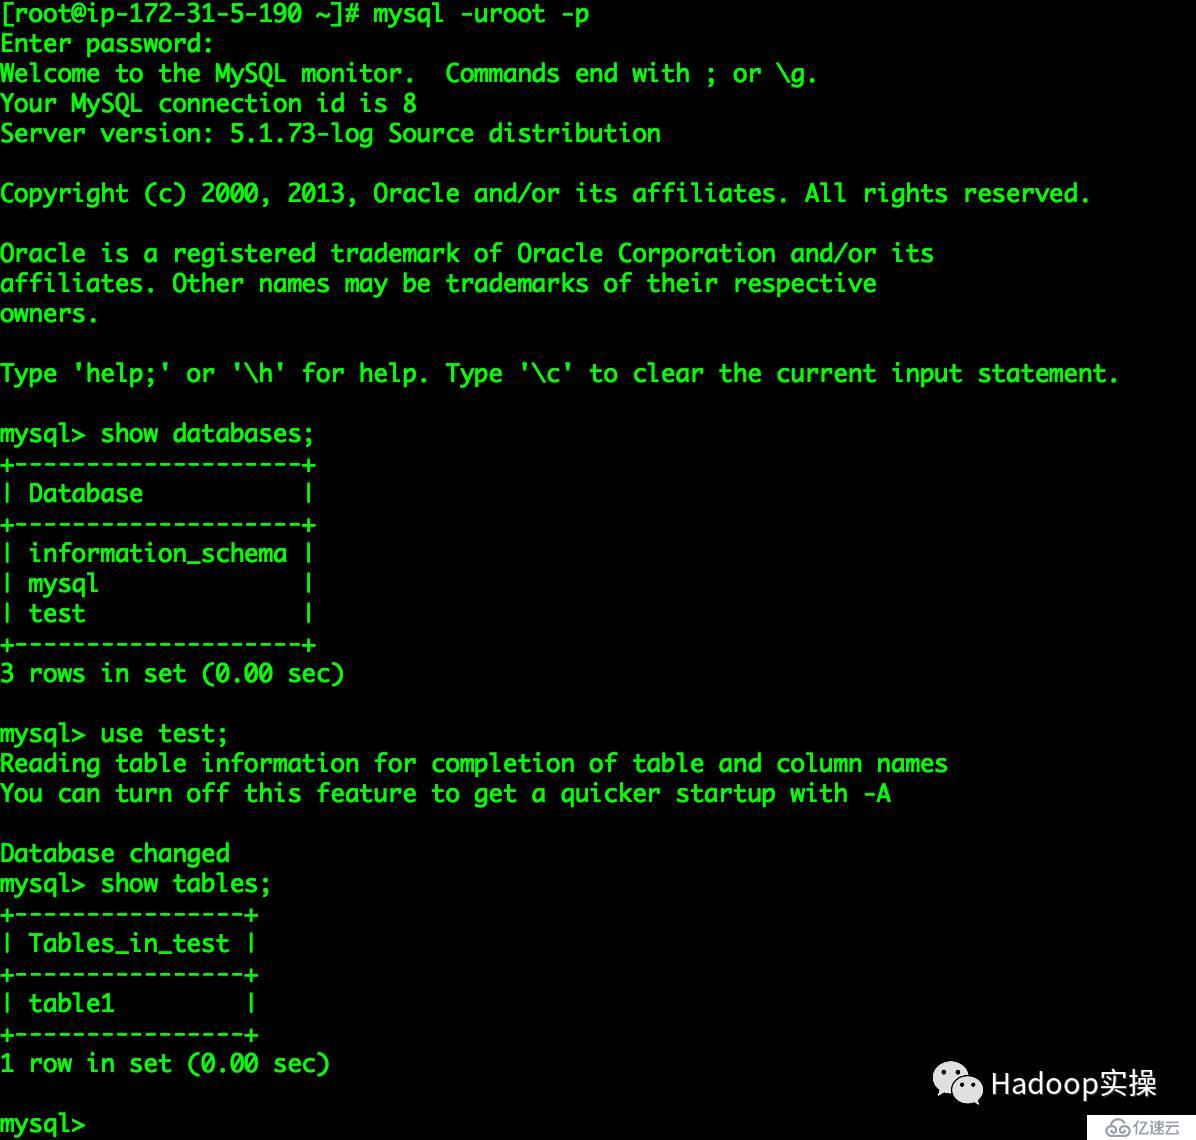
通過上述測試,Master主MySQL創建的庫和表都正常的同步到Slave從MySQL。
3.備注
mysql> stop slave;
Query OK, 0 rows affected (0.00 sec)

mysql> reset slave;
Query OK, 0 rows affected (0.00 sec)

mysql> 
注意:執行上述操作后,需要重啟MySQL服務。
對于以上關于操作CDH元數據庫MySQL主備詳細教程,大家是不是覺得非常有幫助。如果需要了解更多內容,請繼續關注我們的行業資訊,相信你會喜歡上這些內容的。
免責聲明:本站發布的內容(圖片、視頻和文字)以原創、轉載和分享為主,文章觀點不代表本網站立場,如果涉及侵權請聯系站長郵箱:is@yisu.com進行舉報,并提供相關證據,一經查實,將立刻刪除涉嫌侵權內容。