您好,登錄后才能下訂單哦!
您好,登錄后才能下訂單哦!
本篇內容介紹了“FastDFS的安裝部署方法”的有關知識,在實際案例的操作過程中,不少人都會遇到這樣的困境,接下來就讓小編帶領大家學習一下如何處理這些情況吧!希望大家仔細閱讀,能夠學有所成!
centos7 操作系統
克隆 libfastcommon 源碼的 master 分支(github 地址: https://github.com/happyfish200/libfastcommon)
進入 libfastcommon 目錄,執行 ./make.sh 及 ./make.sh install 操作
執行 yum install -y libevent 安裝 libevent
克隆 FastDFS 源碼的 master 分支(github 地址: https://github.com/happyfish200/fastdfs)
進入 FastDFS 目錄,執行 ./make.sh 及 ./make.sh install 操作
安裝后,FastDFS 會默認在 /etc/fdfs 目錄下生成配置文件模版,命名為 *.conf.sample,我們需要復制為 .conf
編輯 tracker 配置文件 /etc/tracker.conf,當前只關注 base_path,配置為可訪問的目錄
啟動 tracker 服務:/usr/bin/fdfs_trackerd /etc/fdfs/tracker.conf
重啟 tracker 服務:/usr/bin/fdfs_trackerd /etc/fdfs/tracker.conf restart
查看是否有 tracker 進程:ps aux | grep tracker
編輯 storage 配置文件 /etc/storage.conf,當前只關注 base_path,store_path0 及 tracker_server。 其中, base_path 和 store_path0 配置為可訪問的路徑,tracker_server 配置為 tracker 的{服務器地址}:{端口}
啟動 storage 服務:/usr/bin/fdfs_storaged /etc/fdfs/storage.conf
重啟 storage 服務:/usr/bin/fdfs_storaged /etc/fdfs/storage.conf restart
查看是否有 storage 進程:ps aux | grep storage
我們可以利用自帶的 client 進行測試。
編輯 client 配置文件 /etc/client.conf,當前只關注 base_path 和 tracker_server,base_path 配置為可訪問的路徑,tracker_server 配置為 tracker 的{服務器地址}:{端口}
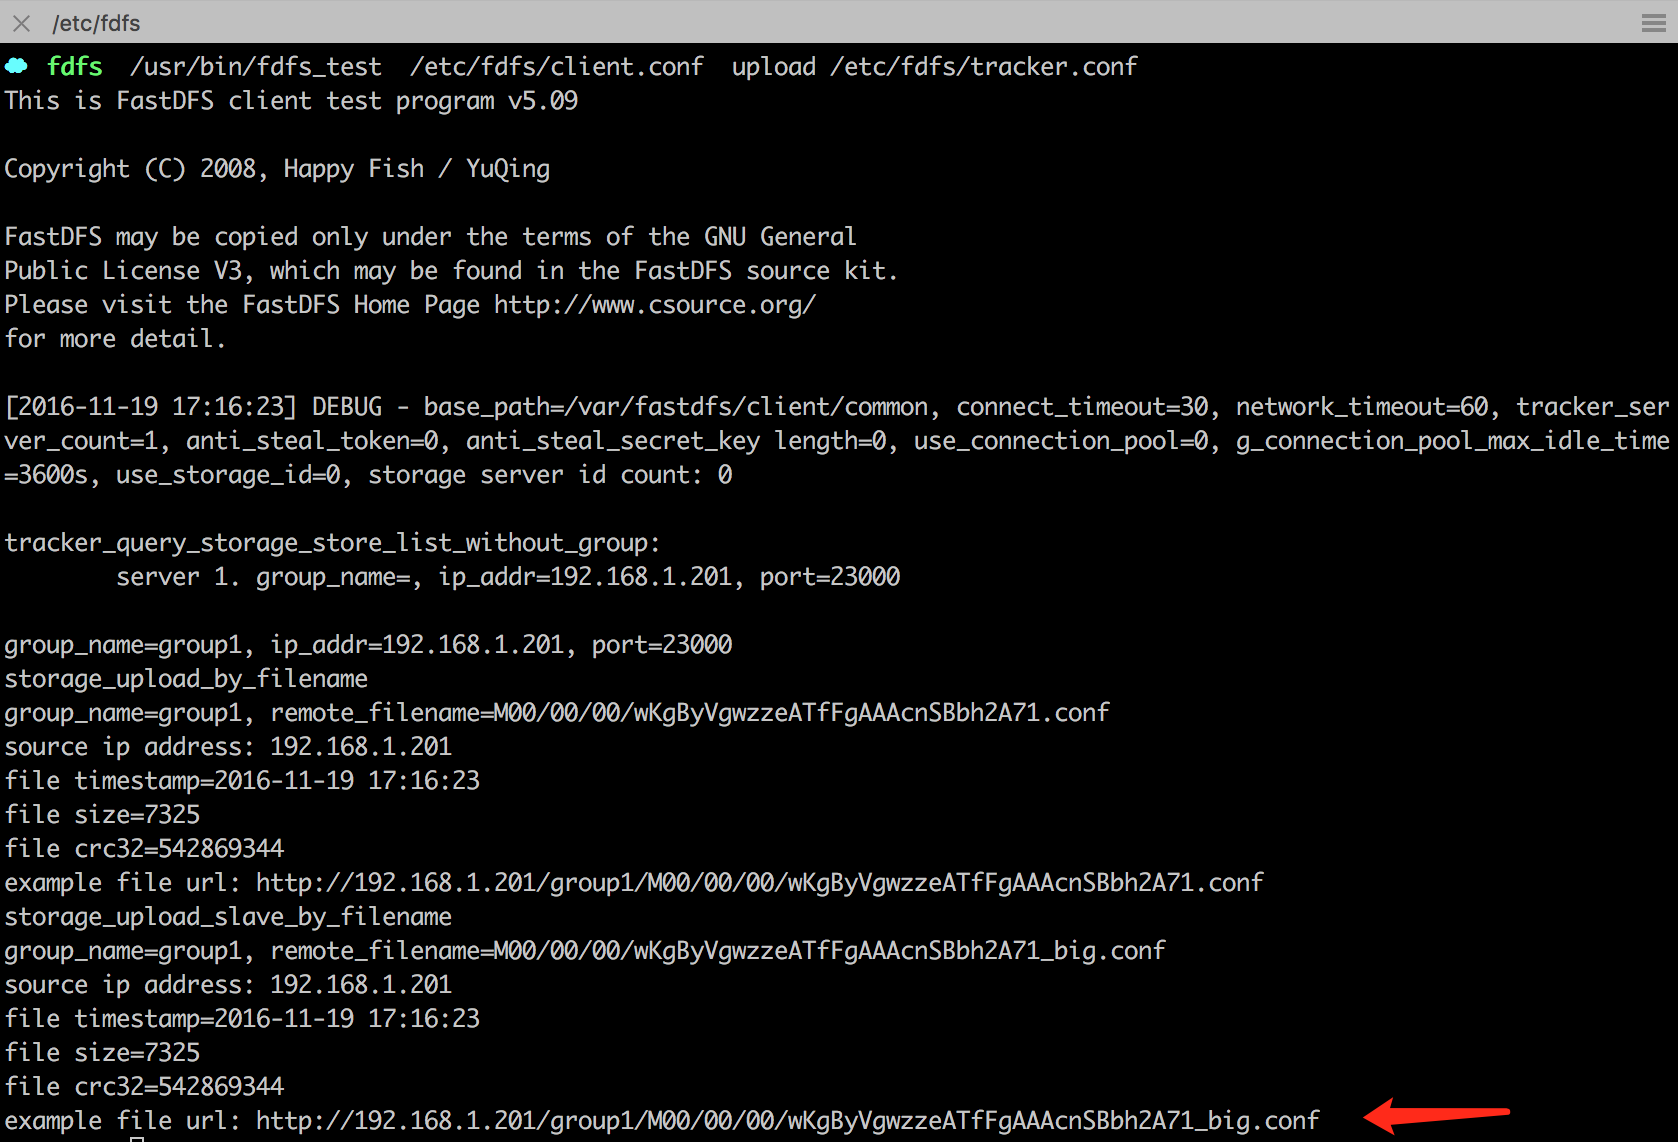
在終端中通過 shell 上傳 opt 目錄下的一個文件:/usr/bin/fdfs_test /etc/fdfs/client.conf upload /etc/fdfs/tracker.conf
如下圖箭頭所示,生成的文件地址為:http://192.168.1.201/group1/M00/00/00/wKgByVgwzzeATfFgAAAcnSBbh3A71_big.conf

“FastDFS的安裝部署方法”的內容就介紹到這里了,感謝大家的閱讀。如果想了解更多行業相關的知識可以關注億速云網站,小編將為大家輸出更多高質量的實用文章!
免責聲明:本站發布的內容(圖片、視頻和文字)以原創、轉載和分享為主,文章觀點不代表本網站立場,如果涉及侵權請聯系站長郵箱:is@yisu.com進行舉報,并提供相關證據,一經查實,將立刻刪除涉嫌侵權內容。