您好,登錄后才能下訂單哦!
您好,登錄后才能下訂單哦!
這篇文章運用簡單易懂的例子給大家介紹linux安裝redis的方法,內容非常詳細,感興趣的小伙伴們可以參考借鑒,希望對大家能有所幫助。
中文官方網站:Http://www.redis.cn/
企業里面做Redis開發,99%都是Linux版的運用和安裝。
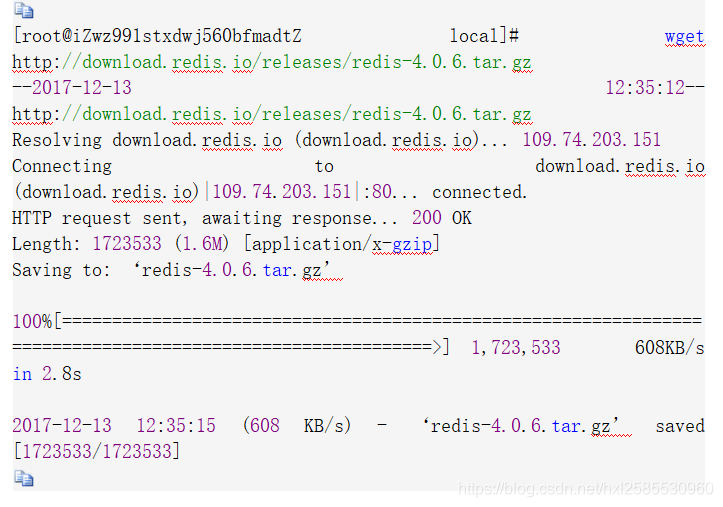
第一步 下載redis
wget http://download.redis.io/releases/redis-4.0.6.tar.gz

第二步 解壓壓縮包
tar -zxvf redis-4.0.6.tar.gz
[root@iZwz991stxdwj560bfmadtZ local]# tar -zxvf redis-4.0.6.tar.gz
第三步 yum安裝gcc依賴
yum install gcc
[root@iZwz991stxdwj560bfmadtZ local]# yum install gcc
遇到選擇,輸入y即可
第四步 跳轉到redis解壓目錄下
cd redis-4.0.6
[root@iZwz991stxdwj560bfmadtZ local]# cd redis-4.0.6
第五步 編譯安裝
make MALLOC=libc
[root@iZwz991stxdwj560bfmadtZ redis-4.0.6]# make MALLOC=libc
將/usr/local/redis-4.0.6/src目錄下的文件加到/usr/local/bin目錄
cd src && make install
[root@iZwz991stxdwj560bfmadtZ redis-4.0.6]# cd src && make install
 CC Makefile.dep

Hint: It's a good idea to run 'make test' ;)

 INSTALL install
 INSTALL install
 INSTALL install
 INSTALL install
 INSTALL install
方式一 直接啟動redis
./redis-server
[root@iZwz991stxdwj560bfmadtZ src]# ./redis-server
18685:C 13 Dec 12:56:12.507 # oO0OoO0OoO0Oo Redis is starting oO0OoO0OoO0Oo
18685:C 13 Dec 12:56:12.507 # Redis version=4.0.6, bits=64, commit=00000000, modified=0, pid=18685, just started
18685:C 13 Dec 12:56:12.507 # Warning: no config file specified, using the default config. In order to specify a config file use ./redis-server /path/to/redis.conf
    _._
   _.-``__ ''-._
  _.-`` `. `_. ''-._   Redis 4.0.6 (00000000/0) 64 bit
 .-`` .-```. ```\/ _.,_ ''-._
 ( '  ,  .-` | `, )  Running in standalone mode
 |`-._`-...-` __...-.``-._|'` _.-'|  Port: 6379
 | `-._ `._ /  _.-' |  PID: 18685
 `-._ `-._ `-./ _.-' _.-'
 |`-._`-._ `-.__.-' _.-'_.-'|
 | `-._`-._  _.-'_.-' |   http://redis.io
 `-._ `-._`-.__.-'_.-' _.-'
 |`-._`-._ `-.__.-' _.-'_.-'|
 | `-._`-._  _.-'_.-' |
 `-._ `-._`-.__.-'_.-' _.-'
  `-._ `-.__.-' _.-'
   `-._  _.-'
    `-.__.-'

18685:M 13 Dec 12:56:12.508 # WARNING: The TCP backlog setting of 511 cannot be enforced because /proc/sys/net/core/somaxconn is set to the lower value of 128.
18685:M 13 Dec 12:56:12.508 # Server initialized
18685:M 13 Dec 12:56:12.508 # WARNING overcommit_memory is set to 0! Background save may fail under low memory condition. To fix this issue add 'vm.overcommit_memory = 1' to /etc/sysctl.conf and then reboot or run the command 'sysctl vm.overcommit_memory=1' for this to take effect.
18685:M 13 Dec 12:56:12.508 # WARNING you have Transparent Huge Pages (THP) support enabled in your kernel. This will create latency and memory usage issues with Redis. To fix this issue run the command 'echo never > /sys/kernel/mm/transparent_hugepage/enabled' as root, and add it to your /etc/rc.local in order to retain the setting after a reboot. Redis must be restarted after THP is disabled.
18685:M 13 Dec 12:56:12.508 * Ready to accept connections
如上圖:redis啟動成功,但是這種啟動方式需要一直打開窗口,不能進行其他操作,不太方便。
按 ctrl + c可以關閉窗口。
方式二 以后臺進程方式啟動redis
第一步:修改redis.conf文件
將
daemonize no
修改為
daemonize yes
第二步:指定redis.conf文件啟動
redis-server /usr/local/redis-4.0.6/redis.conf
ps -aux | grep redis查看redis進程

這樣redis就在linux上安裝成功了

關于linux安裝redis的方法就分享到這里了,希望以上內容可以對大家有一定的幫助,可以學到更多知識。如果覺得文章不錯,可以把它分享出去讓更多的人看到。
免責聲明:本站發布的內容(圖片、視頻和文字)以原創、轉載和分享為主,文章觀點不代表本網站立場,如果涉及侵權請聯系站長郵箱:is@yisu.com進行舉報,并提供相關證據,一經查實,將立刻刪除涉嫌侵權內容。