您好,登錄后才能下訂單哦!
您好,登錄后才能下訂單哦!
OS:centos mini6.4 ip:192.168.1.115
首先還是安裝jdk,這里采用的是1.7
#####install java
rpm -ivh jdk-7u75-linux-x64.rpm
export 'JAVA_HOME=/usr/java/jdk1.7.0_75' >> /etc/profile.d/java.sh
export 'PATH=$JAVA_HOME/bin:$PATH' >> /etc/profile.d/java.sh
export 'CLASSPATH=.:$JAVA_HOME/jre/lib:$JAVA_HOME/lib:$JAVA_HOME/lib/tools.jar' >> /etc/profile.d/java.sh
. /etc/profile.d/java.sh
######verify java
java -version
######modify java arguement
vim /usr/java/jdk1.7.0_75/jre/lib/security/java.security
最初
securerandom.source=file:/dev/urandom
修改后
securerandom.source=file:/dev/./urandom
######create weblogic user
groupadd web
useradd -g web -m -d /home/weblogic weblogic
passwd weblogic --->redhat
chown -R weblogic:web /home/weblogic/
rz -y fmw_12.1.3.0.0_wls.jar
chmod 755 fmw_12.1.3.0.0_wls.jar
#########創建清單文件,以及組
echo '#Oracle Installer Location File Location' >> /etc/oraInst.loc
echo 'inst_group=web' >> /etc/oraInst.loc
echo 'inventory_loc=/home/weblogic/oraInventory' >> /etc/oraInst.loc
chmod 755 /etc/oraInst.loc
chown -R weblogic:web /etc/oraInst.loc
#####create rsp
[root@weblogic weblogic]# cat wls.rsp
[ENGINE]
#DO NOT CHANGE THIS.
Response File Version=1.0.0.0.0
[GENERIC]
#The oracle home location. This can be an existing Oracle Home or a new Oracle Home
ORACLE_HOME=/home/weblogic/Oracle/Middleware ---》指定安裝的目錄路徑
#Set this variable value to the Installation Type selected. e.g. WebLogic Server, Coherence, Complete with Examples.
INSTALL_TYPE=WebLogic Server
#Provide the My Oracle Support Username. If you wish to ignore Oracle Configuration Manager configuration provide empty string for user name.
MYORACLESUPPORT_USERNAME=
#Provide the My Oracle Support Password
MYORACLESUPPORT_PASSWORD=<SECURE VALUE>
DECLINE_SECURITY_UPDATES=true
#Set this to true if My Oracle Support Password is specified
SECURITY_UPDATES_VIA_MYORACLESUPPORT=false
#Provide the Proxy Host
PROXY_HOST=
#Provide the Proxy Port
PROXY_PORT=
#Provide the Proxy Username
PROXY_USER=
#Provide the Proxy Password
PROXY_PWD=<SECURE VALUE>
#Type String (URL format) Indicates the OCM Repeater URL which should be of the format [scheme[Http/Https]]://[repeater host]:[repeater port]
COLLECTOR_SUPPORTHUB_URL=
響應文件具體可參考官方文檔
chmod 755 wls.rsp
chown -R weblogic:web /home/weblogic/
#######install weblogic
su - weblogic
cd /home/weblogic
java -jar fmw_12.1.3.0.0_wls.jar -silent -responseFile /home/weblogic/wls.rsp -invPtrLoc /etc/oraInst.loc
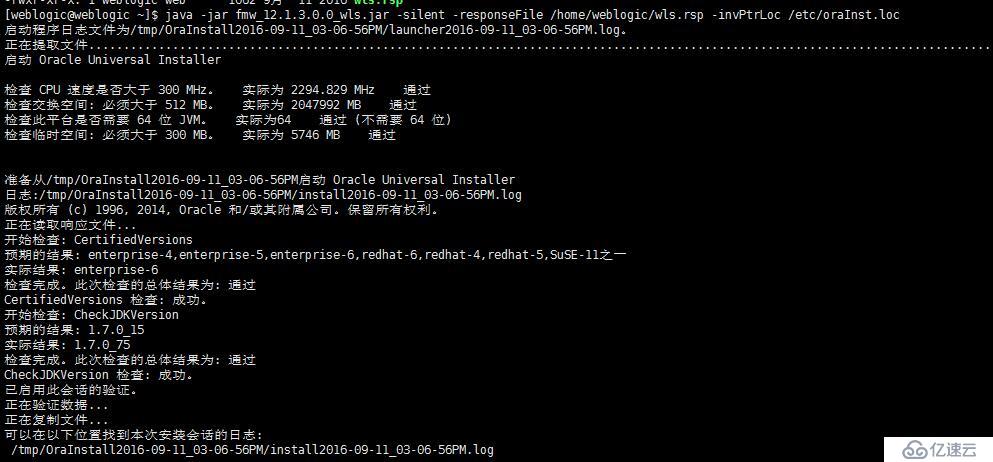

至此安裝weblogic完成,下面開始創建domain,也是靜默的方式,這里采用相對來說兩種方式,看下面操作:
1、創建domain響應文件,參照原始模板進行創建
vim /home/weblogic/create_domain.rsp
read template from "/home/weblogic/Oracle/Middleware/wlserver/common/templates/wls/wls.jar";
set JavaHome "/usr/java/jdk1.7.0_75";
set ServerStartMode "dev";
find Server "AdminServer" as AdminServer;
set AdminServer.ListenAddress "";
set AdminServer.ListenPort "7001";
set AdminServer.SSL.Enabled "true"; ---》當然如果這里用不到可以不用設置
set AdminServer.SSL.ListenPort "8002";
//We can directly create a new managed server.
create Server "base" as BASE;
set BASE.ListenAddress "";
set BASE.ListenPort "8003";
//set BASE.SSL.Enabled "true";
//set BASE.SSL.ListenPort "8004″;
//Create Machine
create Machine "base" as Machinename;
//use templates default weblogic user
find User "weblogic" as u1;
set u1.password "weblogic123";
//create a new user
create User "weblogic2" as u2;
set u2.password "weblogic123";
write domain to "/home/weblogic/Oracle/Middleware/user_projects/domains/base_domain/";
// The domain name will be "demo-domain"
close template;
創建響應文件完成,即開始創建domain
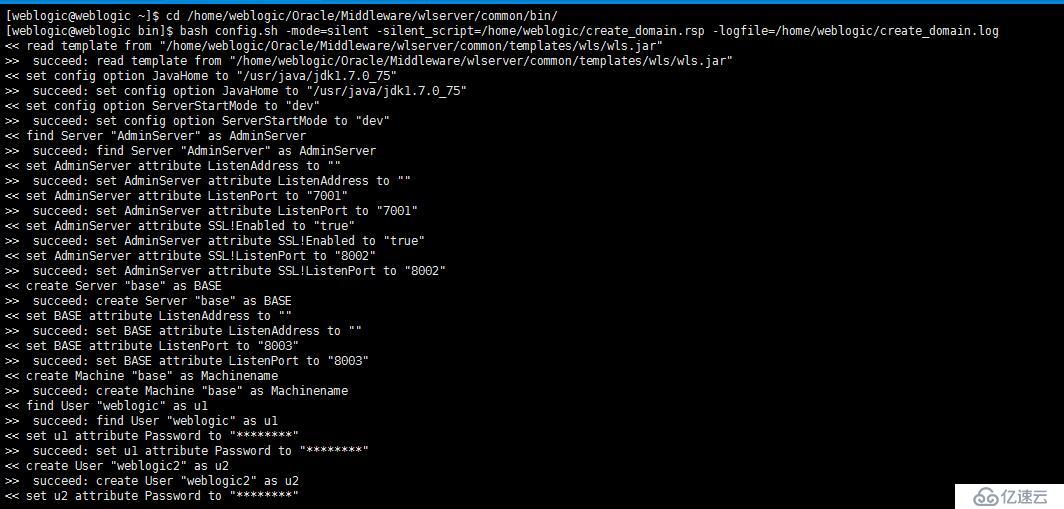
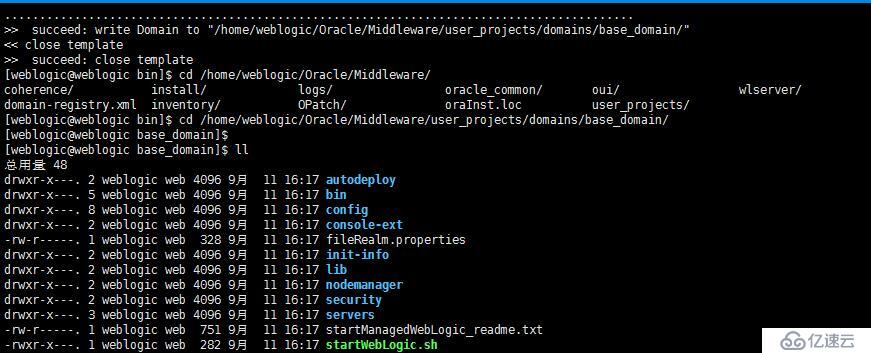
可以看見base_domain已經創建成功,現在需要開啟服務,但是報錯如下
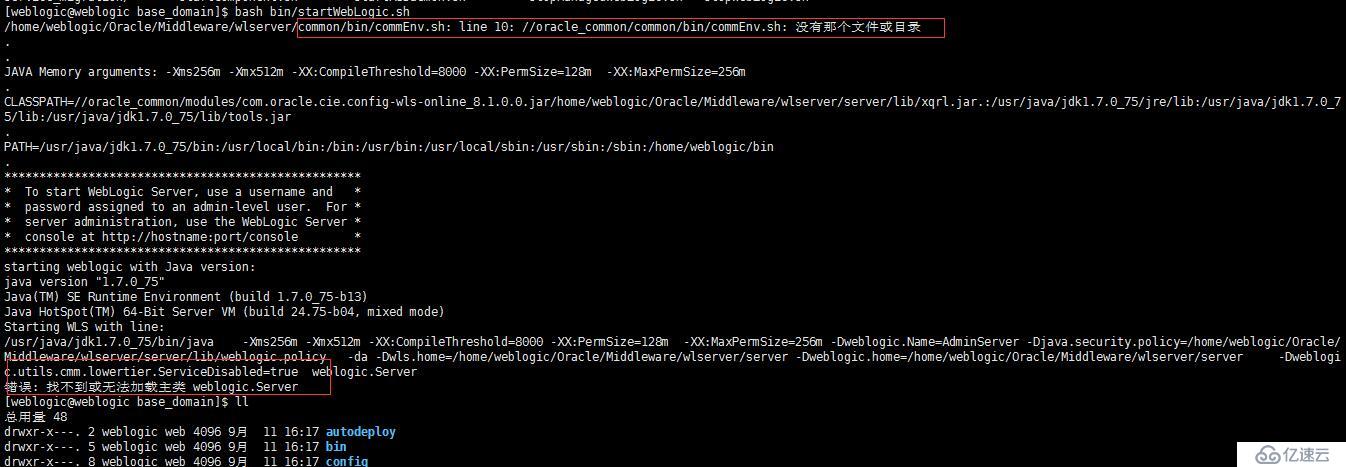
我以為創建的domain有問題,于是采用第二種方式創建domain
2、采用的是wlst-tool這個工具
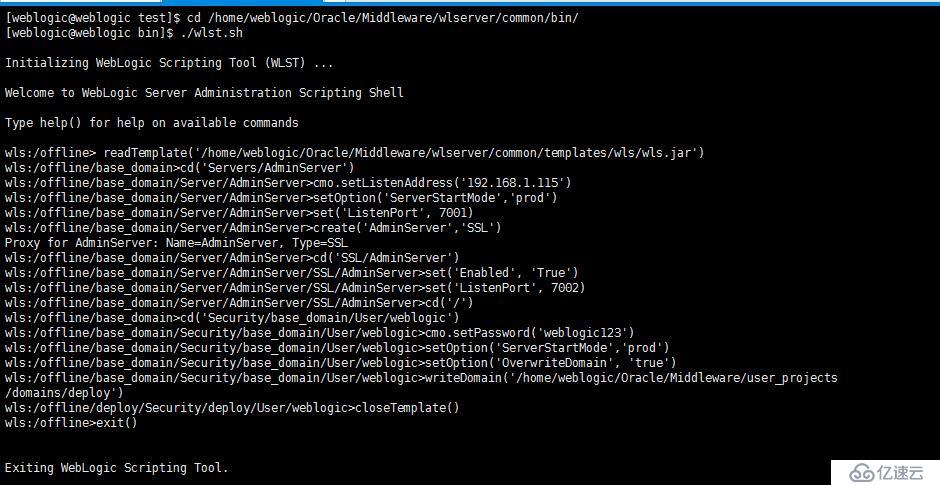
這樣的方式就不用創建文件,這兩周方式都可以創建domain
創建domain完成后,于是啟動服務,但依然報相同的錯誤
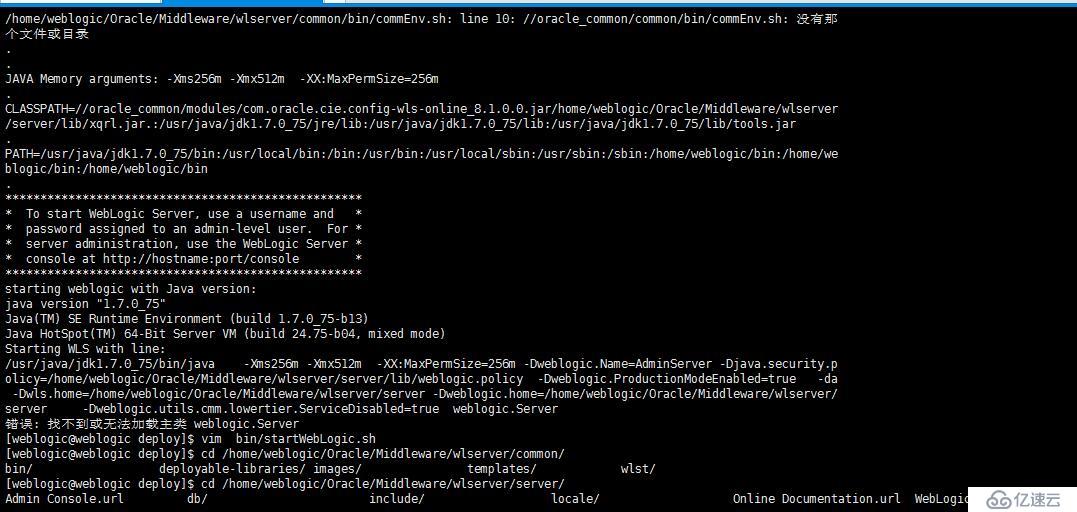
于是推翻了上面創建domain有問題的結論,開始google查找這個錯誤的原因
解決辦法:
編輯weblogic用戶的環境變量如下:vim /home/weblogic/.bash_profile
PATH=$PATH:$HOME/bin
export CONFIG_JVM_ARGS="-Djava.security.egd=file:/dev/./urandom"
export WL_HOME=/home/weblogic/Oracle/Middleware/wlserver
export MW_HOME=/home/weblogic/Oracle/Middleware/
export PATH
然后再次啟動服務,不再報錯


于是查看瀏覽器:
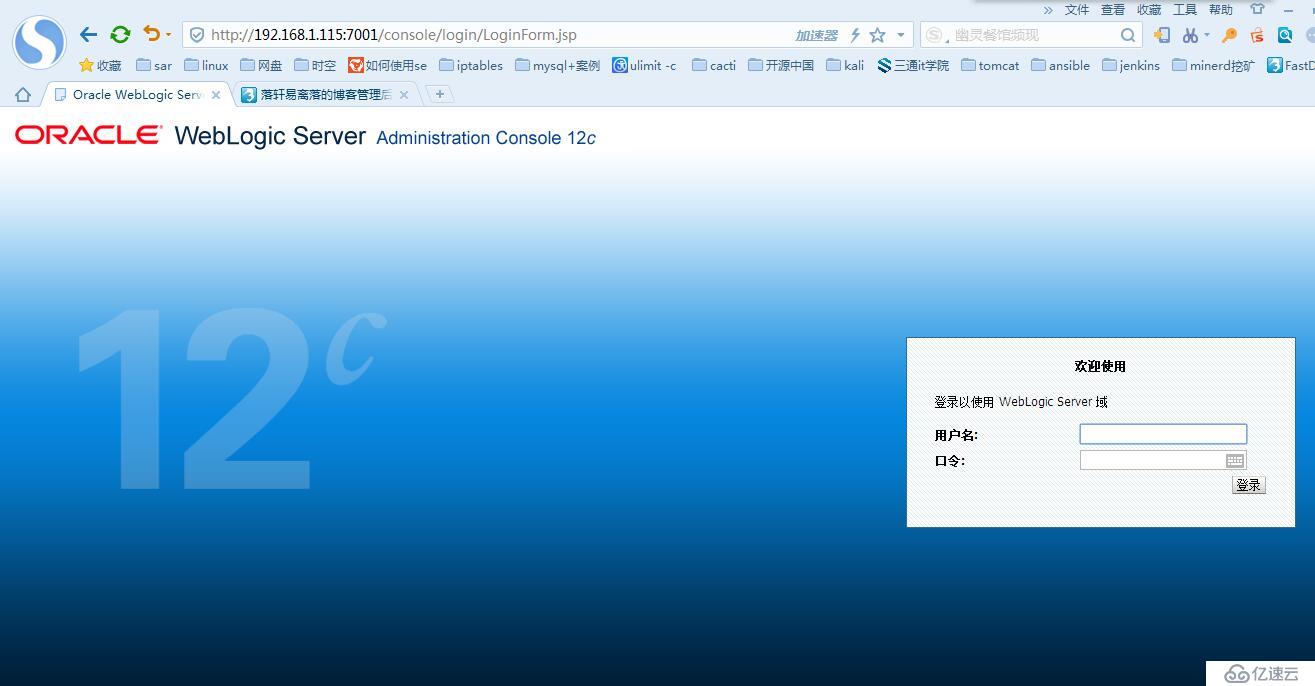
于是基于weblogic 12c的12.1.3.0版本搭建成功
oracle:http://docs.oracle.com/cd/E11882_01/install.112/e24326/toc.htm
If CentOS has already been installed without a graphical interface,
you can install this with the following commands:
$ yum groupinstall "X Window System" "Desktop" "Desktop Platform"
$ yum install gdm
免責聲明:本站發布的內容(圖片、視頻和文字)以原創、轉載和分享為主,文章觀點不代表本網站立場,如果涉及侵權請聯系站長郵箱:is@yisu.com進行舉報,并提供相關證據,一經查實,將立刻刪除涉嫌侵權內容。