溫馨提示×
您好,登錄后才能下訂單哦!
點擊 登錄注冊 即表示同意《億速云用戶服務條款》
您好,登錄后才能下訂單哦!
今天就跟大家聊聊有關thymeleaf模板怎么在SpringBoot中使用,可能很多人都不太了解,為了讓大家更加了解,小編給大家總結了以下內容,希望大家根據這篇文章可以有所收獲。
1.導入依賴
 <!-- 添加thymeleaf模版的依賴 -->
   <dependency>
      <groupId>org.springframework.boot</groupId>
      <artifactId>spring-boot-starter-thymeleaf</artifactId>
  </dependency>
2.application.yml文件中新增thymeleaf配置
###配置thymeleaf
spring:
 thymeleaf:
  cache: false
3.創建實體類
public class Student {
  private Integer stu_id;
  private String stu_name;

  public Integer getStu_id() {
    return stu_id;
  }

  public void setStu_id(Integer stu_id) {
    this.stu_id = stu_id;
  }

  public Student(Integer stu_id, String stu_name) {
    this.stu_id = stu_id;
    this.stu_name = stu_name;
  }

  public String getStu_name() {
    return stu_name;
  }

  public void setStu_name(String stu_name) {
    this.stu_name = stu_name;
  }
}
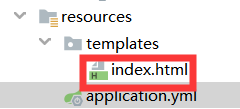
4.在src/main/resource文件夾下創建templates文件夾
并創建一個index.html以備后續使用

5.創建一個ThyController類
@Controller
@RequestMapping("/thyController")
public class ThyController {
  @RequestMapping("/thymeleaf")
  public String thymeleaf(Model model){
    List<Student> list=new ArrayList<>();
    Student stu1=new Student(1,"張三");
    Student stu2=new Student(2,"李四");
    Student stu3=new Student(3,"王五");

    list.add(stu1);
    list.add(stu2);
    list.add(stu3);

    model.addAttribute("stuList",list);
    return "index";
  }
}
6.hello.html頁面
<!DOCTYPE html>
<html lang="en" xmlns:th="http://www.w3.org/1999/xhtml">
<head>
  <meta charset="UTF-8"/>
  <title>ss</title>
</head>
<body>
<ul th:each="stu:${stuList}">
  <li><span th:text="${stu.stu_id}"></span><span th:text="${stu.stu_name}"></span></li>
</ul>
</body>
</html>
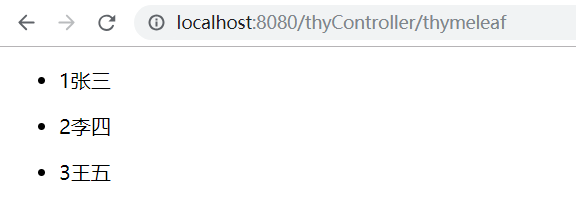
7. 瀏覽器測試

看完上述內容,你們對thymeleaf模板怎么在SpringBoot中使用有進一步的了解嗎?如果還想了解更多知識或者相關內容,請關注億速云行業資訊頻道,感謝大家的支持。
免責聲明:本站發布的內容(圖片、視頻和文字)以原創、轉載和分享為主,文章觀點不代表本網站立場,如果涉及侵權請聯系站長郵箱:is@yisu.com進行舉報,并提供相關證據,一經查實,將立刻刪除涉嫌侵權內容。