溫馨提示×
您好,登錄后才能下訂單哦!
點擊 登錄注冊 即表示同意《億速云用戶服務條款》
您好,登錄后才能下訂單哦!
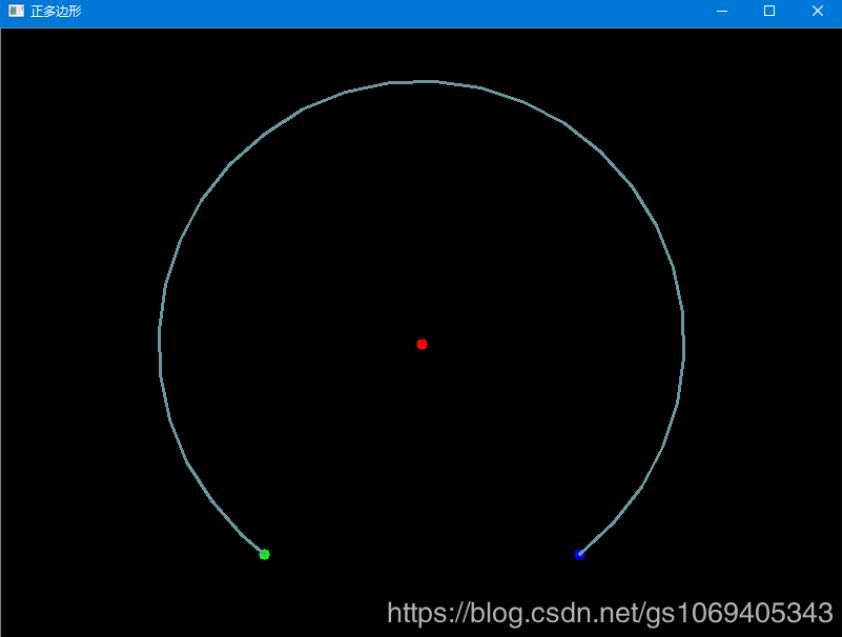
逆時針畫圓弧,原理:將360度分割成36份,分別標出每10度角度時的坐標點,然后將每個點連接起來。
#include <iostream>
#include <opencv2\core\core.hpp>
#include <opencv2\opencv.hpp>
#include <opencv2\highgui\highgui.hpp>
#include <opencv2\contrib\contrib.hpp>

#include <fstream>
#include <windows.h>

using namespace cv;
using namespace std;

// 圖像、圓心、開始點、結束點、線寬
void DrawArc(Mat *src, Point ArcCenter, Point StartPoint, Point EndPoint, int Fill)
{
 if (Fill <= 0) return;

 vector<Point> Dots;
 double Angle1 = atan2((StartPoint.y - ArcCenter.y), (StartPoint.x - ArcCenter.x));
 double Angle2 = atan2((EndPoint.y - ArcCenter.y), (EndPoint.x - ArcCenter.x));
 double Angle = Angle1 - Angle2;
 Angle = Angle * 180.0 / CV_PI;

 if (Angle < 0) Angle = 360 + Angle;
 if (Angle == 0) Angle = 360;
 int brim = floor(Angle / 10); // 向下取整

 Dots.push_back(StartPoint);
 for (int i = 0; i < brim; i++)
 {
 double dSinRot = sin(-(10 * (i + 1)) * CV_PI / 180);
 double dCosRot = cos(-(10 * (i + 1)) * CV_PI / 180);
 int x = ArcCenter.x + dCosRot * (StartPoint.x - ArcCenter.x) - dSinRot * (StartPoint.y - ArcCenter.y);
 int y = ArcCenter.y + dSinRot * (StartPoint.x - ArcCenter.x) + dCosRot * (StartPoint.y - ArcCenter.y);
 Dots.push_back(Point(x, y));
 }
 Dots.push_back(EndPoint);
 RNG &rng = theRNG();
 Scalar color = Scalar(rng.uniform(100, 255), rng.uniform(100, 255), rng.uniform(100, 255));
 for (int i = 0; i < Dots.size() - 1; i++) {
 line(*src, Dots[i], Dots[i + 1], color, Fill);
 }
 Dots.clear();
}

int main()
{
 Mat Img = Mat::zeros(800, 800, CV_8UC3);
 int64 tim = getTickCount();

 // 坐標零點 400,400
 Point ZeroPoint = Point(400, 400);
 // 起始坐標 150,-100
 Point StartPoint = Point(ZeroPoint.x +150, ZeroPoint.y - (-100));
 // 結束坐標 -150,-100
 Point EndPoint = Point(ZeroPoint.x - 150, ZeroPoint.y - (-100));

 // 圓心相對起始點的坐標 -150,200
 int I = StartPoint.x - 150;
 int J = StartPoint.y - (+200);

 Point Arc = Point(I, J);

 // 顯示圓心坐標
 circle(Img, Arc, 5, Scalar(0, 0, 255), -1);
 // 顯示起始點坐標
 circle(Img, StartPoint, 5, Scalar(255, 0, 0), -1);
 // 顯示結束點坐標
 circle(Img, EndPoint, 5, Scalar(0, 255, 0), -1);

 // 圖像、圓心、開始點、結束點、線寬
 DrawArc(&Img, Arc, StartPoint, EndPoint, 2);
 imshow("正多邊形", Img);

 tim = getTickCount() - tim;
 printf("處理耗時: %fms\n\n", tim * 1000 / getTickFrequency());
 waitKey(0);
 return 0;
}
效果如下:

以上就是本文的全部內容,希望對大家的學習有所幫助,也希望大家多多支持億速云。
免責聲明:本站發布的內容(圖片、視頻和文字)以原創、轉載和分享為主,文章觀點不代表本網站立場,如果涉及侵權請聯系站長郵箱:is@yisu.com進行舉報,并提供相關證據,一經查實,將立刻刪除涉嫌侵權內容。