您好,登錄后才能下訂單哦!
您好,登錄后才能下訂單哦!
一:安裝PyQt5
pip install pyqt5
如果你的系統沒有安裝pip請閱讀我們的另一篇文章 windows下python安裝pip方法詳解
二:PyQt5簡單使用
#!/usr/bin/python3
# -*- coding: utf-8 -*-

"""
Py40.com PyQt5 tutorial

In this example, we create a simple
window in PyQt5.

author: Jan Bodnar
website: py40.com
last edited: January 2015
"""

import sys

#這里我們提供必要的引用。基本控件位于pyqt5.qtwidgets模塊中。
from PyQt5.QtWidgets import QApplication, QWidget


if __name__ == '__main__':
 #每一pyqt5應用程序必須創建一個應用程序對象。sys.argv參數是一個列表,從命令行輸入參數。
 app = QApplication(sys.argv)
 #QWidget部件是pyqt5所有用戶界面對象的基類。他為QWidget提供默認構造函數。默認構造函數沒有父類。
 w = QWidget()
 #resize()方法調整窗口的大小。這離是250px寬150px高
 w.resize(250, 150)
 #move()方法移動窗口在屏幕上的位置到x = 300,y = 300坐標。
 w.move(300, 300)
 #設置窗口的標題
 w.setWindowTitle('Simple')
 #顯示在屏幕上
 w.show()

 #系統exit()方法確保應用程序干凈的退出
 #的exec_()方法有下劃線。因為執行是一個Python關鍵詞。因此,exec_()代替
 sys.exit(app.exec_())
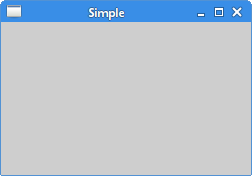
上面的示例代碼在屏幕上顯示一個小窗口。
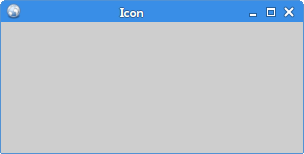
應用程序圖標是一個小的圖像,通常在標題欄的左上角顯示。在下面的例子中我們將介紹如何做pyqt5的圖標。同時我們也將介紹一些新方法。
#!/usr/bin/python3
# -*- coding: utf-8 -*-

"""
py40 PyQt5 tutorial

This example shows an icon
in the titlebar of the window.

author: Jan Bodnar
website: py40.com
last edited: January 2015
"""

import sys
from PyQt5.QtWidgets import QApplication, QWidget
from PyQt5.QtGui import QIcon


class Example(QWidget):

 def __init__(self):
  super().__init__()

  self.initUI() #界面繪制交給InitUi方法


 def initUI(self):
  #設置窗口的位置和大小
  self.setGeometry(300, 300, 300, 220)
  #設置窗口的標題
  self.setWindowTitle('Icon')
  #設置窗口的圖標,引用當前目錄下的web.png圖片
  self.setWindowIcon(QIcon('web.png'))

  #顯示窗口
  self.show()


if __name__ == '__main__':
 #創建應用程序和對象
 app = QApplication(sys.argv)
 ex = Example()
 sys.exit(app.exec_())
前面的例子是在程序風格。Python編程語言支持程序和面向對象編程風格。Pyqt5使用OOP編程。
class Example(QWidget):

 def __init__(self):
  super().__init__()
  ...
面向對象編程有三個重要的方面:類、變量和方法。這里我們創建一個新的類為Examle。Example繼承自QWidget類。
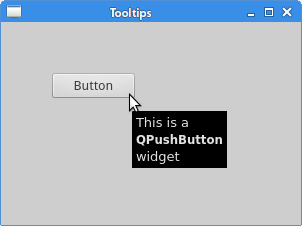
在下面的例子中我們顯示一個提示語
#!/usr/bin/python3
# -*- coding: utf-8 -*-

"""
Py40 PyQt5 tutorial

This example shows a tooltip on
a window and a button.

author: Jan Bodnar
website: py40.com
last edited: January 2015
"""

import sys
from PyQt5.QtWidgets import (QWidget, QToolTip,
 QPushButton, QApplication)
from PyQt5.QtGui import QFont


class Example(QWidget):

 def __init__(self):
  super().__init__()

  self.initUI()


 def initUI(self):
  #這種靜態的方法設置一個用于顯示工具提示的字體。我們使用10px滑體字體。
  QToolTip.setFont(QFont('SansSerif', 10))

  #創建一個提示,我們稱之為settooltip()方法。我們可以使用豐富的文本格式
  self.setToolTip('This is a <b>QWidget</b> widget')

  #創建一個PushButton并為他設置一個tooltip
  btn = QPushButton('Button', self)
  btn.setToolTip('This is a <b>QPushButton</b> widget')

  #btn.sizeHint()顯示默認尺寸
  btn.resize(btn.sizeHint())

  #移動窗口的位置
  btn.move(50, 50)

  self.setGeometry(300, 300, 300, 200)
  self.setWindowTitle('Tooltips')
  self.show()


if __name__ == '__main__':

 app = QApplication(sys.argv)
 ex = Example()
 sys.exit(app.exec_())
運行程序,顯示一個窗口
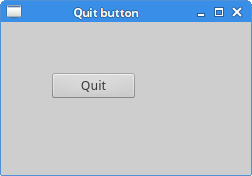
關閉一個窗口可以點擊標題欄上的X。在下面的例子中,我們將展示我們如何通過編程來關閉窗口。
#!/usr/bin/python3
# -*- coding: utf-8 -*-

"""
Py40 PyQt5 tutorial

This program creates a quit
button. When we press the button,
the application terminates.

author: Jan Bodnar
website: py40.com
last edited: January 2015
"""

import sys
from PyQt5.QtWidgets import QWidget, QPushButton, QApplication
from PyQt5.QtCore import QCoreApplication


class Example(QWidget):

 def __init__(self):
  super().__init__()

  self.initUI()


 def initUI(self):

  qbtn = QPushButton('Quit', self)
  qbtn.clicked.connect(QCoreApplication.instance().quit)
  qbtn.resize(qbtn.sizeHint())
  qbtn.move(50, 50)

  self.setGeometry(300, 300, 250, 150)
  self.setWindowTitle('Quit button')
  self.show()


if __name__ == '__main__':

 app = QApplication(sys.argv)
 ex = Example()
 sys.exit(app.exec_())
默認情況下,如果我們單擊x按鈕窗口就關門了。有時我們想修改這個默認的行為。例如我們在編輯器中修改了一個文件,當關閉他的時候,我們顯示一個消息框確認。
#!/usr/bin/python3
# -*- coding: utf-8 -*-

"""
ZetCode PyQt5 tutorial

This program shows a confirmation
message box when we click on the close
button of the application window.

author: Jan Bodnar
website: zetcode.com
last edited: January 2015
"""

import sys
from PyQt5.QtWidgets import QWidget, QMessageBox, QApplication


class Example(QWidget):

 def __init__(self):
  super().__init__()

  self.initUI()


 def initUI(self):

  self.setGeometry(300, 300, 250, 150)
  self.setWindowTitle('Message box')
  self.show()


 def closeEvent(self, event):

  reply = QMessageBox.question(self, 'Message',
   "Are you sure to quit?", QMessageBox.Yes |
   QMessageBox.No, QMessageBox.No)

  if reply == QMessageBox.Yes:
   event.accept()
  else:
   event.ignore()


if __name__ == '__main__':

 app = QApplication(sys.argv)
 ex = Example()
 sys.exit(app.exec_())
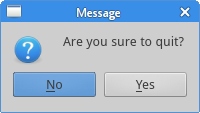
我們關閉窗口的時候,觸發了QCloseEvent。我們需要重寫closeEvent()事件處理程序。
reply = QMessageBox.question(self, 'Message',
 "Are you sure to quit?", QMessageBox.Yes |
 QMessageBox.No, QMessageBox.No)
我們顯示一個消息框,兩個按鈕:“是”和“不是”。第一個字符串出現在titlebar。第二個字符串消息對話框中顯示的文本。第三個參數指定按鈕的組合出現在對話框中。最后一個參數是默認按鈕,這個是默認的按鈕焦點。
if reply == QtGui.QMessageBox.Yes:
 event.accept()
else:
 event.ignore()
我們處理返回值,如果單擊Yes按鈕,關閉小部件并終止應用程序。否則我們忽略關閉事件。
下面的腳本顯示了如何在屏幕中心顯示窗口。
#!/usr/bin/python3
# -*- coding: utf-8 -*-

"""
Py40 PyQt5 tutorial

This program centers a window
on the screen.

author: Jan Bodnar
website: py40.com
last edited: January 2015
"""

import sys
from PyQt5.QtWidgets import QWidget, QDesktopWidget, QApplication


class Example(QWidget):

 def __init__(self):
  super().__init__()

  self.initUI()


 def initUI(self):

  self.resize(250, 150)
  self.center()

  self.setWindowTitle('Center')
  self.show()


 #控制窗口顯示在屏幕中心的方法
 def center(self):

  #獲得窗口
  qr = self.frameGeometry()
  #獲得屏幕中心點
  cp = QDesktopWidget().availableGeometry().center()
  #顯示到屏幕中心
  qr.moveCenter(cp)
  self.move(qr.topLeft())


if __name__ == '__main__':

 app = QApplication(sys.argv)
 ex = Example()
 sys.exit(app.exec_())
QtGui,QDesktopWidget類提供了用戶的桌面信息,包括屏幕大小。
本篇文章只是簡單示范pyqt5的基本使用方法更詳細的使用方法請查看我們的另一篇文章 python圖形開發GUI庫pyqt5的詳細使用方法及各控件的屬性與方法
更多關于python圖形開發GUI庫pyqt5的基本使用方法請查看下面的相關鏈接
免責聲明:本站發布的內容(圖片、視頻和文字)以原創、轉載和分享為主,文章觀點不代表本網站立場,如果涉及侵權請聯系站長郵箱:is@yisu.com進行舉報,并提供相關證據,一經查實,將立刻刪除涉嫌侵權內容。