您好,登錄后才能下訂單哦!
您好,登錄后才能下訂單哦!
這篇文章主要介紹“JavaScript中的offsetLeft、offsetTop怎么使用”的相關知識,小編通過實際案例向大家展示操作過程,操作方法簡單快捷,實用性強,希望這篇“JavaScript中的offsetLeft、offsetTop怎么使用”文章能幫助大家解決問題。
<body>
<style>
    body { margin:0;  }
    .box1 { width:300px; height:300px; margin:100px; background:#333; overflow:hidden; }
    .box2 { width:200px; height:200px; margin:100px; background:#666; overflow:hidden; }
    .box3 { width:100px; height:100px; margin:100px; background:#999;}
</style>
<div class="box1">
    <div class="box2">
    	<div class="box3"></div>
    </div>
</div>
<script>
    var oBox1 = document.querySelector('.box1');
    var oBox2 = document.querySelector('.box2');
    var oBox3 = document.querySelector('.box3');

    console.log('box1: '+ oBox1.offsetLeft +','+ oBox1.offsetTop);
    console.log('box2: '+ oBox2.offsetLeft +','+ oBox2.offsetTop);
    console.log('box3: '+ oBox3.offsetLeft +','+ oBox3.offsetTop);
</script>
</body>
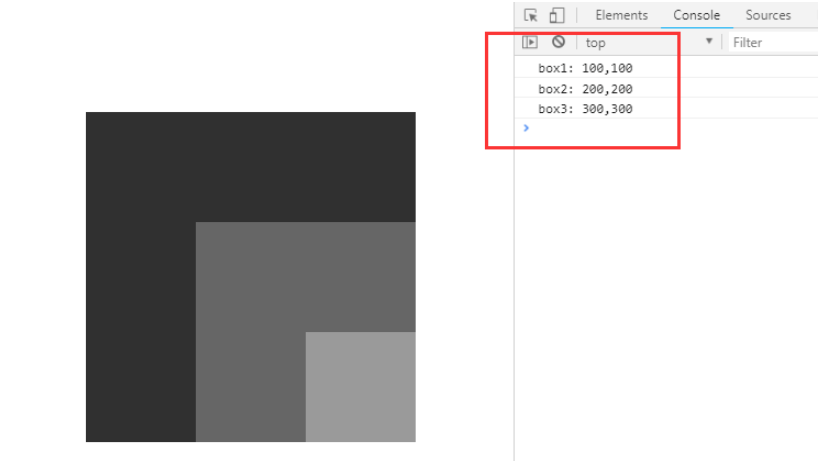
①第一個例子中,三個div的上一級的定位元素都是body,body是最外層的定位元素,三個div獲取到的offsetLeft值跟offsetTop值都是相對于body的偏移量。
<body>
<style>
    body { margin:0;  }
    .box1 { width:300px; height:300px; margin:100px; background:#333; overflow:hidden; position:relative;}
    .box2 { width:200px; height:200px; margin:100px; background:#666; overflow:hidden; }
    .box3 { width:100px; height:100px; margin:100px; background:#999;}
</style>
<div class="box1">
    <div class="box2">
    	<div class="box3"></div>
    </div>
</div>
<script>
    var oBox1 = document.querySelector('.box1');
    var oBox2 = document.querySelector('.box2');
    var oBox3 = document.querySelector('.box3');

    console.log('box1: '+ oBox1.offsetLeft +','+ oBox1.offsetTop);
    console.log('box2: '+ oBox2.offsetLeft +','+ oBox2.offsetTop);
    console.log('box3: '+ oBox3.offsetLeft +','+ oBox3.offsetTop);
</script>
</body>
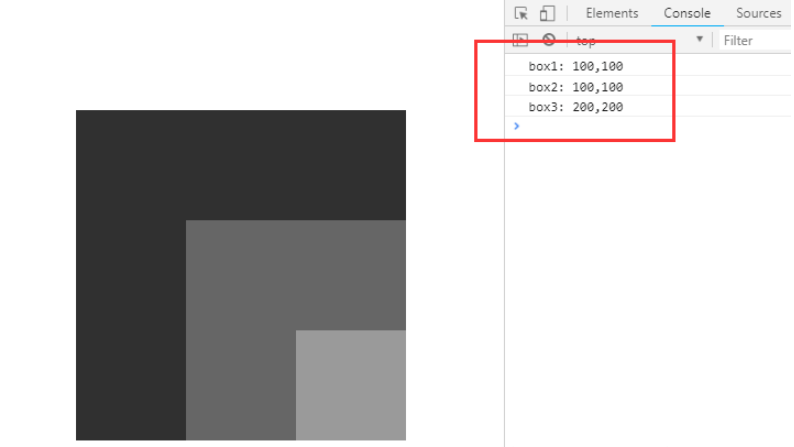
②第二個例子中,box1加上了相對定位,這時候box2,box3的上一級定位元素不再是body了,這時他們獲取到的offsetLeft值跟offsetTop值都是相對于box1的偏移量。而box1的上一級定位元素還是body,所以他的偏移量還是相對于body的。
<body>
<style>
    body { margin:0;  }
    .box1 { width:300px; height:300px; margin:100px; background:#333; overflow:hidden; position:relative; }
    .box2 { width:200px; height:200px; margin:100px; background:#666; overflow:hidden; position:relative; }
    .box3 { width:100px; height:100px; margin:100px; background:#999;}
</style>
<div class="box1">
    <div class="box2">
    	<div class="box3"></div>
    </div>
</div>
<script>
    var oBox1 = document.querySelector('.box1');
    var oBox2 = document.querySelector('.box2');
    var oBox3 = document.querySelector('.box3');

    console.log('box1: '+ oBox1.offsetLeft +','+ oBox1.offsetTop);
    console.log('box2: '+ oBox2.offsetLeft +','+ oBox2.offsetTop);
    console.log('box3: '+ oBox3.offsetLeft +','+ oBox3.offsetTop);
</script>
</body>
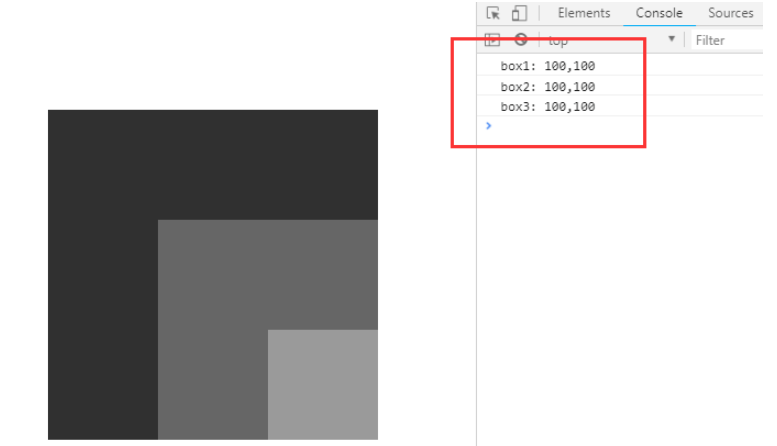
③第三個例子中,box1跟box2都加上了相對定位,這時候,box3的上一級定位元素變成是box2,box2的上一級定位元素是box1,box1的上一級定位元素還是body。所以這時候就出現了。三個div的偏移量都為100;
通過上面的三個例子不難看出,offsetLeft值跟offsetTop值的獲取跟父級元素沒關系,而是跟其上一級的定位元素(除position:static;外的所有定位如fixed,relative,absolute)有關系。
思路很簡單,就是把元素本身的偏移量跟所有上級定位元素的偏移量都加起來就可以了,問題又來了,假如我們不知道他有幾個上級定位元素呢?
其實也不難。js不但提供了offsetLeft、offsetTop方法,還提供了offsetParent(獲取上一級定位元素對象)的方法。所以現在我們只需封裝一個函數就可以了。
function offset(obj,direction){
    //將top,left首字母大寫,并拼接成offsetTop,offsetLeft
    var offsetDir = 'offset'+ direction[0].toUpperCase()+direction.substring(1);

    var realNum = obj[offsetDir];
    var positionParent = obj.offsetParent;  //獲取上一級定位元素對象

    while(positionParent != null){
	realNum += positionParent[offsetDir];
	positionParent = positionParent.offsetParent;
    }
    return realNum;
}
運用程序中
<body>
<style>
    body { margin:0;  }
    .box1 { width:300px; height:300px; margin:100px; background:#333; overflow:hidden; position:relative; }
    .box2 { width:200px; height:200px; margin:100px; background:#666; overflow:hidden; position:relative; }
    .box3 { width:100px; height:100px; margin:100px; background:#999;}
</style>
<div class="box1">
    <div class="box2">
    	<div class="box3"></div>
    </div>
</div>
<script>
    var oBox1 = document.querySelector('.box1');
    var oBox2 = document.querySelector('.box2');
    var oBox3 = document.querySelector('.box3');

    function offset(obj,direction){
        //將top,left首字母大寫,并拼接成offsetTop,offsetLeft
	var offsetDir = 'offset'+ direction[0].toUpperCase()+direction.substring(1);

	var realNum = obj[offsetDir];
	var positionParent = obj.offsetParent;  //獲取上一級定位元素對象

	while(positionParent != null){
	    realNum += positionParent[offsetDir];
	    positionParent = positionParent.offsetParent;
	}
	return realNum;
    }
    console.log('box1: '+ offset(oBox1,'left') +','+ offset(oBox1,'top'));
    console.log('box2: '+ offset(oBox2,'left') +','+ offset(oBox2,'top'));
    console.log('box3: '+ offset(oBox3,'left') +','+ offset(oBox3,'top'));
</script>
</body>
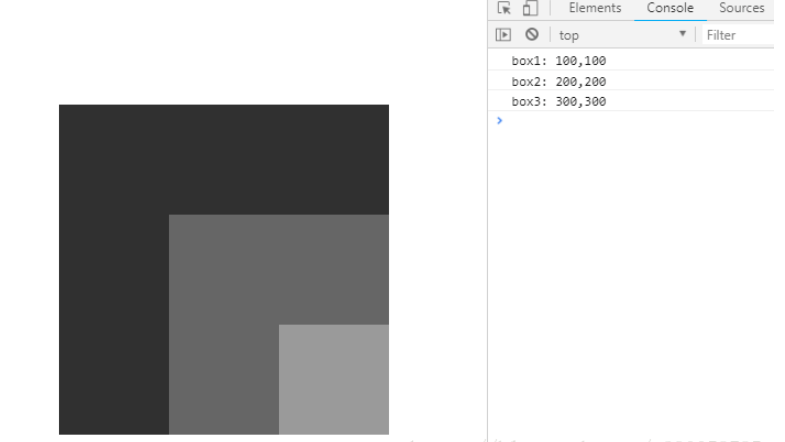
運行結果為:

關于“JavaScript中的offsetLeft、offsetTop怎么使用”的內容就介紹到這里了,感謝大家的閱讀。如果想了解更多行業相關的知識,可以關注億速云行業資訊頻道,小編每天都會為大家更新不同的知識點。
免責聲明:本站發布的內容(圖片、視頻和文字)以原創、轉載和分享為主,文章觀點不代表本網站立場,如果涉及侵權請聯系站長郵箱:is@yisu.com進行舉報,并提供相關證據,一經查實,將立刻刪除涉嫌侵權內容。