您好,登錄后才能下訂單哦!
您好,登錄后才能下訂單哦!
本篇內容介紹了“SpringBoot ApplicationContextAware拓展接口如何使用”的有關知識,在實際案例的操作過程中,不少人都會遇到這樣的困境,接下來就讓小編帶領大家學習一下如何處理這些情況吧!希望大家仔細閱讀,能夠學有所成!
ApplicationContextAware接口:
public interface ApplicationContextAware extends Aware {
    void setApplicationContext(ApplicationContext applicationContext) throws BeansException;
}
首先Aware接口就知道這是springboot擴展給用戶使用的,這里提供了方法setApplicationContext,參數就是傳遞spring容器上下文對象進來,我們可以接收這個上下文對象,我們要想知道獲取spring容器上下文ApplicationContext具體有什么作用,這才是擴展接口的目的所在,獲取上下文根據上下文的特性做一些事情。
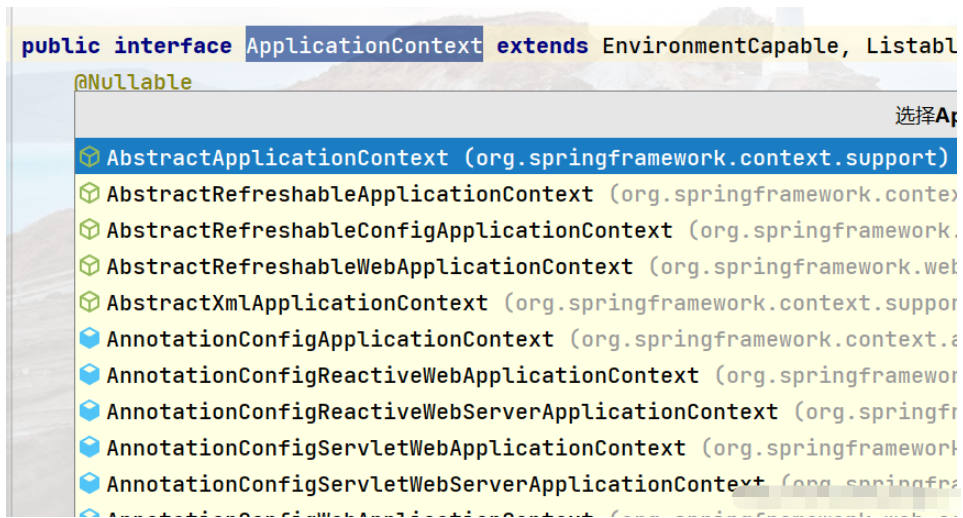
我們來看ApplicationContext對象的方法:

來看看AbstractApplicationContext實現類的方法:
    public Object getBean(String name) throws BeansException {this.assertBeanFactoryActive();return this.getBeanFactory().getBean(name);}
    public <T> T getBean(String name, Class<T> requiredType) throws BeansException {this.assertBeanFactoryActive();return this.getBeanFactory().getBean(name, requiredType);}
    public Object getBean(String name, Object... args) throws BeansException {this.assertBeanFactoryActive();return this.getBeanFactory().getBean(name, args);}
    public <T> T getBean(Class<T> requiredType) throws BeansException {this.assertBeanFactoryActive();return this.getBeanFactory().getBean(requiredType);}
    public <T> T getBean(Class<T> requiredType, Object... args) throws BeansException {this.assertBeanFactoryActive();return this.getBeanFactory().getBean(requiredType, args);}
    public <T> ObjectProvider<T> getBeanProvider(Class<T> requiredType) {this.assertBeanFactoryActive();return this.getBeanFactory().getBeanProvider(requiredType);}
    public <T> ObjectProvider<T> getBeanProvider(ResolvableType requiredType) {this.assertBeanFactoryActive();return this.getBeanFactory().getBeanProvider(requiredType);}
    public boolean containsBean(String name) {return this.getBeanFactory().containsBean(name);}
    public boolean isSingleton(String name) throws NoSuchBeanDefinitionException {this.assertBeanFactoryActive();return this.getBeanFactory().isSingleton(name);}
    public boolean isPrototype(String name) throws NoSuchBeanDefinitionException {this.assertBeanFactoryActive();return this.getBeanFactory().isPrototype(name);}
這里我們可以發現 getBean()方法很眼熟,因為在最最開始學習spring時沒有用spring的腳手架創建項目,我們獲取bean的方法通常是classPathContextLoader掃描bean的xml文件解析組成ApplicationCOntext對象,再調用它的getBean方法獲取實例bean。
由此可以發現我們主要的應用途徑就是使用這個getBean的方法,那么動態的注入bean我們通過很多方法就能實現,所以這里不難想到,靜態方法中無法使用注入的bean的問題。
其次我們來復現這個問題,大家來看如下的代碼:
public class JsonGetter {
@Resource
private UuidGetter uuidGetter;
public static string Test(){
       return uuidGetter.getUuid();
}
public static JsONobject set0bjectToJsonObject(object data){
       return JsoNobject.parseObject(String.valueof(JsONObject.toJSON(data)));
}
public static JsONObject setStringTO3son0bject(String data) { return JsONObject.parseObject(data);
}
我們發現在靜態的Test方法中調用注入的bean直接報錯,這里解釋一下:歸功于類的加載機制與加載順序,靜態屬性與靜態代碼塊最先加載(static靜態優先),這里加載靜態方法是沒有bean實例給你用的,自然會報錯。
如何解決?我們可以采取Spring獲取bean對象時調用getBean方法的思路,在容器加載時將spring容器的上下文進行靜態存儲:
@Component
@Lazy(value = false)
public class SpringContextHolder implements ApplicationContextAware, DisposableBean {
    /**
     * 將上下文靜態設置,在初始化組件時就進行靜態上下文的覆蓋(這個覆蓋是將遠spring容器的上下文對象引用加到我們預定設置)
     */
    private static ApplicationContext applicationContext = null;
    public static ApplicationContext getApplicationContext() {
        assertContextInjected();
        return applicationContext;
    }
    @SuppressWarnings("unchecked")
    public static <T> T getBean(String name) {
        assertContextInjected();
        return (T) applicationContext.getBean(name);
    }
    public static  <T> T getBean(Class<T> beanType) {
        assertContextInjected();
        return applicationContext.getBean(beanType);
    }
    @Override
    public void setApplicationContext(@NotNull ApplicationContext applicationContext) throws BeansException {
        SpringContextHolder.applicationContext = applicationContext;
    }
    @Override
    public void destroy() {
        applicationContext = null;
    }
    private static void assertContextInjected() {
        Assert.notNull(applicationContext,
                "applicationContext屬性未注入, 請在applicationContext.xml中定義SpringContextHolder.");
    }
    public static void pushEvent(ApplicationEvent event){
        assertContextInjected();
        applicationContext.publishEvent(event);
    }
}
這里只需要關注的是靜態成員變量ApplicationContext的定義、賦值與驗證:
    /**
     * 將上下文靜態設置,在初始化組件時就進行靜態上下文的覆蓋(這個覆蓋是將遠spring容器的上下文對象引用加到我們預定設置)
     */
    private static ApplicationContext applicationContext = null;
重寫擴展接口的方法,實現靜態上下文的覆蓋:
    @Override
    public void setApplicationContext(@NotNull ApplicationContext applicationContext) throws BeansException {
        SpringContextHolder.applicationContext = applicationContext;
    }
將獲取它的方法公有修飾,便于共享:
    public static ApplicationContext getApplicationContext() {
        assertContextInjected();
        return applicationContext;
    }
寫到這里還是不明白,這么定義一個組件,將spring上下文對象靜態覆蓋到底有何作用?
不要慌,我們來看看這個類的這個方法:
public class AppContext {
    static transient ThreadLocal<Map<String, String>> contextMap = new ThreadLocal<>();
    ......省略n行業務代碼
    public static void fillLoginContext() {
        DingAppInfo appInfo = SpringContextHolder.getBean(DingAppInfoService.class).findAppInfo(APP_CODE);
        setDingVerifyInfo(appInfo);
        CloudChatAppInfo cloudChatAppInfo = SpringContextHolder.getBean(CloudChatAppInfoService.class).findAppInfo(APP_CODE);
        setCloudChatInfo(cloudChatAppInfo);
    }
    public static void clear() {
        contextMap.remove(); //本地線程的remove方法極其重要,注意每次給它使用之后一定要調用remove清理,防止內存泄露。
    }
}
我們發現上例代碼中進行了查庫的操作:
DingAppInfo appInfo = SpringContextHolder.getBean(DingAppInfoService.class).findAppInfo(APP_CODE);
“SpringBoot ApplicationContextAware拓展接口如何使用”的內容就介紹到這里了,感謝大家的閱讀。如果想了解更多行業相關的知識可以關注億速云網站,小編將為大家輸出更多高質量的實用文章!
免責聲明:本站發布的內容(圖片、視頻和文字)以原創、轉載和分享為主,文章觀點不代表本網站立場,如果涉及侵權請聯系站長郵箱:is@yisu.com進行舉報,并提供相關證據,一經查實,將立刻刪除涉嫌侵權內容。