您好,登錄后才能下訂單哦!
您好,登錄后才能下訂單哦!
本篇內容主要講解“SpringBoot之怎么正確、安全的關閉服務”,感興趣的朋友不妨來看看。本文介紹的方法操作簡單快捷,實用性強。下面就讓小編來帶大家學習“SpringBoot之怎么正確、安全的關閉服務”吧!
我們利用遠程關閉功能可以實現優雅地關閉指定地服務。
正文
本文依然使用v1.5.8.RELEASE ,講地是利用actuator的Endpoints實現關閉服務
首先準備一個eureka服務,然后啟動他。
然后準備一個eureka客戶端服務,客戶端的pom除了必要的springboot的web依賴還需要添加依賴如下
<dependency>
       <groupId>org.springframework.boot</groupId>
       <artifactId>spring-boot-starter-actuator</artifactId>
 </dependency>
在eureka客戶端服務的application.properties文件開啟shutdown endpoint,SpringBoot的endpoints.shutdown.enabled默認是關閉的。
eureka.client.service-url.defaultZone=http://admin:admin@localhost:1111/eureka/
server.port=8762
spring.application.name=eureka-client
#啟用shutdown
endpoints.shutdown.enabled=true
#禁用密碼驗證
endpoints.shutdown.sensitive=false

#如果用的2.x版本的 就用注釋的那四行配置
#management.endpoints.shutdown.enabled=true
#management.endpoints.health.enabled=true
#management.endpoints.web.base-path=/
#management.endpoints.web.exposure.include=*
配置已經配好,這時可以啟動服務了,將他注冊在eureka上面,這時我們可以看到下面

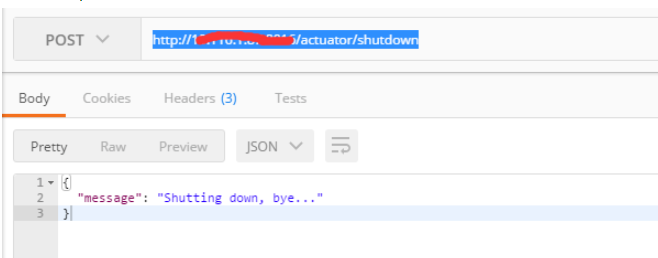
然后在終端執行 curl -X POST 127.0.0.1:8762/shutdown ,可以看到message:Shutting down,bye...說明成功關閉了服務

下面筆者要教給大家一種高級使用的方法,做了一個安全的認證,上面關閉服務的缺點大家顯而易見,知道服務端口和ip的就能關閉,這種做法很不安全,接下來要在客戶端服務配置一下安全認證。
首先在eureka客戶端服務的application.properties文件追加配置
eureka.client.service-url.defaultZone=http://admin:admin@localhost:1111/eureka/
server.port=8762
spring.application.name=eureka-client
management.security.enabled=true
#啟用shutdown
endpoints.shutdown.enabled=true
#禁用密碼驗證
endpoints.shutdown.sensitive=true
#驗證用戶名
security.user.name=admin
#驗證密碼
security.user.password=admin
#角色
management.security.role=SUPERUSER
#指定shutdown endpoint的路徑
endpoints.shutdown.path=/custompath
#也可以統一指定所有endpoints的路徑`management.context-path=/manage`
#指定管理端口和IP
management.port=8081
management.address=127.0.0.1
我們使用了security,就需要在pom添加依賴
<dependency>
     <groupId>org.springframework.boot</groupId>
     <artifactId>spring-boot-starter-security</artifactId>
</dependency>
大功告成,是不是很簡單,下面啟動你的客戶端服務,這里我就不貼一些多余的圖片了,成功注冊到eureka上面了,和上面的圖一樣。
接下來使用終端訪問 curl -X POST -u admin:admin 127.0.0.1:8081/custompath

看見了你的服務又和你say byebye了吧!
這個命令 curl -X POST -u admin:admin 127.0.0.1:8081/custompath 每一個位置對應的參數值大家可以看application.properties文件分別對應了哪些配置就明白了。
首次接觸springboot項目,在本地測試的時候,發現不知道怎么關閉程序,雖然后來不得不用殺死進程的方式解決,但總覺得這種方式太簡單粗暴。就準備問問度娘別人都是怎么做的。
結果普遍答案是:
步驟:
第一步:引入依賴
<dependency>
      <groupId>org.springframework.boot</groupId>
      <artifactId>spring-boot-starter-actuator</artifactId>
</dependency>
第二步:application.properties配置
 # 啟用shutdown
endpoints.shutdown.enabled=true

# 禁用密碼驗證
endpoints.shutdown.sensitive=false
第三步:http://IP:端口號/actuator/shutdown或者http://IP:端口號/shutdown
結果:
404!!!!!!!
為什么總是404?
后來幡然醒悟,別人都是springboot 1.X,而我的是2.X。(springboot變化好大o(╥﹏╥)o)
接著,我繼續查2.0以上版本怎么解決,結果大多數是在啟動類加一推代碼……可能是我不會用吧,反正沒成功。繼續找……
后來看到大多數人又說,下面的方式配置:
management:
  endpoints:
    web:
      exposure:
        include: "*"
然后看日志,發現所有的端點都打開了,就shutdown沒打開o(╥﹏╥)o
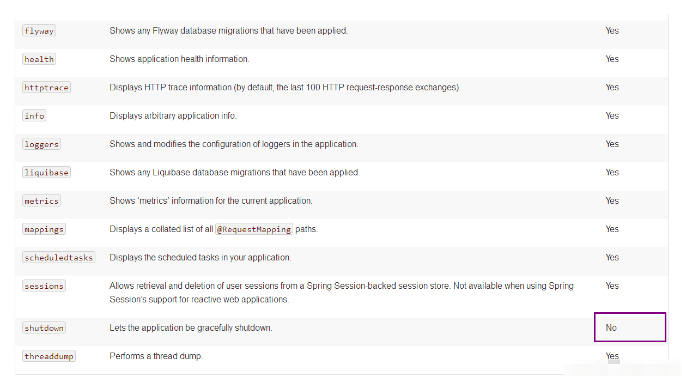
實在找不到相關博客了,就去官網找答案

原來人家默認是關著的,那就打開呀!于是我以為發現了新大陸,就去打開,據需看官網,看到這樣一句。
management.endpoint.shutdown.enabled=true
添加上去,果然成功!

但是,過程中我曾經寫成了這樣:
##錯誤寫法!!!!!!!!!!!!!!!!!
management:
  endpoints:
    web:
      exposure:
       include: "*"
    shutdown:
      enabled: true
注意哈,這是錯誤寫法,我把endpoints當成了endpoint!!!他們可是不一樣的啊!
最終寫法:
management:
  endpoints:
    web:
      exposure:
       include: shutdown
    #注意下面這個位置!!
  endpoint:
    shutdown:
      enabled: true
注:include后面可以添加你想用到的端點 。
到此,相信大家對“SpringBoot之怎么正確、安全的關閉服務”有了更深的了解,不妨來實際操作一番吧!這里是億速云網站,更多相關內容可以進入相關頻道進行查詢,關注我們,繼續學習!
免責聲明:本站發布的內容(圖片、視頻和文字)以原創、轉載和分享為主,文章觀點不代表本網站立場,如果涉及侵權請聯系站長郵箱:is@yisu.com進行舉報,并提供相關證據,一經查實,將立刻刪除涉嫌侵權內容。