您好,登錄后才能下訂單哦!
您好,登錄后才能下訂單哦!
今天小編給大家分享一下C#如何實現不同窗體之間傳遞參數的相關知識點,內容詳細,邏輯清晰,相信大部分人都還太了解這方面的知識,所以分享這篇文章給大家參考一下,希望大家閱讀完這篇文章后有所收獲,下面我們一起來了解一下吧。
主要兩個內容:
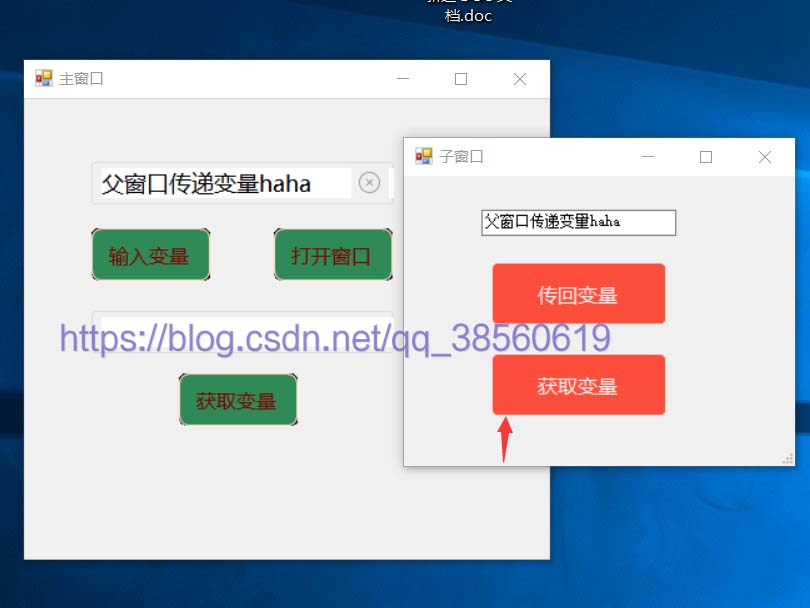
①父窗口給子窗口傳遞參數,
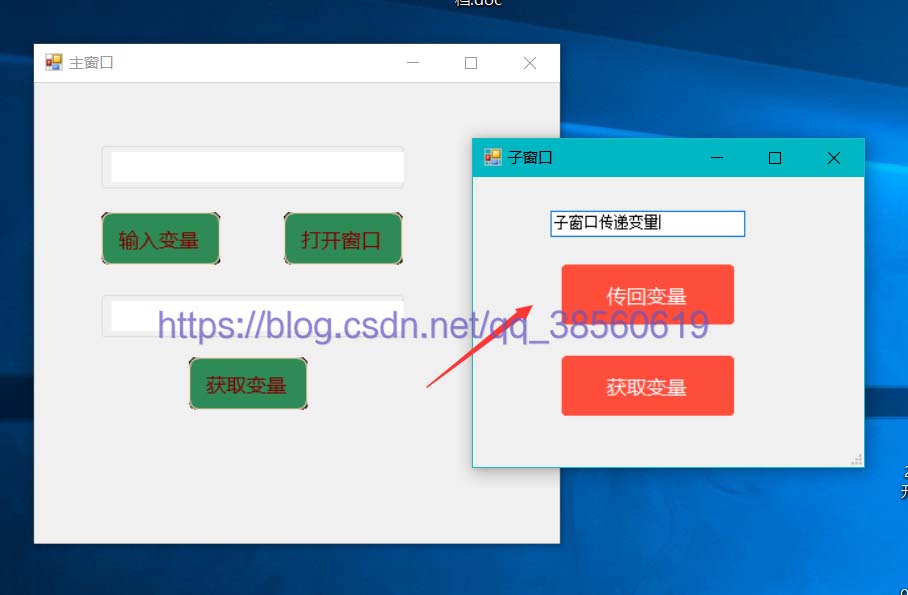
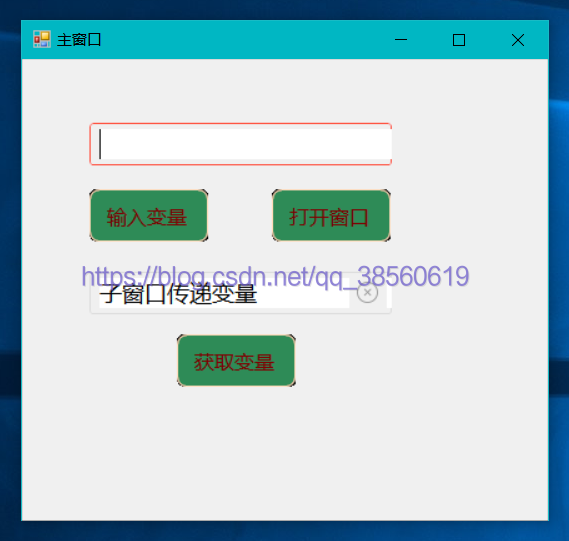
②子窗口給父窗口傳遞參數。
這個就比較簡單了,級別高一點訪問也輕松一點。具體的原理我就不講了(感覺說不清楚OJ2…),總之使用類的私有變量然后父窗口賦值就可以了。
父窗口(mainForm)代碼:
namespace demo_Params
{
    public partial class mainForm : Form
    {
        public mainForm()
        {
            InitializeComponent();
        }

        //傳遞變量到子窗口
        private void btn_Input_BtnClick(object sender, EventArgs e)
        {
            childForm childForm = new childForm();//childForm為新建窗口類
            childForm.str = this.tb_MainFormIn.InputText ;//str為子類的公有變量
            if (childForm.ShowDialog() == DialogResult.OK) return;
        }


    }
}
子窗口(childForm)代碼:
namespace demo_Params
{
    public partial class childForm : Form
    {
        public childForm()
        {
            InitializeComponent();
        }

        //私有變量和賦值,value值在父窗口傳遞
        private string w_str;
        public string str
        {
            set
            {
                w_str = value;
            }
        }
        //顯示父窗口的變量到文本框
        private void btn_getPara_BtnClick(object sender, EventArgs e)
        {
            this.tb_childFormIn.Text = w_str;
        }
    }
}
這個就比較麻煩了,看了很多,自己用起來感覺不錯的是通過委托事件和事件觸發執行函數來解決參數的傳遞和接受。道理就不說了,直接COPY用起來。
父窗口(mainForm)代碼:
namespace demo_Params
{
    public partial class mainForm : Form
    {
        public mainForm()
        {
            InitializeComponent();
        }
        //接受參數初始化
        string str = "";
        //打開子窗口childForm
        private void btn_openWin_BtnClick(object sender, EventArgs e)
        {

            childForm childForm = new childForm();
            childForm.getParam += new backParam(fun_GetChildParam);//綁定事件
            if (childForm.ShowDialog() == DialogResult.OK) return;
        }
        //委托事件執行方法
        void fun_GetChildParam(string w_childpara)
        {
            str = w_childpara;
        }
        //顯示參數到文本框,看看參數能不能調用
        private void btn_Output_BtnClick(object sender, EventArgs e)
        {
            tb_MainFormOut.InputText = str;
        }
    }
}
子窗口(childForm)代碼:
namespace demo_Params
{

    public delegate void backParam(string str);//聲明委托
    public partial class childForm : Form
    {
        public childForm()
        {
            InitializeComponent();
        }
        public event backParam getParam;//委托事件,接受一個string變量

        //傳回變量 關閉窗口
        private void btn_childFormBack_BtnClick(object sender, EventArgs e)
        {
            getParam(this.tb_childFormIn.Text);//將變量委托
            this.DialogResult = DialogResult.OK;
        }
    }
}

兩種傳遞參數的情況,我寫在了一個程序里面。整理時為了區分,有所刪改。(子傳父代碼塊內不含父傳子內容)
直接至WPF項目中,應該不能運行。 使用了第三方控件,部分控件屬性、事件命名不同。大家如要復現使用TextBox和Button即可。
最近在做項目時涉及到了子窗體與父窗體之間的參數傳輸問題,通過查閱與學習總結了一種方法。
Form1為主窗體,Form2為子窗體。
實現:在Form1上添加一個button1,點擊button1后顯示Form2,再點擊Form2的button1 在button1_Click事件中通過this.Owner將Form2的textBox2的值設置給Form1的textBox1(也可以將Form2中的某個值傳給Form1,然后在Form1進行后續的處理,將示例代碼修改一下即可)
示例代碼:
    //Form1上的代碼(主窗體)
    public partial class Form1 : Form
    {
        public MainForm()
        {
            InitializeComponent();
        }
        private void button1_Click(object sender, EventArgs e)
        {
            //顯示Form2
            Form2 childForm = new Form2();
            childForm.Show();
            //定義Form2的“爸爸”為Form1
            calForm.Owner = this;


            或者
            //Form2 childForm = new Form2();
            //childForm.Show(this);
        }
    }


    //Form2上的代碼(子窗體)
    public partial class Form2 : Form
    {
        public CalibrationForm()
        {
            InitializeComponent();
        }
        private void button_Click(object sender, EventArgs e)
        {
            MainForm mForm = (MainForm)this.Owner;
            //注意 如果textBox1是放在panel1中的 則先找panel1 再找textBox1
            ((TextBox)mForm.Controls["textBox1"]).Text = this.textBox2.Text;

            //也可直接將控件的屬性Modifiers修改為public 然后直接調用
            mForm.textBox1.Text = this.textBox2.Text;
        }
}Form1為主窗體,Form2為子窗體。
實現:在Form1上添加一個button1,點擊button1后顯示Form2,然后點擊Form2的button1顯示Form1中的某個參數。(用構造函數來實例化Form2窗體,然后把Form1的this指針傳進去,這樣就可以在Form2中調用Form1的參數(此參數必須是public屬性的))
示例代碼:
    //Form1上的代碼(主窗體)
    public partial class Form1 : Form
    {
        public MainForm()
        {
            InitializeComponent();
        }

        public string str = "你好!";
        private void button1_Click(object sender, EventArgs e)
        {
            //實例化子窗體,并將父窗體的指針this傳入
            Form2 childForm = new Form2(this);
            childForm.Show();
        }
    }


    //Form2上的代碼(子窗體)
    public partial class Form2 : Form
    {
        public CalibrationForm()
        {
            InitializeComponent();
        }

        private Form1 frmMain;
        public Form2(Form1 mForm)
        {
            InitializeComponent();
            this.frmMain = mForm;
        }

        private void button1_Click(object sender,EventArgs e)

        {

             this.textBox1.Text = mForm.str;

        }
     }
子窗體與父窗體之間的參數傳輸方法不止這一種,還可以用委托等,這里只總結了個人認為較為簡單的一種方法,如果以后涉及委托會進行補充。
以上就是“C#如何實現不同窗體之間傳遞參數”這篇文章的所有內容,感謝各位的閱讀!相信大家閱讀完這篇文章都有很大的收獲,小編每天都會為大家更新不同的知識,如果還想學習更多的知識,請關注億速云行業資訊頻道。
免責聲明:本站發布的內容(圖片、視頻和文字)以原創、轉載和分享為主,文章觀點不代表本網站立場,如果涉及侵權請聯系站長郵箱:is@yisu.com進行舉報,并提供相關證據,一經查實,將立刻刪除涉嫌侵權內容。