您好,登錄后才能下訂單哦!
您好,登錄后才能下訂單哦!
本篇內容介紹了“如何搭建SpringBoot+MyBatisPlus快速開發腳手架”的有關知識,在實際案例的操作過程中,不少人都會遇到這樣的困境,接下來就讓小編帶領大家學習一下如何處理這些情況吧!希望大家仔細閱讀,能夠學有所成!
可能有些小伙伴還不了解這個腳手架,我們先來聊聊它!
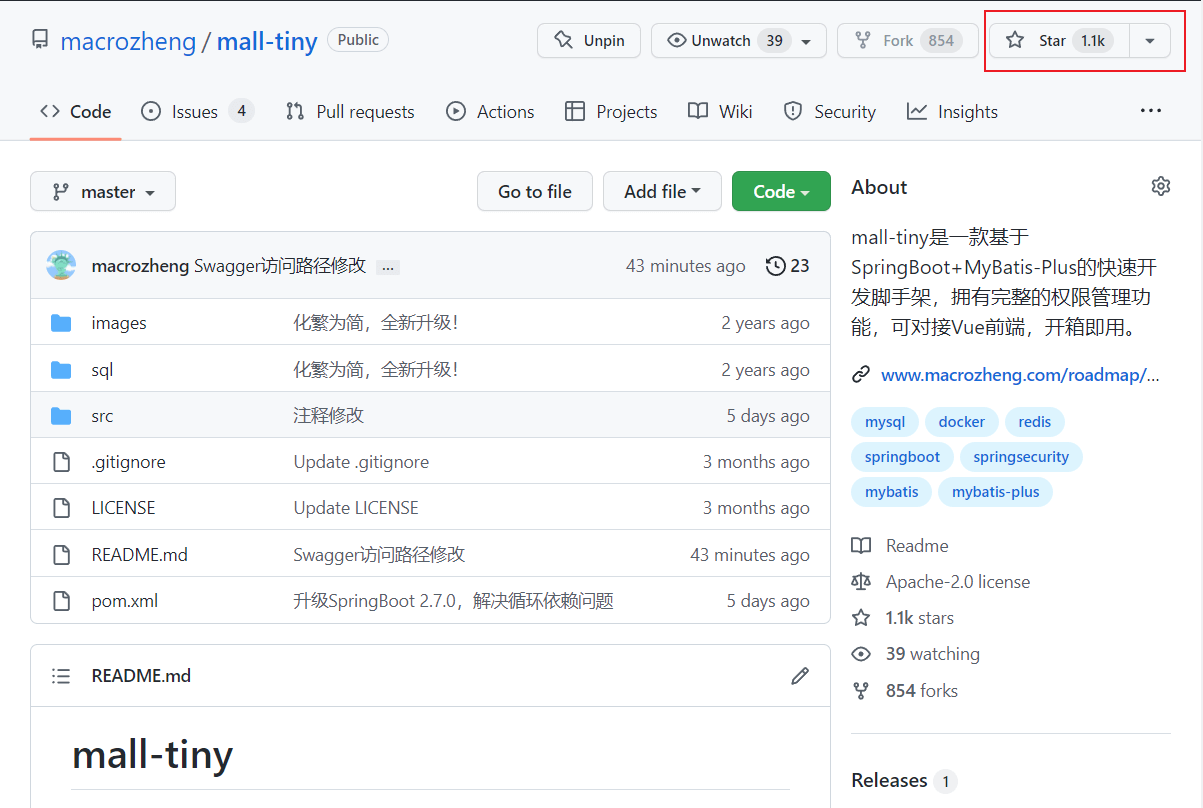
mall-tiny是一款基于SpringBoot+MyBatis-Plus的快速開發腳手架,目前在Github上已有1100+Star。它擁有完整的權限管理功能,支持使用MyBatis-Plus代碼生成器生成代碼,可對接mall項目的Vue前端,開箱即用。
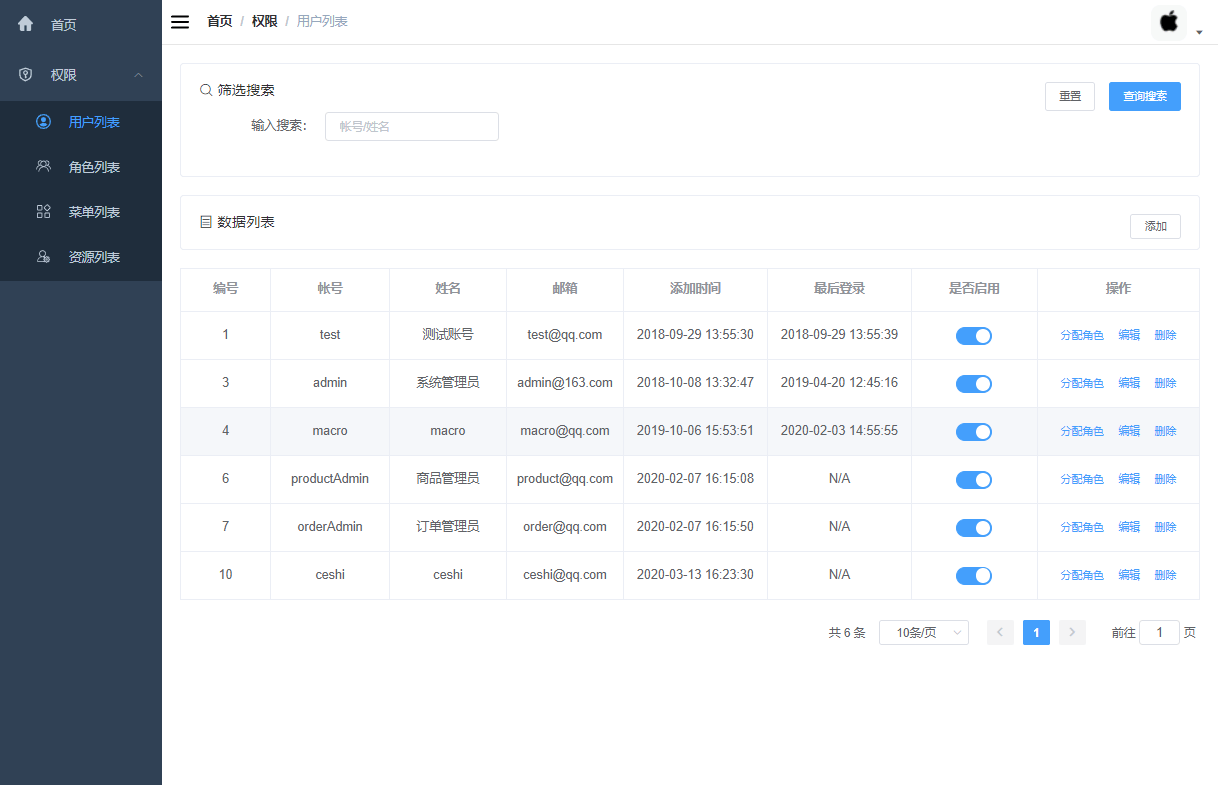
mall-tiny項目可無縫對接mall-admin-web前端項目,秒變前后端分離腳手架,由于mall-tiny項目僅實現了基礎的權限管理功能,所以前端對接后只會展示權限管理相關功能。
這次升級不僅支持了Spring Boot 2.7.0,其他依賴版本也升級到了最新版本。
| 技術 | 版本 | 說明 |
|---|---|---|
| SpringBoot | 2.7.0 | 容器+MVC框架 |
| SpringSecurity | 5.7.1 | 認證和授權框架 |
| MyBatis | 3.5.9 | ORM框架 |
| MyBatis-Plus | 3.5.1 | MyBatis增強工具 |
| MyBatis-Plus Generator | 3.5.1 | 數據層代碼生成器 |
| Swagger-UI | 3.0.0 | 文檔生產工具 |
| Redis | 5.0 | 分布式緩存 |
| Docker | 18.09.0 | 應用容器引擎 |
| Druid | 1.2.9 | 數據庫連接池 |
| Hutool | 5.8.0 | Java工具類庫 |
| JWT | 0.9.1 | JWT登錄支持 |
| Lombok | 1.18.24 | 簡化對象封裝工具 |
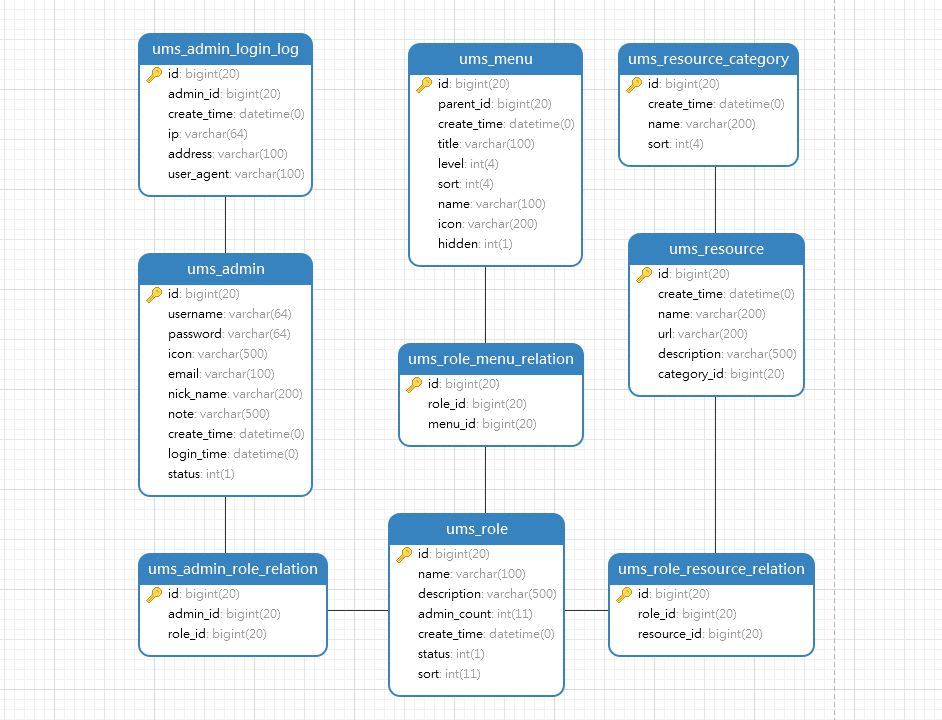
化繁為簡,僅保留了權限管理功能相關的9張表,業務簡單更加方便定制開發,覺得mall項目學習太復雜的小伙伴可以先學習下mall-tiny。
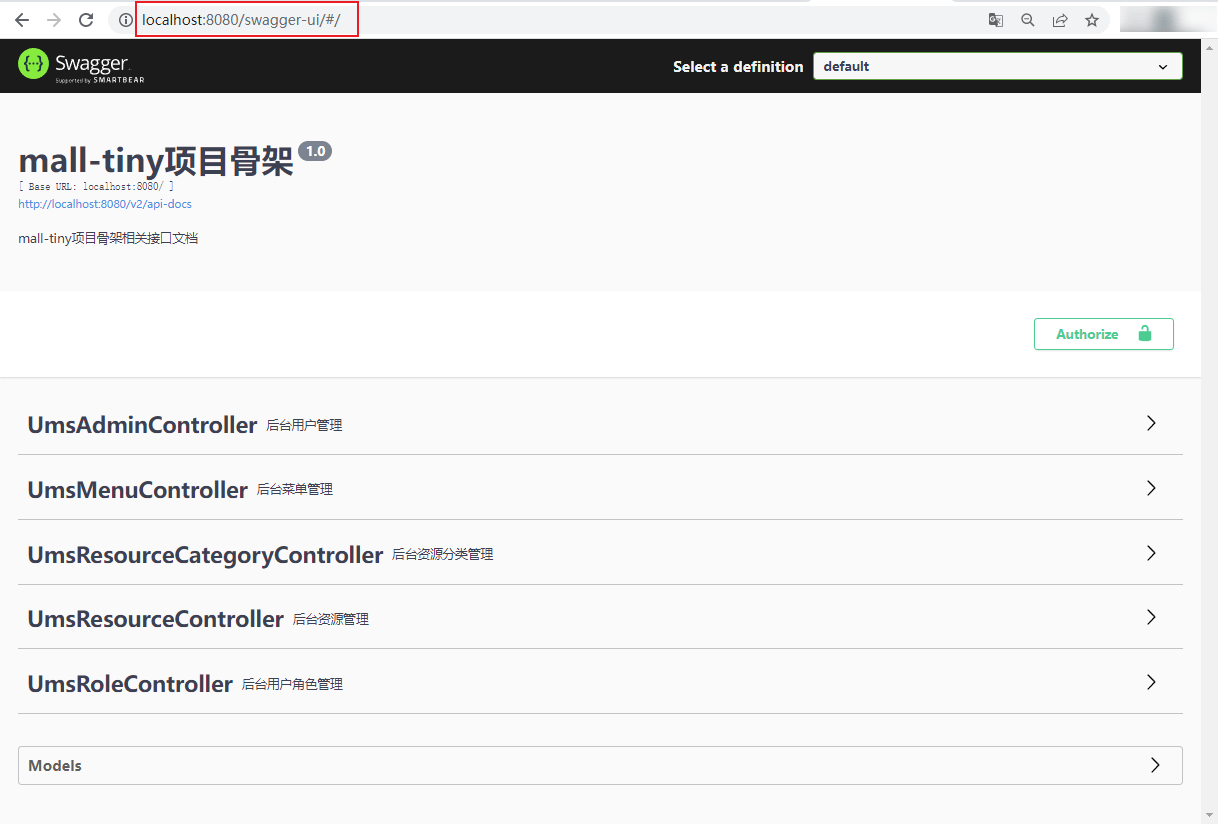
由于升級了Swagger版本,原來的接口文檔訪問路徑已經改變,最新訪問路徑:http://localhost:8080/swagger-ui/
升級版本基本不影響之前的使用方式,具體使用流程可以參考最新版README文件:
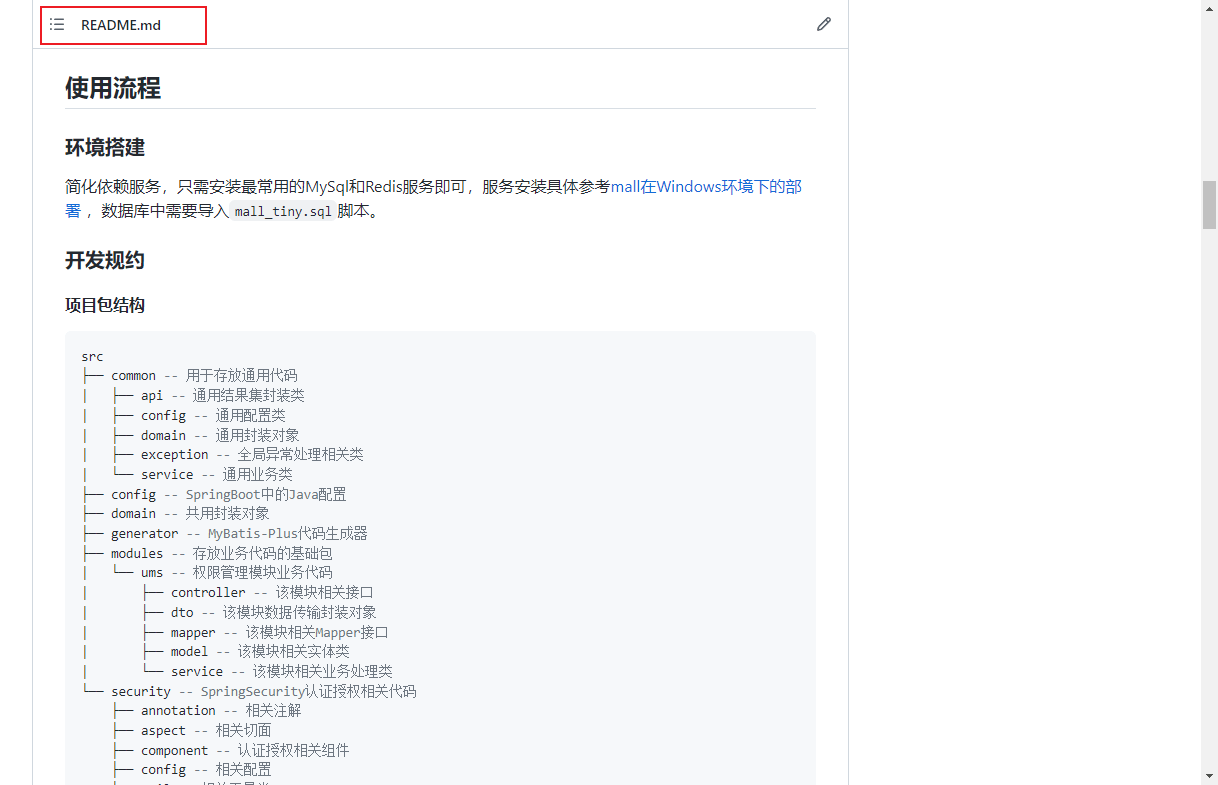
接下來我們再來聊聊項目升級Spring Boot 2.7.0版本遇到的問題,這些應該是升級該版本的通用問題,你如果想升級2.7.0版本的話,了解下會很有幫助!
在升級Spring Boot 2.6.x版本的時候,其實Swagger就有一定的兼容性問題,需要在配置中添加BeanPostProcessor這個Bean,具體可以參考升級 SpringBoot 2.6.x 版本后,Swagger 沒法用了! ;
/**
 * Swagger API文檔相關配置
 * Created by macro on 2018/4/26.
 */
@Configuration
@EnableSwagger2
public class SwaggerConfig extends BaseSwaggerConfig {
    @Bean
    public static BeanPostProcessor springfoxHandlerProviderBeanPostProcessor() {
        return new BeanPostProcessor() {
            @Override
            public Object postProcessAfterInitialization(Object bean, String beanName) throws BeansException {
                if (bean instanceof WebMvcRequestHandlerProvider || bean instanceof WebFluxRequestHandlerProvider) {
                    customizeSpringfoxHandlerMappings(getHandlerMappings(bean));
                }
                return bean;
            }
            private <T extends RequestMappingInfoHandlerMapping> void customizeSpringfoxHandlerMappings(List<T> mappings) {
                List<T> copy = mappings.stream()
                        .filter(mapping -> mapping.getPatternParser() == null)
                        .collect(Collectors.toList());
                mappings.clear();
                mappings.addAll(copy);
            }
            @SuppressWarnings("unchecked")
            private List<RequestMappingInfoHandlerMapping> getHandlerMappings(Object bean) {
                try {
                    Field field = ReflectionUtils.findField(bean.getClass(), "handlerMappings");
                    field.setAccessible(true);
                    return (List<RequestMappingInfoHandlerMapping>) field.get(bean);
                } catch (IllegalArgumentException | IllegalAccessException e) {
                    throw new IllegalStateException(e);
                }
            }
        };
    }
}
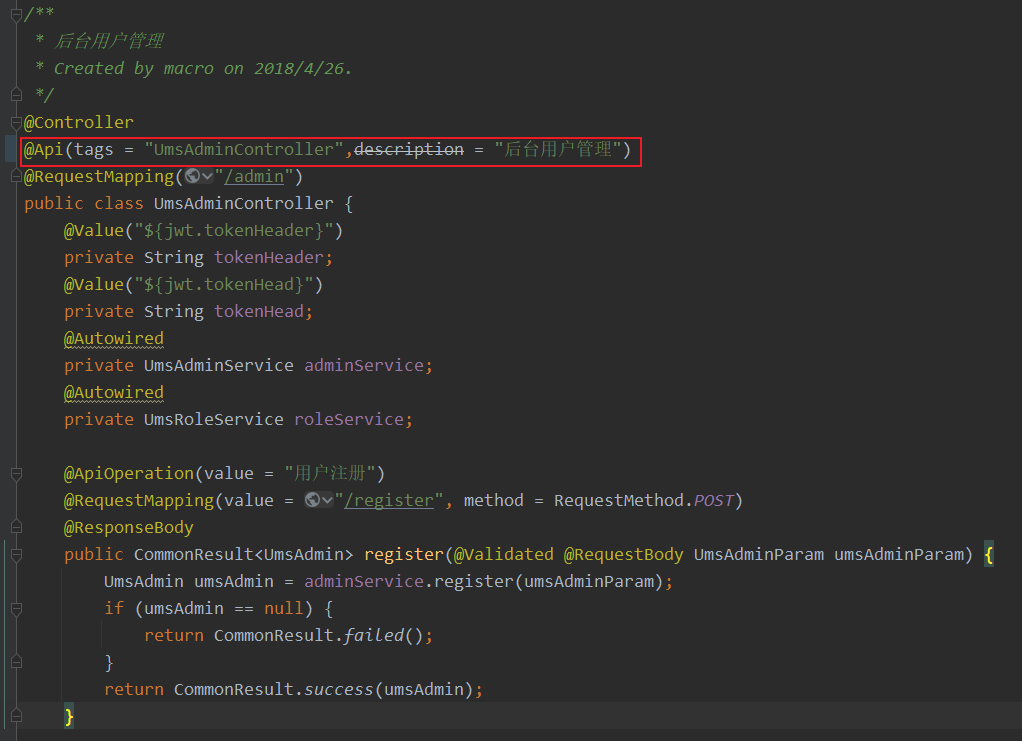
之前我們通過@Api注解的description屬性來配置接口描述的方法已經被棄用了;
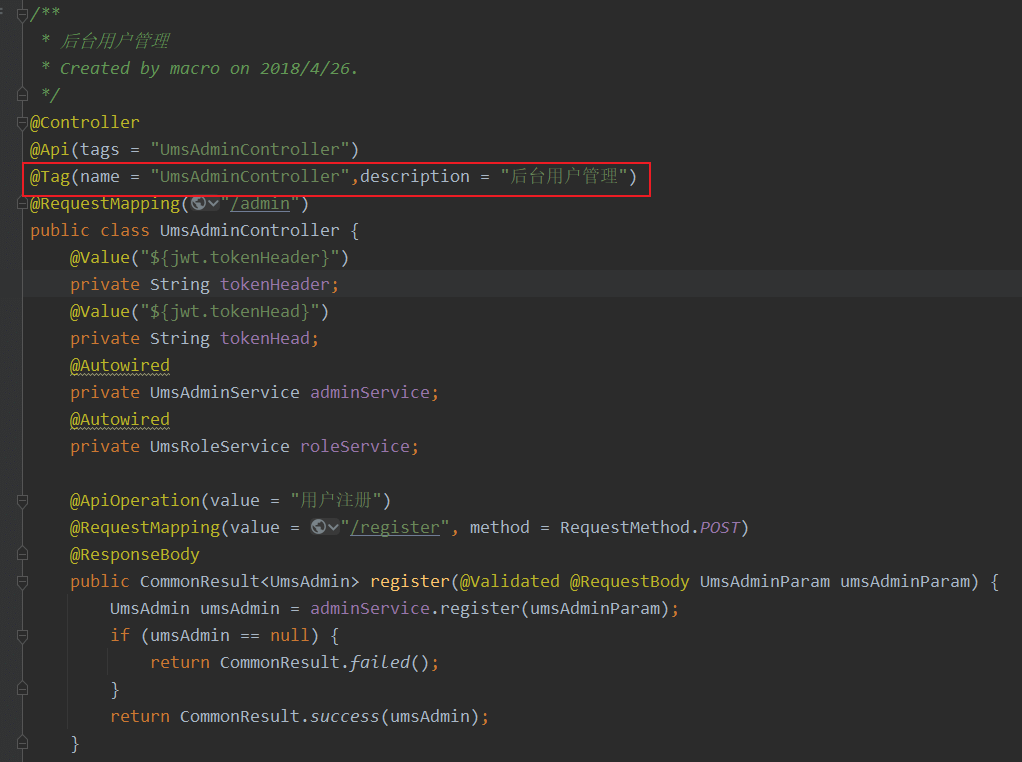
我們可以使用@Tag注解來配置接口說明,并使用@Api注解中的tags屬性來指定。
升級Spring Boot 2.7.0版本后,原來通過繼承WebSecurityConfigurerAdapter來配置的方法已經被棄用了,僅需配置SecurityFilterChainBean即可,具體參考Spring Security最新用法。
/**
 * SpringSecurity 5.4.x以上新用法配置
 * 為避免循環依賴,僅用于配置HttpSecurity
 * Created by macro on 2019/11/5.
 */
@Configuration
public class SecurityConfig {
    @Autowired
    private IgnoreUrlsConfig ignoreUrlsConfig;
    @Autowired
    private RestfulAccessDeniedHandler restfulAccessDeniedHandler;
    @Autowired
    private RestAuthenticationEntryPoint restAuthenticationEntryPoint;
    @Autowired
    private JwtAuthenticationTokenFilter jwtAuthenticationTokenFilter;
    @Autowired
    private DynamicSecurityService dynamicSecurityService;
    @Autowired
    private DynamicSecurityFilter dynamicSecurityFilter;
    @Bean
    SecurityFilterChain filterChain(HttpSecurity httpSecurity) throws Exception {
        ExpressionUrlAuthorizationConfigurer<HttpSecurity>.ExpressionInterceptUrlRegistry registry = httpSecurity
                .authorizeRequests();
        //不需要保護的資源路徑允許訪問
        for (String url : ignoreUrlsConfig.getUrls()) {
            registry.antMatchers(url).permitAll();
        }
        //允許跨域請求的OPTIONS請求
        registry.antMatchers(HttpMethod.OPTIONS)
                .permitAll();
        // 任何請求需要身份認證
        registry.and()
                .authorizeRequests()
                .anyRequest()
                .authenticated()
                // 關閉跨站請求防護及不使用session
                .and()
                .csrf()
                .disable()
                .sessionManagement()
                .sessionCreationPolicy(SessionCreationPolicy.STATELESS)
                // 自定義權限拒絕處理類
                .and()
                .exceptionHandling()
                .accessDeniedHandler(restfulAccessDeniedHandler)
                .authenticationEntryPoint(restAuthenticationEntryPoint)
                // 自定義權限攔截器JWT過濾器
                .and()
                .addFilterBefore(jwtAuthenticationTokenFilter, UsernamePasswordAuthenticationFilter.class);
        //有動態權限配置時添加動態權限校驗過濾器
        if(dynamicSecurityService!=null){
            registry.and().addFilterBefore(dynamicSecurityFilter, FilterSecurityInterceptor.class);
        }
        return httpSecurity.build();
    }
}MyBatis-Plus從之前的版本升級到了3.5.1版本,用法沒有大的改變,感覺最大的區別就是代碼生成器的用法改了。 在之前的用法中我們是通過new對象然后set各種屬性來配置的,具體參考如下代碼:
/**
 * MyBatisPlus代碼生成器
 * Created by macro on 2020/8/20.
 */
public class MyBatisPlusGenerator {
    /**
     * 初始化全局配置
     */
    private static GlobalConfig initGlobalConfig(String projectPath) {
        GlobalConfig globalConfig = new GlobalConfig();
        globalConfig.setOutputDir(projectPath + "/src/main/java");
        globalConfig.setAuthor("macro");
        globalConfig.setOpen(false);
        globalConfig.setSwagger2(true);
        globalConfig.setBaseResultMap(true);
        globalConfig.setFileOverride(true);
        globalConfig.setDateType(DateType.ONLY_DATE);
        globalConfig.setEntityName("%s");
        globalConfig.setMapperName("%sMapper");
        globalConfig.setXmlName("%sMapper");
        globalConfig.setServiceName("%sService");
        globalConfig.setServiceImplName("%sServiceImpl");
        globalConfig.setControllerName("%sController");
        return globalConfig;
    }
}
而新版的MyBatis-Plus代碼生成器已經改成使用建造者模式來配置了,具體可以參考MyBatisPlusGenerator類中的代碼。
/**
 * MyBatisPlus代碼生成器
 * Created by macro on 2020/8/20.
 */
public class MyBatisPlusGenerator {
    /**
     * 初始化全局配置
     */
    private static GlobalConfig initGlobalConfig(String projectPath) {
        return new GlobalConfig.Builder()
                .outputDir(projectPath + "/src/main/java")
                .author("macro")
                .disableOpenDir()
                .enableSwagger()
                .fileOverride()
                .dateType(DateType.ONLY_DATE)
                .build();
    }
}其實Spring Boot從2.6.x版本已經開始不推薦使用循環依賴了,如果你的項目中使用的循環依賴比較多的話,可以使用如下配置開啟;
spring:
  main:
    allow-circular-references: true
不過既然官方都不推薦使用了,我們最好還是避免循環依賴的好,這里分享下我解決循環依賴問題的一點思路。如果一個類里有多個依賴項,這個類非必要的Bean就不要配置了,可以使用單獨的類來配置Bean。比如SecurityConfig這個配置類中,我只聲明了必要的SecurityFilterChain配置;
/**
 * SpringSecurity 5.4.x以上新用法配置
 * 為避免循環依賴,僅用于配置HttpSecurity
 * Created by macro on 2019/11/5.
 */
@Configuration
public class SecurityConfig {
    @Autowired
    private IgnoreUrlsConfig ignoreUrlsConfig;
    @Autowired
    private RestfulAccessDeniedHandler restfulAccessDeniedHandler;
    @Autowired
    private RestAuthenticationEntryPoint restAuthenticationEntryPoint;
    @Autowired
    private JwtAuthenticationTokenFilter jwtAuthenticationTokenFilter;
    @Autowired
    private DynamicSecurityService dynamicSecurityService;
    @Autowired
    private DynamicSecurityFilter dynamicSecurityFilter;
    @Bean
    SecurityFilterChain filterChain(HttpSecurity httpSecurity) throws Exception {
        //省略若干代碼...
        return httpSecurity.build();
    }
}
其他配置都被我移動到了CommonSecurityConfig配置類中,這樣就避免了之前的循環依賴;
/**
 * SpringSecurity通用配置
 * 包括通用Bean、Security通用Bean及動態權限通用Bean
 * Created by macro on 2022/5/20.
 */
@Configuration
public class CommonSecurityConfig {
    @Bean
    public PasswordEncoder passwordEncoder() {
        return new BCryptPasswordEncoder();
    }
    @Bean
    public IgnoreUrlsConfig ignoreUrlsConfig() {
        return new IgnoreUrlsConfig();
    }
    @Bean
    public JwtTokenUtil jwtTokenUtil() {
        return new JwtTokenUtil();
    }
    @Bean
    public RestfulAccessDeniedHandler restfulAccessDeniedHandler() {
        return new RestfulAccessDeniedHandler();
    }
    @Bean
    public RestAuthenticationEntryPoint restAuthenticationEntryPoint() {
        return new RestAuthenticationEntryPoint();
    }
    @Bean
    public JwtAuthenticationTokenFilter jwtAuthenticationTokenFilter(){
        return new JwtAuthenticationTokenFilter();
    }
    @Bean
    public DynamicAccessDecisionManager dynamicAccessDecisionManager() {
        return new DynamicAccessDecisionManager();
    }
    @Bean
    public DynamicSecurityMetadataSource dynamicSecurityMetadataSource() {
        return new DynamicSecurityMetadataSource();
    }
    @Bean
    public DynamicSecurityFilter dynamicSecurityFilter(){
        return new DynamicSecurityFilter();
    }
}
還有一個典型的循環依賴問題,UmsAdminServiceImpl和UmsAdminCacheServiceImpl相互依賴了;
/**
 * 后臺管理員管理Service實現類
 * Created by macro on 2018/4/26.
 */
@Service
public class UmsAdminServiceImpl extends ServiceImpl<UmsAdminMapper,UmsAdmin> implements UmsAdminService {
    @Autowired
    private UmsAdminCacheService adminCacheService;
}
/**
 * 后臺用戶緩存管理Service實現類
 * Created by macro on 2020/3/13.
 */
@Service
public class UmsAdminCacheServiceImpl implements UmsAdminCacheService {
    @Autowired
    private UmsAdminService adminService;
}
我們可以創建一個用于獲取Spring容器中的Bean的工具類來實現;
/**
 * Spring工具類
 * Created by macro on 2020/3/3.
 */
@Component
public class SpringUtil implements ApplicationContextAware {
    private static ApplicationContext applicationContext;
    // 獲取applicationContext
    public static ApplicationContext getApplicationContext() {
        return applicationContext;
    }
    @Override
    public void setApplicationContext(ApplicationContext applicationContext) throws BeansException {
        if (SpringUtil.applicationContext == null) {
            SpringUtil.applicationContext = applicationContext;
        }
    }
    // 通過name獲取Bean
    public static Object getBean(String name) {
        return getApplicationContext().getBean(name);
    }
    // 通過class獲取Bean
    public static <T> T getBean(Class<T> clazz) {
        return getApplicationContext().getBean(clazz);
    }
    // 通過name,以及Clazz返回指定的Bean
    public static <T> T getBean(String name, Class<T> clazz) {
        return getApplicationContext().getBean(name, clazz);
    }
}
然后在UmsAdminServiceImpl中使用該工具類獲取Bean來解決循環依賴。
/**
 * 后臺管理員管理Service實現類
 * Created by macro on 2018/4/26.
 */
@Service
public class UmsAdminServiceImpl extends ServiceImpl<UmsAdminMapper,UmsAdmin> implements UmsAdminService {
    @Override
    public UmsAdminCacheService getCacheService() {
        return SpringUtil.getBean(UmsAdminCacheService.class);
    }
}在使用Spring Boot 2.7.0版本時,如果不修改之前的跨域配置,通過前端訪問會出現跨域問題,后端報錯如下。
java.lang.IllegalArgumentException: When allowCredentials is true, allowedOrigins cannot contain the special value "*" since that cannot be set on the "Access-Control-Allow-Origin" response header.
To allow credentials to a set of origins, list them explicitly or consider using "allowedOriginPatterns" instead.
具體的意思就是allowedOrigins已經不再支持通配符*的配置了,改為需要使用allowedOriginPatterns來設置,具體配置修改如下。
/**
 * 全局跨域配置
 * Created by macro on 2019/7/27.
 */
@Configuration
public class GlobalCorsConfig {
    /**
     * 允許跨域調用的過濾器
     */
    @Bean
    public CorsFilter corsFilter() {
        CorsConfiguration config = new CorsConfiguration();
        //允許所有域名進行跨域調用
        config.addAllowedOriginPattern("*");
        //該用法在SpringBoot 2.7.0中已不再支持
        //config.addAllowedOrigin("*");
        //允許跨越發送cookie
        config.setAllowCredentials(true);
        //放行全部原始頭信息
        config.addAllowedHeader("*");
        //允許所有請求方法跨域調用
        config.addAllowedMethod("*");
        UrlBasedCorsConfigurationSource source = new UrlBasedCorsConfigurationSource();
        source.registerCorsConfiguration("/**", config);
        return new CorsFilter(source);
    }
}
“如何搭建SpringBoot+MyBatisPlus快速開發腳手架”的內容就介紹到這里了,感謝大家的閱讀。如果想了解更多行業相關的知識可以關注億速云網站,小編將為大家輸出更多高質量的實用文章!
免責聲明:本站發布的內容(圖片、視頻和文字)以原創、轉載和分享為主,文章觀點不代表本網站立場,如果涉及侵權請聯系站長郵箱:is@yisu.com進行舉報,并提供相關證據,一經查實,將立刻刪除涉嫌侵權內容。