您好,登錄后才能下訂單哦!
您好,登錄后才能下訂單哦!
這篇“Python怎么創建屬于自己的IP池”文章的知識點大部分人都不太理解,所以小編給大家總結了以下內容,內容詳細,步驟清晰,具有一定的借鑒價值,希望大家閱讀完這篇文章能有所收獲,下面我們一起來看看這篇“Python怎么創建屬于自己的IP池”文章吧。
Python 3.8
Pycharm
requests >>> pip install requests
parsel >>> pip install parsel
win + R 輸入 cmd 點擊確定, 輸入安裝命令 pip install 模塊名 (pip install requests) 回車
在pycharm中點擊Terminal(終端) 輸入安裝命令
選擇file(文件) >>> setting(設置) >>> Project(項目) >>> python interpreter(python解釋器)
點擊齒輪, 選擇add
添加python安裝路徑
選擇file(文件) >>> setting(設置) >>> Plugins(插件)
點擊 Marketplace 輸入想要安裝的插件名字 比如:翻譯插件 輸入 translation / 漢化插件 輸入 Chinese
選擇相應的插件點擊 install(安裝) 即可
安裝成功之后 是會彈出 重啟pycharm的選項 點擊確定, 重啟即可生效
proxies_dict = {
    "http": "http://" + ip:端口,
    "https": "http://" + ip:端口,
}找我們想要數據內容, 從哪里來的
發送請求, 對于目標網址發送請求
獲取數據, 獲取服務器返回響應數據(網頁源代碼)
解析數據, 提取我們想要的數據內容
保存數據, 爬音樂 視頻 本地csv 數據庫… IP檢測, 檢測IP代理是否可用 可用用IP代理 保存
from 從
import 導入
從 什么模塊里面 導入 什么方法
from xxx import * # 導入所有方法
# 導入數據請求模塊
import requests  # 數據請求模塊 第三方模塊 pip install requests
# 導入 正則表達式模塊
import re  # 內置模塊
# 導入數據解析模塊
import parsel  # 數據解析模塊 第三方模塊 pip install parsel  >>> 這個是scrapy框架核心組件


lis = []
lis_1 = []

# 1. 發送請求, 對于目標網址發送請求 https://www.kuaidaili.com/free/
for page in range(11, 21):
    url = f'https://www.kuaidaili.com/free/inha/{page}/'  # 確定請求url地址
    """
    headers 請求頭 作用偽裝python代碼
    """
    # 用requests模塊里面get 方法 對于url地址發送請求, 最后用response變量接收返回數據
    response = requests.get(url)
    # <Response [200]>  請求之后返回response響應對象, 200狀態碼表示請求成功
    # 2. 獲取數據, 獲取服務器返回響應數據(網頁源代碼)  response.text 獲取響應體文本數據
    # print(response.text)
    # 3. 解析數據, 提取我們想要的數據內容
    """
    解析數據方式方法:
        正則: 可以直接提取字符串數據內容
    需要把獲取下來html字符串數據 進行轉換
        xpath: 根據標簽節點 提取數據內容
        css選擇器: 根據標簽屬性提取數據內容

        哪一種方面用那種, 那是喜歡用那種
    """
    # 正則表達式提取數據內容
    """
    # 正則提取數據 re.findall() 調用模塊里面的方法
    # 正則 遇事不決 .*? 可以匹配任意字符(除了換行符\n以外) re.S

    ip_list = re.findall('<td data-title="IP">(.*?)</td>', response.text, re.S)
    port_list = re.findall('<td data-title="PORT">(.*?)</td>', response.text, re.S)
    print(ip_list)
    print(port_list)
    """
    # css選擇器:
    """
    # css選擇器提取數據 需要把獲取下來html字符串數據(response.text) 進行轉換
    # 我不會css 或者 xpath 怎么辦
    # #list > table > tbody > tr > td:nth-child(1)
    # //*[@id="list"]/table/tbody/tr/td[1]
    selector = parsel.Selector(response.text) # 把html 字符串數據轉成 selector 對象
    ip_list = selector.css('#list tbody tr td:nth-child(1)::text').getall()
    port_list = selector.css('#list tbody tr td:nth-child(2)::text').getall()
    print(ip_list)
    print(port_list)
    """
    # xpath 提取數據
    selector = parsel.Selector(response.text) # 把html 字符串數據轉成 selector 對象
    ip_list = selector.xpath('//*[@id="list"]/table/tbody/tr/td[1]/text()').getall()
    port_list = selector.xpath('//*[@id="list"]/table/tbody/tr/td[2]/text()').getall()
    # print(ip_list)
    # print(port_list)
    for ip, port in zip(ip_list, port_list):
        # print(ip, port)
        proxy = ip + ':' + port
        proxies_dict = {
            "http": "http://" + proxy,
            "https": "http://" + proxy,
        }
        # print(proxies_dict)
        lis.append(proxies_dict)
        # 4.檢測IP質量
        try:
            response = requests.get(url=url, proxies=proxies_dict, timeout=1)
            if response.status_code == 200:
                print('當前代理IP: ', proxies_dict,  '可以使用')
                lis_1.append(proxies_dict)
        except:
            print('當前代理IP: ', proxies_dict,  '請求超時, 檢測不合格')


print('獲取的代理IP數量: ', len(lis))
print('獲取可用的IP代理數量: ', len(lis_1))
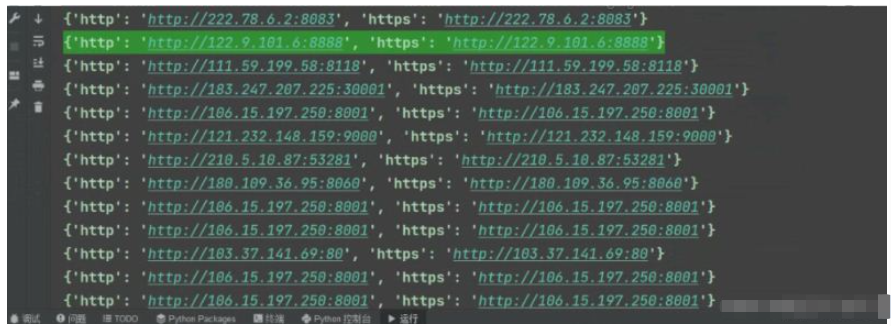
print('獲取可用的IP代理: ', lis_1)

dit = {
    'http': 'http://110.189.152.86:40698',
    'https': 'http://110.189.152.86:40698'
}

以上就是關于“Python怎么創建屬于自己的IP池”這篇文章的內容,相信大家都有了一定的了解,希望小編分享的內容對大家有幫助,若想了解更多相關的知識內容,請關注億速云行業資訊頻道。
免責聲明:本站發布的內容(圖片、視頻和文字)以原創、轉載和分享為主,文章觀點不代表本網站立場,如果涉及侵權請聯系站長郵箱:is@yisu.com進行舉報,并提供相關證據,一經查實,將立刻刪除涉嫌侵權內容。