溫馨提示×
您好,登錄后才能下訂單哦!
點擊 登錄注冊 即表示同意《億速云用戶服務條款》
您好,登錄后才能下訂單哦!
這篇文章將為大家詳細講解有關vue如何實現簡單的分頁功能,小編覺得挺實用的,因此分享給大家做個參考,希望大家閱讀完這篇文章后可以有所收獲。
具體內容如下
我們都知道在spring boot項目中安裝pagehelper可以實現分頁功能,但是在vue中也能在前端實現分頁。
1、首先,在data中定義以下變量:
data() {
    return {
      list: null,
      listLoading: true,
      totalPage: 1, // 統共頁數,默認為1
            currentPage: 1, //當前頁數 ,默認為1
            pageSize: 5, // 每頁顯示數量
      currentPageData: [], //當前頁顯示內容
      headPage: 1
    }
  },
2、發送請求,獲取后端數據(list集合)
axios.get('http://192.168.56.1:8081/sel/'+id).then((res) =>{
        console.log(res.data.data )
        that.list = res.data.data
        that.listLoading = false
3、根據返回數據list的length來計算data中變量的值:
this.totalPage=Math.ceil(this.list.length / this.pageSize);
        this.totalPage = this.totalPage == 0 ? 1 : this.totalPage;
        this.getCurrentPageData();
4、調用getCurrentPageData()方法設置當前頁面的數據
getCurrentPageData() {
                        let begin = (this.currentPage - 1) * this.pageSize;
                        let end = this.currentPage * this.pageSize;
                        this.currentPageData = this.list.slice(
                            begin,
                            end
                        );
                    },
5、添加按鈕并實現首頁、尾頁、上一頁、下一頁功能:
<input type="button" value="首頁" @click="firstPage">
<input type="button" value="上一頁" @click="prevPage">
<input type="button" value="下一頁" @click="nextPage">
<input type="button" value="尾頁" @click="lastPage">
 //上一頁
prevPage() {

          if (this.currentPage == 1) {
                 return false;
             } else {
                 this.currentPage--;
                 this.getCurrentPageData();
                }
                    },
                    // 下一頁
                    nextPage() {

                        if (this.currentPage == this.totalPage) {
                            return false;
                        } else {
                            this.currentPage++;
                            this.getCurrentPageData();
                        }
              },
              //尾頁
              lastPage() {

               if (this.currentPage == this.totalPage) {
                     return false;
                        } else {
                     this.currentPage=this.totalPage;
                      this.getCurrentPageData();
                  }

              } ,
           //首頁
              firstPage(){
             this.currentPage=  this.headPage;
             this.getCurrentPageData();
}
注意!
最后需要修改組件中的data

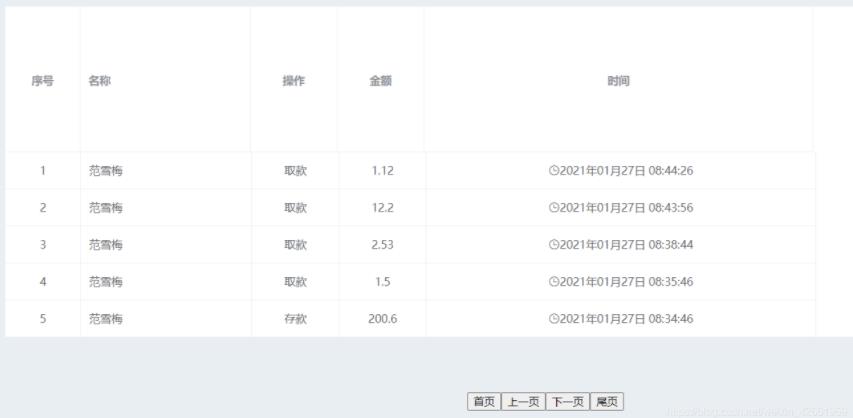
前端展示:

關于“vue如何實現簡單的分頁功能”這篇文章就分享到這里了,希望以上內容可以對大家有一定的幫助,使各位可以學到更多知識,如果覺得文章不錯,請把它分享出去讓更多的人看到。
免責聲明:本站發布的內容(圖片、視頻和文字)以原創、轉載和分享為主,文章觀點不代表本網站立場,如果涉及侵權請聯系站長郵箱:is@yisu.com進行舉報,并提供相關證據,一經查實,將立刻刪除涉嫌侵權內容。