您好,登錄后才能下訂單哦!
您好,登錄后才能下訂單哦!
怎樣深入了解Vue組件七種通信方式,相信很多沒有經驗的人對此束手無策,為此本文總結了問題出現的原因和解決方法,通過這篇文章希望你能解決這個問題。
vue組件通信的方式,這是在面試中一個非常高頻的問題,我剛開始找實習便經常遇到這個問題,當時只知道回到props和 $emit,后來隨著學習的深入,才發現vue組件的通信方式竟然有這么多!
今天對vue組件通信方式進行一下總結,如寫的有疏漏之處還請大家留言。
props和 $emit相信大家十分的熟悉了,這是我們最常用的vue通信方式。
props:props可以是數組或對象,用于接收來自父組件通過v-bind傳遞的數據。當props為數組時,直接接收父組件傳遞的屬性;當 props 為對象時,可以通過type、default、required、validator等配置來設置屬性的類型、默認值、是否必傳和校驗規則。
$emit:在父子組件通信時,我們通常會使用 $emit來觸發父組件v-on在子組件上綁定相應事件的監聽。
代碼實例
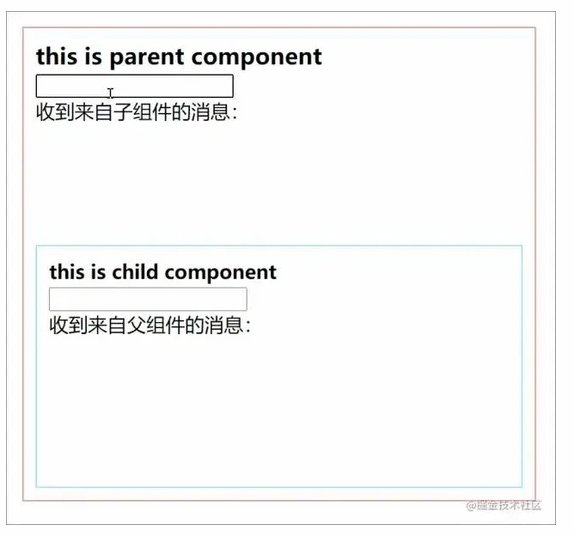
下面通過代碼來實現一下props和 $emit的父子組件通信,在這個實例中,我們都實現了以下的通信:
父向子傳值:父組件通過 :messageFromParent="message" 將父組件 message 值傳遞給子組件,當父組件的 input 標簽輸入時,子組件p標簽中的內容就會相應改變。
子向父傳值:父組件通過 @on-receive="receive" 在子組件上綁定了 receive 事件的監聽,子組件 input 標簽輸入時,會觸發 receive 回調函數, 通過 this.$emit('on-receive', this.message) 將子組件 message 的值賦值給父組件 messageFromChild ,改變父組件p標簽的內容。
請看代碼:
// 子組件代碼
<template>
  <div class="child">
    <h5>this is child component</h5>
    <input type="text" v-model="message" @keyup="send" />
    <p>收到來自父組件的消息:{{ messageFromParent }}</p>
  </div>
</template>
<script>
export default {
  name: 'Child',
  props: ['messageFromParent'],  // 通過props接收父組件傳過來的消息
  data() {
    return {
      message: '',
    }
  },
  methods: {
    send() {
      this.$emit('on-receive', this.message)  // 通過 $emit觸發on-receive事件,調用父組件中receive回調,并將this.message作為參數
    },
  },
}
</script>
// 父組件代碼
<template>
<div class="parent">
<h4>this is parent component</h4>
<input type="text" v-model="message" />
<p>收到來自子組件的消息:{{ messageFromChild }}</p>
<Child :messageFromParent="message" @on-receive="receive" />
</div>
</template>
<script>
import Child from './child'
export default {
name: 'Parent',
data() {
return {
message: '', // 傳遞給子組件的消息
messageFromChild: '',
}
},
components: {
Child,
},
methods: {
receive(msg) { // 接受子組件的信息,并將其賦值給messageFromChild
this.messageFromChild = msg
},
},
}
</script>效果預覽
v-slot是 Vue2.6 版本中新增的用于統一實現插槽和具名插槽的api,用于替代 slot(2.6.0廢棄) 、 slot-scope(2.6.0廢棄) 、 scope(2.5.0廢棄) 等api。
v-slot在 template 標簽中用于提供具名插槽或需要接收 prop 的插槽,如果不指定 v-slot ,則取默認值 default 。
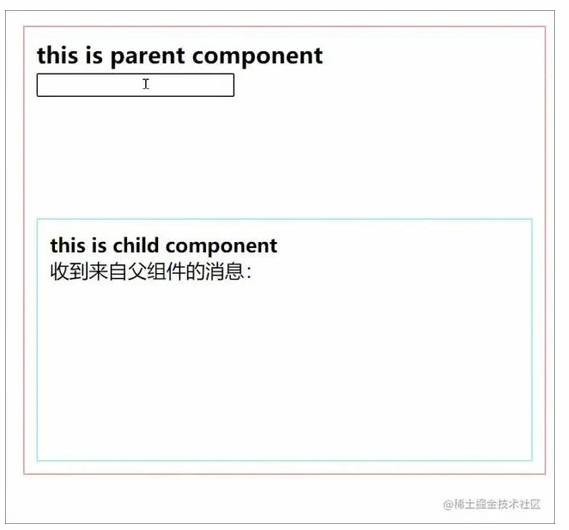
下面請看v-slot的代碼實例,在這個實例中我們實現了:
父向子傳值:父組件通過 <template v-slot:child>{{ message }}</template> 將父組件的message值傳遞給子組件,子組件通過 <slot name="child"></slot> 接收到相應內容,實現了父向子傳值。
// 子組件代碼
<template>
  <div class="child">
    <h5>this is child component</h5>
    <p>收到來自父組件的消息:
      <slot name="child"></slot>  <!--展示父組件通過插槽傳遞的{{message}}-->
    </p>
  </div>
</template>
<template>
<div class="parent">
<h4>this is parent component</h4>
<input type="text" v-model="message" />
<Child>
<template v-slot:child>
{{ message }} <!--插槽要展示的內容-->
</template>
</Child>
</div>
</template>
<script>
import Child from './child'
export default {
name: 'Parent',
data() {
return {
message: '',
}
},
components: {
Child,
},
}
</script>效果預覽
我們也同樣可以通過 $refs/$parent/$children/$root 等方式獲取 Vue 組件實例,得到實例上綁定的屬性及方法等,來實現組件之間的通信。
$refs:我們通常會將 $refs綁定在DOM元素上,來獲取DOM元素的 attributes。在實現組件通信上,我們也可以將 $refs 綁定在子組件上,從而獲取子組件實例。
$parent:我們可以在 Vue 中直接通過 this.$parent 來獲取當前組件的父組件實例(如果有的話)。
$children:同理,我們也可以在 Vue 中直接通過 this.$children 來獲取當前組件的子組件實例的數組。但是需要注意的是, this.$children 數組中的元素下標并不一定對用父組件引用的子組件的順序,例如有異步加載的子組件,可能影響其在 children 數組中的順序。所以使用時需要根據一定的條件例如子組件的name去找到相應的子組件。
$root:獲取當前組件樹的根 Vue 實例。如果當前實例沒有父實例,此實例將會是其自己。通過 $root ,我們可以實現組件之間的跨級通信。
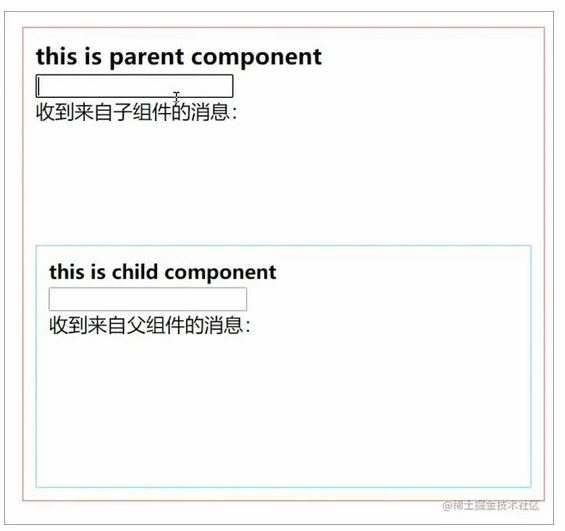
下面來看一個 $ parent 和 $ children 使用的實例(由于這幾個api的使用方式大同小異,所以關于 $ refs 和 $ root 的使用就不在這里展開了,在這個實例中實現了:
父向子傳值:子組件通過 $parent.message 獲取到父組件中message的值。
子向父傳值:父組件通過 $children 獲取子組件實例的數組,在通過對數組進行遍歷,通過實例的 name 獲取到對應 Child1 子組件實例將其賦值給 child1,然后通過 child1.message 獲取到 Child1 子組件的message。
代碼如下:
// 子組件
<template>
  <div class="child">
    <h5>this is child component</h5>
    <input type="text" v-model="message" />
    <p>收到來自父組件的消息:{{ $parent.message }}</p>  <!--展示父組件實例的message-->
  </div>
</template>
<script>
export default {
  name: 'Child1',
  data() {
    return {
      message: '',   // 父組件通過this.$children可以獲取子組件實例的message
    }
  },
}
</script>
// 父組件
<template>
<div class="parent">
<h4>this is parent component</h4>
<input type="text" v-model="message" />
<p>收到來自子組件的消息:{{ child1.message }}</p> <!--展示子組件實例的message-->
<Child />
</div>
</template>
<script>
import Child from './child'
export default {
name: 'Parent',
data() {
return {
message: '',
child1: {},
}
},
components: {
Child,
},
mounted() {
this.child1 = this.$children.find((child) => {
return child.$options.name === 'Child1' // 通過options.name獲取對應name的child實例
})
},
}
</script>效果預覽
$ attrs和 $ listeners 都是 Vue2.4 中新增加的屬性,主要是用來供使用者用來開發高級組件的。
$attrs:用來接收父作用域中不作為 prop 被識別的 attribute 屬性,并且可以通過 v-bind="$attrs" 傳入內部組件——在創建高級別的組件時非常有用。
試想一下,當你創建了一個組件,你要接收 param1 、param2、param3 …… 等數十個參數,如果通過 props,那你需要通過 props: ['param1', 'param2', 'param3', ……] 等聲明一大堆。如果這些 props 還有一些需要往更深層次的子組件傳遞,那將會更加麻煩。
而使用 $attrs ,你不需要任何聲明,直接通過 $attrs.param1 、 $attrs.param2 ……就可以使用,而且向深層子組件傳遞上面也給了示例,十分方便。
$listeners:包含了父作用域中的 v-on 事件監聽器。它可以通過 v-on="$listeners" 傳入內部組件——在創建更高層次的組件時非常有用,這里在傳遞時的使用方法和 $attrs 十分類似。
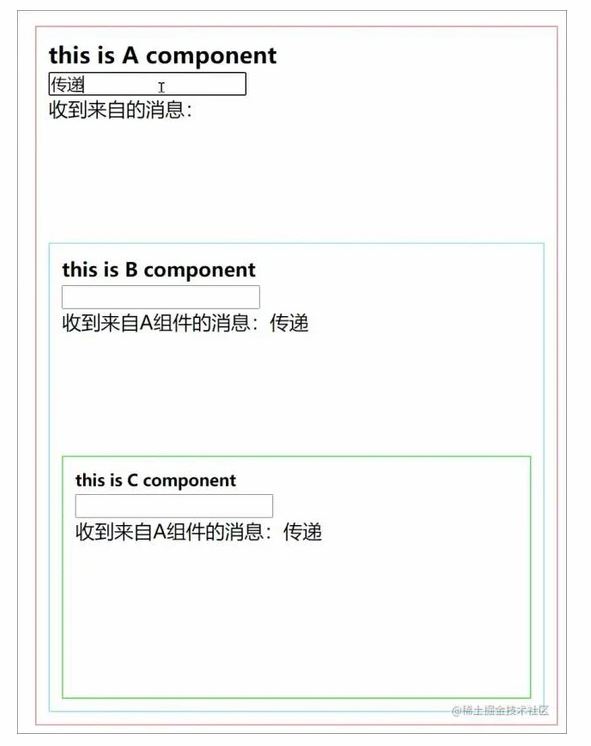
在這個實例中,共有三個組件:A、B、C,其關系為:[ A [ B [C] ] ],A為B的父組件,B為C的父組件。即:1級組件A,2級組件B,3級組件C。我們實現了:
父向子傳值:1級組件A通過 :messageFromA="message" 將 message 屬性傳遞給2級組件B,2級組件B通過 $attrs.messageFromA 獲取到1級組件A的 message 。
:messageFromA="message"
v-bind="$attrs"
$attrs.messageFromA
子向父傳值:1級組件A通過 @keyup="receive" 在子孫組件上綁定keyup事件的監聽,2級組件B在通過 v-on="$listeners" 來將 keyup 事件綁定在其 input 標簽上。當2級組件B input 輸入框輸入時,便會觸發1級組件A的receive回調,將2級組件B的 input 輸入框中的值賦值給1級組件A的 messageFromComp ,從而實現子向父傳值。
@keyup="receive"
<CompC v-on="$listeners" />
v-on="$listeners"
代碼如下:
// 3級組件C
<template>
  <div class="compc">
    <h6>this is C component</h6>
    <input name="compC" type="text" v-model="message" v-on="$listeners" /> <!--將A組件keyup的監聽回調綁在該input上-->
    <p>收到來自A組件的消息:{{ $attrs.messageFromA }}</p>
  </div>
</template>
<script>
export default {
  name: 'Compc',
  data() {
    return {
      message: '',
    }
  },
}
</script>
// 2級組件B
<template>
<div class="compb">
<h5>this is B component</h5>
<input name="compB" type="text" v-model="message" v-on="$listeners" /> <!--將A組件keyup的監聽回調綁在該input上-->
<p>收到來自A組件的消息:{{ $attrs.messageFromA }}</p>
<CompC v-bind="$attrs" v-on="$listeners" /> <!--將A組件keyup的監聽回調繼續傳遞給C組件,將A組件傳遞的attrs繼續傳遞給C組件-->
</div>
</template>
<script>
import CompC from './compC'
export default {
name: 'CompB',
components: {
CompC,
},
data() {
return {
message: '',
}
},
}
</script>// A組件
<template>
<div class="compa">
<h4>this is A component</h4>
<input type="text" v-model="message" />
<p>收到來自{{ comp }}的消息:{{ messageFromComp }}</p>
<CompB :messageFromA="message" @keyup="receive" /> <!--監聽子孫組件的keyup事件,將message傳遞給子孫組件-->
</div>
</template>
<script>
import CompB from './compB'
export default {
name: 'CompA',
data() {
return {
message: '',
messageFromComp: '',
comp: '',
}
},
components: {
CompB,
},
methods: {
receive(e) { // 監聽子孫組件keyup事件的回調,并將keyup所在input輸入框的值賦值給messageFromComp
this.comp = e.target.name
this.messageFromComp = e.target.value
},
},
}
</script>效果預覽
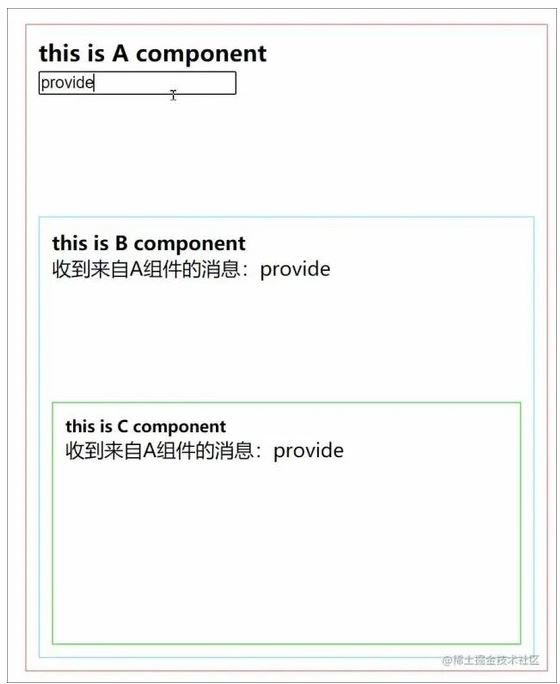
provide/inject這對選項需要一起使用,以允許一個祖先組件向其所有子孫后代注入一個依賴,不論組件層次有多深,并在其上下游關系成立的時間里始終生效。如果你是熟悉React的同學,你一定會立刻想到Context這個api,二者是十分相似的。
provide:是一個對象,或者是一個返回對象的函數。該對象包含可注入其子孫的 property ,即要傳遞給子孫的屬性和屬性值。
injcet:一個字符串數組,或者是一個對象。當其為字符串數組時,使用方式和props十分相似,只不過接收的屬性由data變成了provide中的屬性。當其為對象時,也和props類似,可以通過配置default和from等屬性來設置默認值,在子組件中使用新的命名屬性等。
這個實例中有三個組件,1級組件A,2級組件B,3級組件C:[ A [ B [C] ] ],A是B的父組件,B是C的父組件。實例中實現了:
父向子傳值:1級組件A通過provide將message注入給子孫組件,2級組件B通過 inject: ['messageFromA'] 來接收1級組件A中的message,并通過 messageFromA.content 獲取1級組件A中message的content屬性值。
跨級向下傳值:1級組件A通過provide將message注入給子孫組件,3級組件C通過 inject: ['messageFromA'] 來接收1級組件A中的message,并通過 messageFromA.content 獲取1級組件A中message的content屬性值,實現跨級向下傳值。
代碼如下:
// 1級組件A
<template>
  <div class="compa">
    <h4>this is A component</h4>
    <input type="text" v-model="message.content" />
    <CompB />
  </div>
</template>
<script>
import CompB from './compB'
export default {
  name: 'CompA',
  provide() {
    return {
      messageFromA: this.message,  // 將message通過provide傳遞給子孫組件
    }
  },
  data() {
    return {
      message: {
        content: '',
      },
    }
  },
  components: {
    CompB,
  },
}
</script>
// 2級組件B
<template>
<div class="compb">
<h5>this is B component</h5>
<p>收到來自A組件的消息:{{ messageFromA && messageFromA.content }}</p>
<CompC />
</div>
</template>
<script>
import CompC from './compC'
export default {
name: 'CompB',
inject: ['messageFromA'], // 通過inject接受A中provide傳遞過來的message
components: {
CompC,
},
}
</script>// 3級組件C
<template>
<div class="compc">
<h6>this is C component</h6>
<p>收到來自A組件的消息:{{ messageFromA && messageFromA.content }}</p>
</div>
</template>
<script>
export default {
name: 'Compc',
inject: ['messageFromA'], // 通過inject接受A中provide傳遞過來的message
}
</script>注意點:
可能有同學想問我上面1級組件A中的message為什么要用object類型而不是string類型,因為在vue provide 和 inject 綁定并不是可響應的。如果message是string類型,在1級組件A中通過input輸入框改變message值后無法再賦值給messageFromA,如果是object類型,當對象屬性值改變后,messageFromA里面的屬性值還是可以隨之改變的,子孫組件inject接收到的對象屬性值也可以相應變化。
子孫provide和祖先同樣的屬性,會在后代中覆蓋祖先的provide值。例如2級組件B中也通過provide向3級組件C中注入一個messageFromA的值,則3級組件C中的messageFromA會優先接收2級組件B注入的值而不是1級組件A。
效果預覽
eventBus又稱事件總線,通過注冊一個新的Vue實例,通過調用這個實例的 $ emit 和 $ on等來監聽和觸發這個實例的事件,通過傳入參數從而實現組件的全局通信。它是一個不具備 DOM 的組件,有的僅僅只是它實例方法而已,因此非常的輕便。
我們可以通過在全局Vue實例上注冊:
// main.js
Vue.prototype.$Bus = new Vue()
但是當項目過大時,我們最好將事件總線抽象為單個文件,將其導入到需要使用的每個組件文件中。這樣,它不會污染全局命名空間:
// bus.js,使用時通過import引入
import Vue from 'vue'
export const Bus = new Vue()
eventBus的原理其實比較簡單,就是使用訂閱-發布模式,實現 $ emit 和 $ on兩個方法即可:
// eventBus原理
export default class Bus {
  constructor() {
    this.callbacks = {}
  }
  $on(event, fn) {
    this.callbacks[event] = this.callbacks[event] || []
    this.callbacks[event].push(fn)
  }
  $emit(event, args) {
    this.callbacks[event].forEach((fn) => {
      fn(args)
    })
  }
}

// 在main.js中引入以下
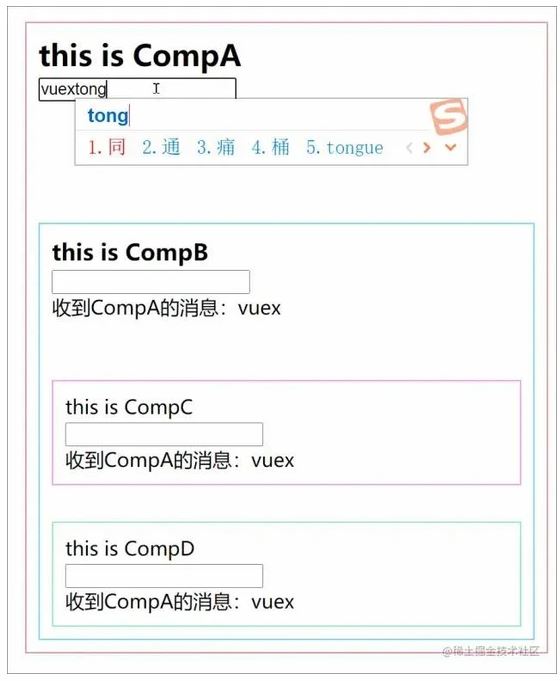
// Vue.prototype.$bus = new Bus()在這個實例中,共包含了4個組件:[ A [ B [ C、D ] ] ],1級組件A,2級組件B,3級組件C和3級組件D。我們通過使用eventBus實現了:
全局通信:即包括了父子組件相互通信、兄弟組件相互通信、跨級組件相互通信。4個組件的操作邏輯相同,都是在input輸入框時,通過 this.$bus.$emit('sendMessage', obj) 觸發sendMessage事件回調,將sender和message封裝成對象作為參數傳入;同時通過 this.$bus.$on('sendMessage', obj) 監聽其他組件的sendMessage事件,實例當前組件示例sender和message的值。這樣任一組件input輸入框值改變時,其他組件都能接收到相應的信息,實現全局通信。
代碼如下:
// main.js
Vue.prototype.$bus = new Vue()
// 1級組件A
<template>
  <div class="containerA">
    <h3>this is CompA</h3>
    <input type="text" v-model="message" @keyup="sendMessage" />
    <p v-show="messageFromBus && sender !== $options.name">
      收到{{ sender }}的消息:{{ messageFromBus }}
    </p>
    <CompB />
  </div>
</template>
<script>
import CompB from './compB'
export default {
  name: 'CompA',
  components: {
    CompB,
  },
  data() {
    return {
      message: '',
      messageFromBus: '',
      sender: '',
    }
  },
  mounted() {
    this.$bus.$on('sendMessage', (obj) => {  // 通過eventBus監聽sendMessage事件
      const { sender, message } = obj
      this.sender = sender
      this.messageFromBus = message
    })
  },
  methods: {
    sendMessage() {
      this.$bus.$emit('sendMessage', { // 通過eventBus觸發sendMessage事件
        sender: this.$options.name,
        message: this.message,
      })
    },
  },
}
</script>
// 2級組件B
<template>
<div class="containerB">
<h4>this is CompB</h4>
<input type="text" v-model="message" @keyup="sendMessage" />
<p v-show="messageFromBus && sender !== $options.name">
收到{{ sender }}的消息:{{ messageFromBus }}
</p>
<CompC />
<CompD />
</div>
</template>
<script>
import CompC from './compC'
import CompD from './compD'
export default {
name: 'CompB',
components: {
CompC,
CompD,
},
data() {
return {
message: '',
messageFromBus: '',
sender: '',
}
},
mounted() {
this.$bus.$on('sendMessage', (obj) => { // 通過eventBus監聽sendMessage事件
const { sender, message } = obj
this.sender = sender
this.messageFromBus = message
})
},
methods: {
sendMessage() {
this.$bus.$emit('sendMessage', { // 通過eventBus觸發sendMessage事件
sender: this.$options.name,
message: this.message,
})
},
},
}
</script>// 3級組件C
<template>
<div class="containerC">
<p>this is CompC</p>
<input type="text" v-model="message" @keyup="sendMessage" />
<p v-show="messageFromBus && sender !== $options.name">
收到{{ sender }}的消息:{{ messageFromBus }}
</p>
</div>
</template>
<script>
export default {
name: 'CompC',
data() {
return {
message: '',
messageFromBus: '',
sender: '',
}
},
mounted() {
this.$bus.$on('sendMessage', (obj) => { // 通過eventBus監聽sendMessage事件
const { sender, message } = obj
this.sender = sender
this.messageFromBus = message
})
},
methods: {
sendMessage() {
this.$bus.$emit('sendMessage', { // 通過eventBus觸發sendMessage事件
sender: this.$options.name,
message: this.message,
})
},
},
}
</script>// 3級組件D
<template>
<div class="containerD">
<p>this is CompD</p>
<input type="text" v-model="message" @keyup="sendMessage" />
<p v-show="messageFromBus && sender !== $options.name">
收到{{ sender }}的消息:{{ messageFromBus }}
</p>
</div>
</template>
<script>
export default {
name: 'CompD',
data() {
return {
message: '',
messageFromBus: '',
sender: '',
}
},
mounted() {
this.$bus.$on('sendMessage', (obj) => { // 通過eventBus監聽sendMessage事件
const { sender, message } = obj
this.sender = sender
this.messageFromBus = message
})
},
methods: {
sendMessage() {
this.$bus.$emit('sendMessage', { // 通過eventBus觸發sendMessage事件
sender: this.$options.name,
message: this.message,
})
},
},
}
</script>效果預覽

圖片過大,截圖處理
當項目龐大以后,在多人維護同一個項目時,如果使用事件總線進行全局通信,容易讓全局的變量的變化難以預測。于是有了Vuex的誕生。
Vuex 是一個專為 Vue.js 應用程序開發的狀態管理模式。它采用集中式存儲管理應用的所有組件的狀態,并以相應的規則保證狀態以一種可預測的方式發生變化。
有關Vuex的內容,可以參考 Vuex官方文檔 [1] ,我就不在這里班門弄斧了,直接看代碼。
Vuex的實例和事件總線leisi,同樣是包含了4個組件:[ A [ B [ C、D ] ] ],1級組件A,2級組件B,3級組件C和3級組件D。我們在這個實例中實現了:
全局通信:代碼的內容和eventBus也類似,不過要比eventBus使用方便很多。每個組件通過watch監聽input輸入框的變化,把input的值通過vuex的commit觸發mutations,從而改變stroe的值。然后每個組件都通過computed動態獲取store中的數據,從而實現全局通信。
// store.js
import Vue from 'vue'
import Vuex from 'vuex'
Vue.use(Vuex)
export default new Vuex.Store({
  state: {
    message: {
      sender: '',
      content: '',
    },
  },
  mutations: {
    sendMessage(state, obj) {
      state.message = {
        sender: obj.sender,
        content: obj.content,
      }
    },
  },
})
// 組件A
<template>
<div class="containerA">
<h3>this is CompA</h3>
<input type="text" v-model="message" />
<p v-show="messageFromStore && sender !== $options.name">
收到{{ sender }}的消息:{{ messageFromStore }}
</p>
<CompB />
</div>
</template>
<script>
import CompB from './compB'
export default {
name: 'CompA',
components: {
CompB,
},
data() {
return {
message: '',
}
},
computed: {
messageFromStore() {
return this.$store.state.message.content
},
sender() {
return this.$store.state.message.sender
},
},
watch: {
message(newValue) {
this.$store.commit('sendMessage', {
sender: this.$options.name,
content: newValue,
})
},
},
}
</script>同樣和eventBus中一樣,B,C,D組件中的代碼除了引入子組件的不同,script部分都是一樣的,就不再往上寫了。
效果預覽
上面總共提到了7中Vue的組件通信方式,他們能夠進行的通信種類如下圖所示:
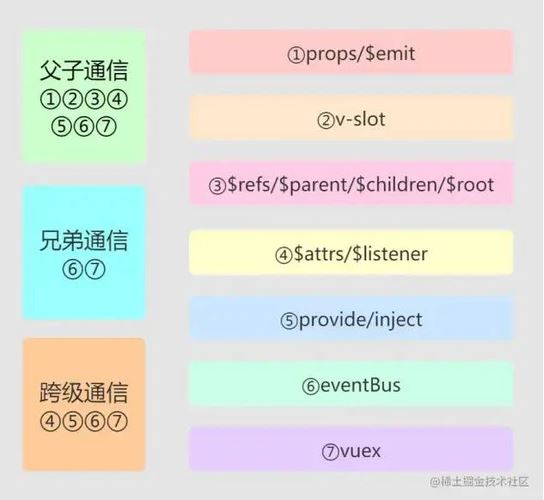
props/$emit:可以實現父子組件的雙向通信,在日常的父子組件通信中一般會作為我們的最常用選擇。
v-slot:可以實現父子組件單向通信(父向子傳值),在實現可復用組件,向組件中傳入DOM節點、html等內容以及某些組件庫的表格值二次處理等情況時,可以優先考慮v-slot。
$ refs/$ parent/ $ children/ $ r oot: 可 以實現父子組件雙向通信,其中 $root可以實現根組件實例向子孫組件跨級單向傳值。 在父組件沒有傳遞值或通過v-on綁定監聽時,父子間想要獲取彼此的屬性或方法可以考慮使用這些api。
$ attrs/ $ listeners: 能夠實現跨級雙向通信,能夠讓你簡單的獲取傳入的屬性和綁定的監聽,并且方便地向下級子組件傳遞,在構建高級組件時十分好用。
provide/inject:可以實現跨級單向通信,輕量地向子孫組件注入依賴,這是你在實現高級組件、創建組件庫時的不二之選。
eventBus:可以實現全局通信,在項目規模不大的情況下,可以利用eventBus實現全局的事件監聽。但是eventBus要慎用,避免全局污染和內存泄漏等情況。
Vuex:可以實現全局通信,是vue項目全局狀態管理的最佳實踐。在項目比較龐大,想要集中式管理全局組件狀態時,那么安裝Vuex準沒錯!
看完上述內容,你們掌握怎樣深入了解Vue組件七種通信方式的方法了嗎?如果還想學到更多技能或想了解更多相關內容,歡迎關注億速云行業資訊頻道,感謝各位的閱讀!
免責聲明:本站發布的內容(圖片、視頻和文字)以原創、轉載和分享為主,文章觀點不代表本網站立場,如果涉及侵權請聯系站長郵箱:is@yisu.com進行舉報,并提供相關證據,一經查實,將立刻刪除涉嫌侵權內容。