您好,登錄后才能下訂單哦!
您好,登錄后才能下訂單哦!
這篇文章主要介紹“SpringBoot怎么定制錯誤頁面及錯誤數據”,在日常操作中,相信很多人在SpringBoot怎么定制錯誤頁面及錯誤數據問題上存在疑惑,小編查閱了各式資料,整理出簡單好用的操作方法,希望對大家解答”SpringBoot怎么定制錯誤頁面及錯誤數據”的疑惑有所幫助!接下來,請跟著小編一起來學習吧!
我們知道 Spring Boot 已經提供了一套默認的異常處理機制,但是 Spring Boot 提供的默認異常處理機制卻并不一定適合我們實際的業務場景,因此,我們通常會根據自身的需要對 Spring Boot 全局異常進行統一定制,例如定制錯誤頁面,定制錯誤數據等。
我們可以通過以下 3 種方式定制 Spring Boot 錯誤頁面:
自定義 error.html
自定義動態錯誤頁面
自定義靜態錯誤頁面
我們可以直接在模板引擎文件夾(/resources/templates)下創建 error.html ,覆蓋 Spring Boot 默認的錯誤視圖頁面(Whitelabel Error Page)。
示例 1
1. 在 spring-boot-adminex 的模板引擎文件夾(classpath:/resources/templates)下,創建一個 error.html,代碼如下。
<!DOCTYPE html>
<html lang="en" xmlns:th="http://www.thymeleaf.org">
<head>
    <meta charset="UTF-8">
    <title>自定義 error.html</title>
</head>
<body>
<h2>自定義 error.html</h2>
<p>status:<span th:text="${status}"></span></p>
<p>error:<span th:text="${error}"></span></p>
<p>timestamp:<span th:text="${timestamp}"></span></p>
<p>message:<span th:text="${message}"></span></p>
<p>path:<span th:text="${path}"></span></p>
</body>
</html>
2. 啟動 Spring Boot,在完成登陸跳轉到主頁后,使用瀏覽器地訪問“http://localhost:8080/111”,結果如下圖。
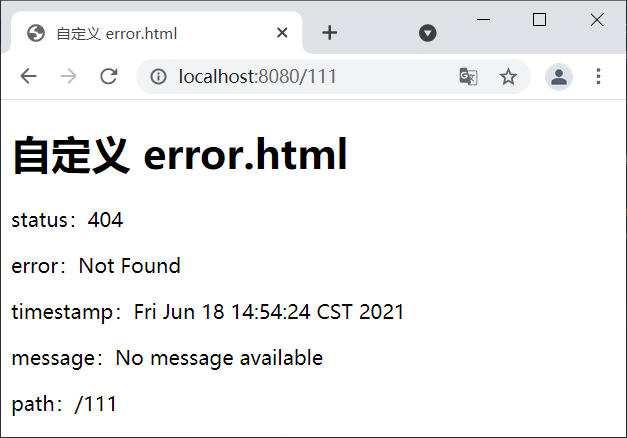
圖1:自定義 error.html
由圖 1 可以看出,Spring Boot 使用了我們自定義的 error.html 覆蓋了默認的錯誤視圖頁面(Whitelabel Error Page)。
如果 Sprng Boot 項目使用了模板引擎,當程序發生異常時,Spring Boot 的默認錯誤視圖解析器(DefaultErrorViewResolver)就會解析模板引擎文件夾(resources/templates/)下 error 目錄中的錯誤視圖頁面。
精確匹配
我們可以根據錯誤狀態碼(例如 404、500、400 等等)的不同,分別創建不同的動態錯誤頁面(例如 404.html、500.html、400.html 等等),并將它們存放在模板引擎文件夾下的 error 目錄中。當發生異常時,Spring Boot 會根據其錯誤狀態碼精確匹配到對應的錯誤頁面上。
示例 2
1. 在 spring-boot-adminex 的模板引擎文件夾下 error 目錄中,創建一個名為 404.html 的錯誤頁面,代碼如下。
<!DOCTYPE html>
<html lang="en" xmlns:th="http://www.thymeleaf.org">
<head>
    <meta charset="UTF-8">
    <title></title>
</head>
<body>
<h2>自定義動態錯誤頁面 404.html</h2>
<p>status:<span th:text="${status}"></span></p>
<p>error:<span th:text="${error}"></span></p>
<p>timestamp:<span th:text="${timestamp}"></span></p>
<p>message:<span th:text="${message}"></span></p>
<p>path:<span th:text="${path}"></span></p>
</body>
</html>
2. 啟動 Spring Boot,在完成登陸跳轉到主頁后,在瀏覽器地址欄輸入“http://localhost:8080/111”,結果如下圖。
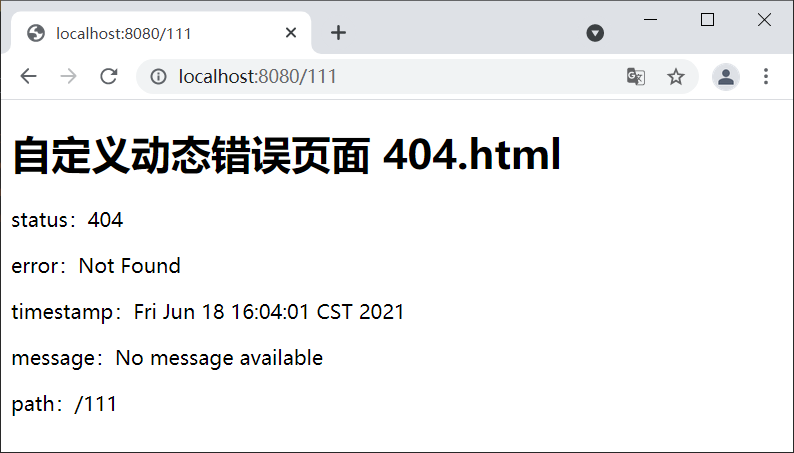
圖2:自定義動態錯誤頁面(精確匹配)
模糊匹配
我們還可以使用 4xx.html 和 5xx.html 作為動態錯誤頁面的文件名,并將它們存放在模板引擎文件夾下的 error 目錄中,來模糊匹配對應類型的所有錯誤,例如 404、400 等錯誤狀態碼以“4”開頭的所有異常,都會解析到動態錯誤頁面 4xx.html 上。
示例 3
在 spring-boot-adminex 的模板引擎文件夾下 error 目錄中,創建一個名為 4xx.html 的錯誤頁面,代碼如下。
<!DOCTYPE html>
<html lang="en" xmlns:th="http://www.thymeleaf.org">
<head>
    <meta charset="UTF-8">
    <title></title>
</head>
<body>
<h2>自定義動態錯誤頁面 4xx.html</h2>
<p>status:<span th:text="${status}"></span></p>
<p>error:<span th:text="${error}"></span></p>
<p>timestamp:<span th:text="${timestamp}"></span></p>
<p>message:<span th:text="${message}"></span></p>
<p>path:<span th:text="${path}"></span></p>
</body>
</html>
2. 啟動 Spring Boot,在完成登陸跳轉到主頁后,使用瀏覽器訪問“http://localhost:8080/111”,結果如下圖。
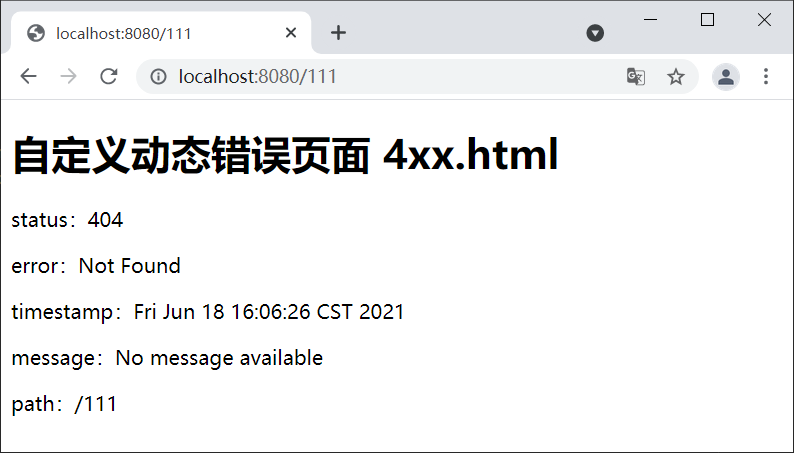
圖3:自定義動態錯誤頁面(模糊匹配)
若 Sprng Boot 項目沒有使用模板引擎,當程序發生異常時,Spring Boot 的默認錯誤視圖解析器(DefaultErrorViewResolver)則會解析靜態資源文件夾下 error 目錄中的靜態錯誤頁面。
精確匹配
我們可以根據錯誤狀態碼(例如 404、500、400 等等)的不同,分別創建不同的靜態錯誤頁面(例如 404.html、500.html、400.html 等等),并將它們存放在靜態資源文件夾下的 error 目錄中。當發生異常時,Spring Boot 會根據錯誤狀態碼精確匹配到對應的錯誤頁面上。
示例 4
1. 在 spring-boot-adminex 的靜態資源文件夾 src/recources/static 下的 error 目錄中,創建一個名為 404.html 的靜態錯誤頁面,代碼如下。
<!DOCTYPE html>
<html lang="en" xmlns:th="http://www.thymeleaf.org">
<head>
    <meta charset="UTF-8">
    <title></title>
</head>
<body>
<h2>自定義靜態錯誤頁面 404.html</h2>
<p>status:<span th:text="${status}"></span></p>
<p>error:<span th:text="${error}"></span></p>
<p>timestamp:<span th:text="${timestamp}"></span></p>
<p>message:<span th:text="${message}"></span></p>
<p>path:<span th:text="${path}"></span></p>
</body>
</html>
2. 啟動 Spring Boot,在完成登陸跳轉到主頁后,使用瀏覽器訪問“http://localhost:8080/111”,結果如下圖。

圖3:自定義靜態錯誤頁面(精確匹配)
由于該錯誤頁為靜態頁面,無法識別 Thymeleaf 表達式,因此無法展示與錯誤相關的錯誤信息。
模糊匹配
我們還可以使用 4xx.html 和 5xx.html 作為靜態錯誤頁面的文件名,并將它們存放在靜態資源文件夾下的 error 目錄中,來模糊匹配對應類型的所有錯誤,例如 404、400 等錯誤狀態碼以“4”開頭的所有錯誤,都會解析到靜態錯誤頁面 4xx.html 上。
示例 3
在 spring-boot-adminex 的模板引擎文件夾下的 error 目錄中,創建一個名為 4xx.html 的錯誤頁面,代碼如下。
<!DOCTYPE html>
<html lang="en" xmlns:th="http://www.thymeleaf.org">
<head>
    <meta charset="UTF-8">
    <title></title>
</head>
<body>
<h2>自定義靜態錯誤頁面 4xx.html</h2>
<p>status:<span th:text="${status}"></span></p>
<p>error:<span th:text="${error}"></span></p>
<p>timestamp:<span th:text="${timestamp}"></span></p>
<p>message:<span th:text="${message}"></span></p>
<p>path:<span th:text="${path}"></span></p>
</body>
</html>
2. 啟動 Spring Boot,在完成登陸跳轉到主頁后,使用瀏覽器訪問“http://localhost:8080/111”,結果如下圖。
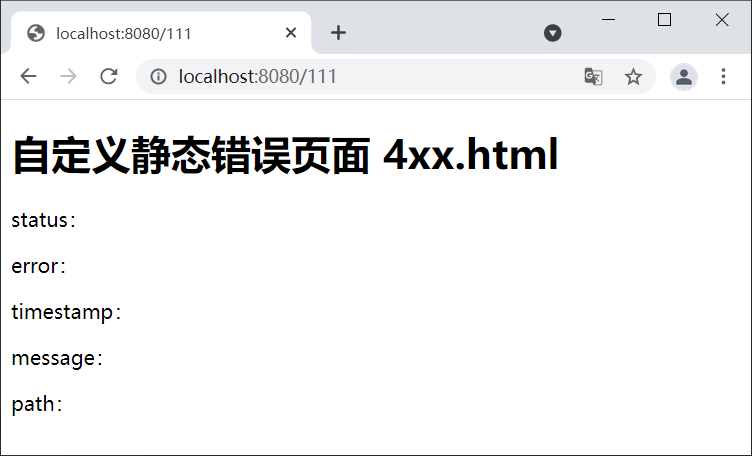
圖3:自定義靜態錯誤頁面(模糊匹配)
錯誤頁面優先級
以上 5 種方式均可以定制 Spring Boot 錯誤頁面,且它們的優先級順序為:自定義動態錯誤頁面(精確匹配)>自定義靜態錯誤頁面(精確匹配)>自定義動態錯誤頁面(模糊匹配)>自定義靜態錯誤頁面(模糊匹配)>自定義 error.html。
當遇到錯誤時,Spring Boot 會按照優先級由高到低,依次查找解析錯誤頁,一旦找到可用的錯誤頁面,則直接返回客戶端展示。
我們知道,Spring Boot 提供了一套默認的異常處理機制,其主要流程如下:
發生異常時,將請求轉發到“/error”,交由 BasicErrorController(Spring Boot 默認的 Error 控制器) 進行處理;
BasicErrorController 根據客戶端的不同,自動適配返回的響應形式,瀏覽器客戶端返回錯誤頁面,機器客戶端返回 JSON 數據。
BasicErrorController 處理異常時,會調用 DefaultErrorAttributes(默認的錯誤屬性處理工具) 的 getErrorAttributes() 方法獲取錯誤數據。
我們還可以定制 Spring Boot 的錯誤數據,具體步驟如下。
自定義異常處理類,將請求轉發到 “/error”,交由 Spring Boot 底層(BasicErrorController)進行處理,自動適配瀏覽器客戶端和機器客戶端。
通過繼承 DefaultErrorAttributes 來定義一個錯誤屬性處理工具,并在原來的基礎上添加自定義的錯誤數據。
被 @ControllerAdvice 注解的類可以用來實現全局異常處理,這是 Spring MVC 中提供的功能,在 Spring Boot 中可以直接使用。
1)在 net.biancheng.net.exception 包內,創建一個名為 UserNotExistException 的異常類,代碼如下。
package net.biancheng.www.exception;
/**
* 自定義異常
*/
public class UserNotExistException extends RuntimeException {
    public UserNotExistException() {
        super("用戶不存在!");
    }
}
2)在 IndexController 添加以下方法,觸發 UserNotExistException 異常,代碼如下。
@Controller
public class IndexController {
    ......
    @GetMapping(value = {"/testException"})
    public String testException(String user) {
        if ("user".equals(user)) {
            throw new UserNotExistException();
        }
        //跳轉到登錄頁 login.html
        return "login";
    }
}
3)在 net.biancheng.www.controller 中,創建一個名為 MyExceptionHandler 異常處理類,代碼如下。
package net.biancheng.www.controller;
import net.biancheng.www.exception.UserNotExistException;
import org.springframework.web.bind.annotation.ControllerAdvice;
import org.springframework.web.bind.annotation.ExceptionHandler;
import javax.servlet.http.HttpServletRequest;
import java.util.HashMap;
import java.util.Map;
@ControllerAdvice
public class MyExceptionHandler {
    @ExceptionHandler(UserNotExistException.class)
    public String handleException(Exception e, HttpServletRequest request) {
        Map<String, Object> map = new HashMap<>();
        //向 request 對象傳入錯誤狀態碼
        request.setAttribute("javax.servlet.error.status_code",500);
        //根據當前處理的異常,自定義的錯誤數據
        map.put("code", "user.notexist");
        map.put("message", e.getMessage());
        //將自定的錯誤數據傳入 request 域中
        request.setAttribute("ext",map);
        return "forward:/error";
    }
}1)在 net.biancheng.www.componet 包內,創建一個錯誤屬性處理工具類 MyErrorAttributes(繼承 DefaultErrorAttributes ),通過該類我們便可以添加自定義的錯誤數據,代碼如下。
package net.biancheng.www.componet;
import org.springframework.boot.web.error.ErrorAttributeOptions;
import org.springframework.boot.web.servlet.error.DefaultErrorAttributes;
import org.springframework.stereotype.Component;
import org.springframework.web.context.request.WebRequest;
import java.util.Map;
//向容器中添加自定義的儲物屬性處理工具
@Component
public class MyErrorAttributes extends DefaultErrorAttributes {
    @Override
    public Map<String, Object> getErrorAttributes(WebRequest webRequest, ErrorAttributeOptions options) {
        Map<String, Object> errorAttributes = super.getErrorAttributes(webRequest, options);
        //添加自定義的錯誤數據
        errorAttributes.put("company", "www.biancheng.net");
        //獲取 MyExceptionHandler 傳入 request 域中的錯誤數據
        Map ext = (Map) webRequest.getAttribute("ext", 0);
        errorAttributes.put("ext", ext);
        return errorAttributes;
    }
}
2)在 templates/error 目錄下,創建動態錯誤頁面 5xx.html,代碼如下。
<!DOCTYPE html>
<html lang="en" xmlns:th="http://www.thymeleaf.org">
<head>
    <meta charset="UTF-8">
    <title>自定義 error.html</title>
</head>
<body>
<p>status:<span th:text="${status}"></span></p>
<p>error:<span th:text="${error}"></span></p>
<p>timestamp:<span th:text="${timestamp}"></span></p>
<p>message:<span th:text="${message}"></span></p>
<p>path:<span th:text="${path}"></span></p>
<!--取出定制的錯誤信息-->
<h4>以下為定制錯誤數據:</h4>
<p>company:<span th:text="${company}"></span></p>
<p>code:<span th:text="${ext.code}"></span></p>
<p>path:<span th:text="${ext.message}"></span></p>
</body>
</html>
3)啟動 Spring Boot,訪問“http://localhost:8080/testException?user=user”,結果如下圖。
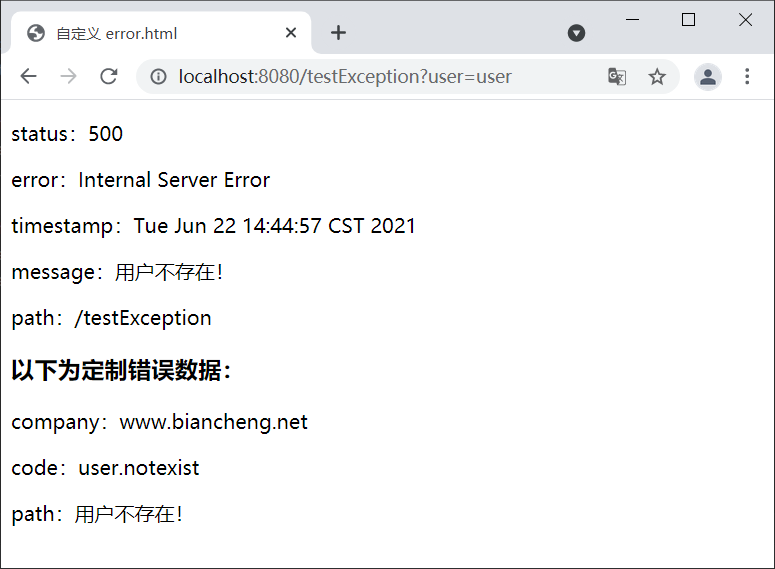
圖4:定制錯誤數據
注意:為了避免攔截器干擾,建議先將攔截器屏蔽掉。
到此,關于“SpringBoot怎么定制錯誤頁面及錯誤數據”的學習就結束了,希望能夠解決大家的疑惑。理論與實踐的搭配能更好的幫助大家學習,快去試試吧!若想繼續學習更多相關知識,請繼續關注億速云網站,小編會繼續努力為大家帶來更多實用的文章!
免責聲明:本站發布的內容(圖片、視頻和文字)以原創、轉載和分享為主,文章觀點不代表本網站立場,如果涉及侵權請聯系站長郵箱:is@yisu.com進行舉報,并提供相關證據,一經查實,將立刻刪除涉嫌侵權內容。