您好,登錄后才能下訂單哦!
您好,登錄后才能下訂單哦!
怎樣利用CSS background系列屬性實現一些花式的文字效果,相信很多沒有經驗的人對此束手無策,為此本文總結了問題出現的原因和解決方法,通過這篇文章希望你能解決這個問題。
如何利用CSS實現花式文字效果?
寫本文的動機是在于,某天,被這樣一個標題所吸引 -- 10 Masterfully Designed Websites,其中列舉了 10 個極具創意的 Web 網站。
其中一個 Red Bull Racing 網站,是介紹關于 F1 紅牛車隊的主頁。其中有這樣一個非常有意思的 Hover 動畫效果:

這個文字的 hover 出現效果,看似簡單,其實想要完全實現它,僅僅依靠 CSS 是非常復雜的,其中一個比較難的地方在于 -- 如何讓一個效果,逐漸作用給整段文字中的部分,而不是一次將整個效果賦予整段文本。
到這里,我想起了之前在這篇文章中 -- CSS 文字裝飾 text-decoration & text-emphasis,我介紹的一種 使用 background 模擬下劃線 的效果。
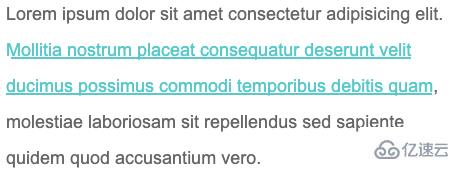
看個簡單的 DEMO,使用 background 模擬文字的下劃線效果:
<p>Lorem ipsum dolor sit amet consectetur adipisicing elit. <a>Mollitia nostrum placeat consequatur deserunt velit ducimus possimus commodi temporibus debitis quam</a>, molestiae laboriosam sit repellendus sed sapiente quidem quod accusantium vero.</p>
p {
    width: 600px;
    font-size: 24px;
    color: #666;
}
a {
    background: linear-gradient(90deg, #0cc, #0cc);
    background-size: 100% 3px;
    background-repeat: no-repeat;
    background-position: 100% 100%;
    color: #0cc;
}
使用 background 模擬文字的下劃線效果,效果圖如下:
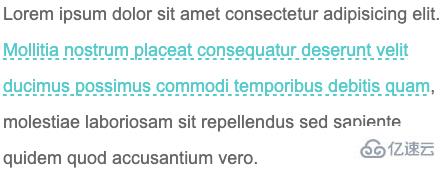
又或者,使用 background 模擬虛線下劃線:
a {
    background: linear-gradient(90deg, #0cc 50%, transparent 50%, transparent 1px);
    background-size: 10px 2px;
    background-repeat: repeat-x;
    background-position: 100% 100%;
}
CodePen Demo -- 使用 background 模擬下劃線與虛線下劃線
https://codepen.io/Chokcoco/pen/YzNQKwm
當然這個是最基礎的,巧妙的運用 background 的各種屬性,我們實現各種有意思的效果。
background-size 與 background-position 實現文字 hover 動效這里,通過巧妙改變 background-size 與 background-position 屬性,我們可以實現一些非常有意思的文字 hover 效果。
先看這樣一個 Demo,核心代碼作用于被 <p> 標簽包裹的 <a> 標簽之上:
<p>Lorem ipsum dolor sit amet consectetur adipisicing elit. <a>Mollitia nostrum placeat consequatur deserunt velit ducimus possimus commodi temporibus debitis quam</a>, molestiae laboriosam sit repellendus sed sapiente quidem quod accusantium vero.</p>
a {
    background: linear-gradient(90deg, #ff3c41, #fc0, #0ebeff);
    background-size: 0 3px;
    background-repeat: no-repeat;
    background-position: 0 100%;
    transition: 1s all;
    color: #0cc;
}

a:hover {
    background-size: 100% 3px;
    color: #000;
}
我們雖然,設定了 background: linear-gradient(90deg, #ff3c41, #fc0, #0ebeff),但是一開始默認它的 background-size: 0 3px,也就是一開始是看不到下劃線的,當 hover 的時候,改變 background-size: 100% 3px,這個時候,就會有一個 0 3px 到 100% 3px 的變換,也就是一個從無到有的伸展效果。
看看最后的效果:

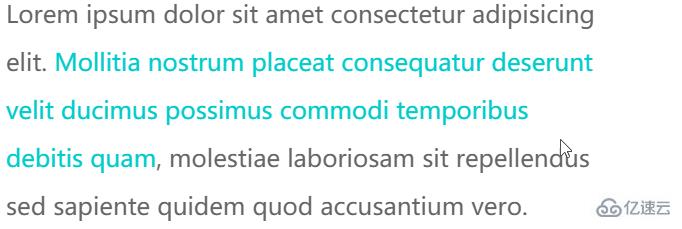
由于設定的 background-position 是 0 100%,如果,設定的 background-position 是 100% 100%,我們可以得到一個反向的效果:
// 其他都保持一致,只改變 background-position,從 0 100% 改為 100% 100%
a {
    ...
    background-position: 100% 100%;
    ...
}
再看看效果,你可以對比著上面的動圖看看具體的差異點在哪:
CodePen Demo -- background 下劃線動畫
https://codepen.io/Chokcoco/pen/QWdgLwp
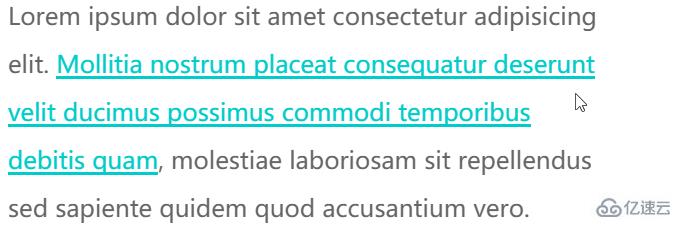
OK,如果我們使用 background 實現兩條重疊的下劃線,再利用上述的兩個不同的 background-position 值,我們就可以得到一個更有意思的下劃線 hover 效果。
CSS 代碼示意,注意看兩條使用 background 模擬的下劃線的 background-position 的值是不一樣的:
a {
    background:
        linear-gradient(90deg, #0cc, #0cc),
        linear-gradient(90deg, #ff3c41, #fc0, #8500d8);
    background-size: 100% 3px, 0 3px;
    background-repeat: no-repeat;
    background-position: 100% 100%, 0 100%;
    transition: 0.5s all;
    color: #0cc;
}
a:hover {
    background-size: 0 3px, 100% 3px;
    color: #000;
}
可以得到這樣一種效果,其實每次 hover, 都有兩條下劃線在移動:
CodePen Demo -- background 下劃線動畫
https://codepen.io/Chokcoco/pen/MWJogjQ
background-size 與 background-position 配合 background-clip 實現文字的漸現上述一大段都在圍繞 -- 下劃線。
回歸到本文一開始提到的 Gif 效果,我們能否實現在一段文字中,實現文字的漸現效果呢?
上述技巧利用的是 background,那么 background 背景色能否改變文字的顏色的?答案是可以的,只需要借助 background-clip。
我們稍微改造下代碼,實現利用 background-clip 實現 hover 的時候部分文字逐漸改變顏色:
<p>
Lorem ipsum dolor sit amet consectetur adipisicing elit.
<a>Mollitia nostrum placeat consequatur deserunt velit ducimus possimus commodi temporibus debitis quam, </a>
molestiae laboriosam sit repellendus sed sapiente quidem quod accusantium vero.
</p>
p {
    color: #666;
    cursor: pointer;
}

a {
    background: linear-gradient(90deg, #fc0, #fc0);
    background-size: 0 100px;
    background-repeat: no-repeat;
    background-position: 0 100%;
    background-clip: text;
    transition: .6s all linear;
}

p:hover a {
    background-size: 100% 100%;
    color: transparent;
}
看看效果,通過 background-clip: text 的遮罩裁剪,我們將 background: linear-gradient(90deg, #fc0, #fc0) 背景色作用給了文字,同時利用 color: transparent 讓文字展示出背景色的色值:
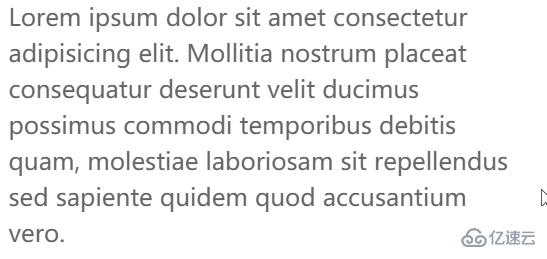
CodePen Demo -- background-size 與 background-position 以及 background-clip 實現文字逐個漸現
https://codepen.io/Chokcoco/pen/qBjmvdq?editors=1100
當然,稍微對上述代碼變形,我們就可以演化出幾種不同的效果。
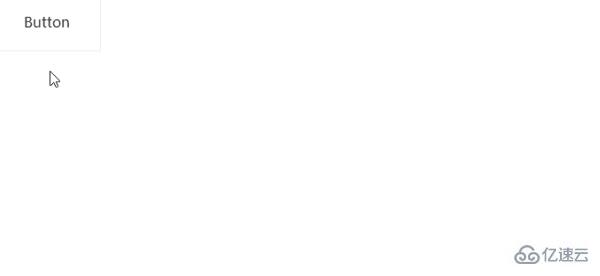
第一種就是從透明到有顏色,逐漸展現,這里我們只需要讓 color 一直是 transparent 即可(下述效果借助了一個按鈕去觸發效果):
<div class="button">Button</div>
<p><a>Lorem ipsum dolor sit amet consectetur adipisicing elit. Mollitia nostrum placeat consequatur deserunt velit ducimus possimus commodi temporibus debitis quam, molestiae laboriosam sit repellendus sed sapiente quidem quod accusantium vero.</a></p>
a {
    background: linear-gradient(90deg, #fc0, #fc0);
    background-size: 0 100px;
    background-repeat: no-repeat;
    background-position: 0 100%;
    color: transparent;
    background-clip: text;
}
.button:hover ~ p a {
    transition: .8s all linear;
    background-size: 0 100px, 100% 100%;
}
效果如下:
還可以實現文字從一種顏色到另外一種顏色的逐個轉變,只需要添加多一層 background-image 漸變。
<div class="button">Button</div>
<p><a>Lorem ipsum dolor sit amet consectetur adipisicing elit. Mollitia nostrum placeat consequatur deserunt velit ducimus possimus commodi temporibus debitis quam, molestiae laboriosam sit repellendus sed sapiente quidem quod accusantium vero.</a></p>
a {
    background:
        linear-gradient(90deg, #999, #999),
        linear-gradient(90deg, #fc0, #fc0);
    background-size: 100% 100%, 0 100px;
    background-repeat: no-repeat;
    background-position: 100% 100%, 0 100%;
    color: transparent;
    background-clip: text;
}
.button:hover ~ p a {
    transition: .8s all linear;
    background-size: 0 100px, 100% 100%;
}
這里需要解釋一下,雖然設置了 color: transparent,但是文字默認還是有顏色的,默認的文字顏色,是由第一層漸變賦予的 background: linear-gradient(90deg, #999, #999), linear-gradient(90deg, #fc0, #fc0),也就是這一層:linear-gradient(90deg, #999, #999)。
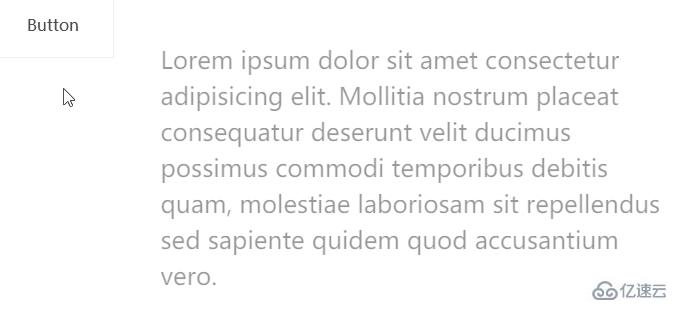
當 hover 觸發時,linear-gradient(90deg, #999, #999) 這一層漸變逐漸消失,而另外一層 linear-gradient(90deg, #fc0, #fc0)` 逐漸出現,借此實現上述效果。
CodePen -- background-clip 文字漸現效果
https://codepen.io/Chokcoco/pen/XWgpyqz
這里,我們簡單利用這個技巧模擬一下文章一開始列出的 Gif 的效果:

這個效果原作者的技巧是:
將每個單詞作為一個對象,包裹一個特殊的 class
利用 animation-delay 將動畫逐漸賦予每個單詞
這里,我們將整段文本統一處理,簡單還原:
<div class="button">Button</div>
<p><a>Lorem ipsum dolor sit amet consectetur adipisicing elit. Mollitia nostrum placeat consequatur deserunt velit ducimus possimus commodi temporibus debitis quam, molestiae laboriosam sit repellendus sed sapiente quidem quod accusantium vero.</a></p>
/** 動畫核心 background、line-height、opacity **/
a {
    background:
        linear-gradient(90deg, #ff5722, #ff5722),
        linear-gradient(90deg, #aaa, #aaa);
    background-size: 100% 100%, 0 100px;
    background-repeat: no-repeat;
    background-position: 100% 100%, 0 100%;
    cursor: pointer;
    color: transparent;
    background-clip: text;
    line-height: 3;
    opacity: 0;
}
.button:hover ~ p a {
    transition: 1.2s background .3s ease-out, .8s line-height ease-out, .6s opacity ease-in;
    background-size: 0 100px, 100% 100%;
    color: transparent;
    line-height: 1;
    opacity: 1;
}
/ ** 簡單控制半透明黑色遮罩出現 **/
a::before {
    content: "";
    position: fixed;
    background: rgba(0, 0, 0, .8);
    top: 0;
    left: 0;
    right: 0;
    bottom: 0;
    z-index: -1;
    transition: .3s all linear;
    opacity: 0;
}
.button:hover ~ p a::before {
    opacity: 1;
}
效果如下:
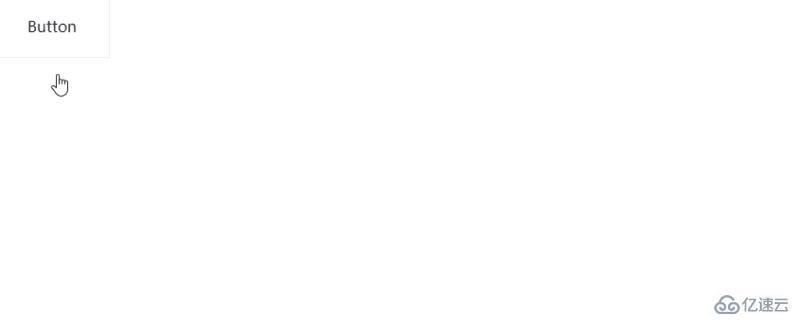
可以看到,由于是整體控制整段文本,效果上沒有逐個單詞控制的好,但是優點是代碼量非常少。對于一些簡單卡片類的 hover 場景,足以。
background-image、background-clip 實現文字漸現效果
https://codepen.io/Chokcoco/pen/abwWMJm
當然,題圖效果使用純 CSS 也是不在話下的。只不過就不是簡單能夠統一處理的了。
這里,我們需要對每一個單詞進行精細化的處理,并且使用每個單詞的偽元素進行額外的動畫。
簡單的結構如下:
<div class="button">Button</div>
<div class="g-wrap"></div>
<p>
    <span data-text="Lorem">Lorem</span>
    <span data-text="ipsum">ipsum</span>
    <span data-text="dolor">dolor</span>
    <span data-text="sit">sit</span>
    <span data-text="amet">amet</span>
    // ... 類似結構
</p>
可以看到,每個單詞都被 <span> 包裹,并且添加了 data-text,方便偽元素拿到當前單詞。
接下來,就是設定動畫,并且通過順序給每個 <span> 添加相應遞增的 animation-delay 以實現沒個單詞動畫的差異性。核心的偽代碼如下:
p {
    position: relative;
    width: 500px;
    overflow: hidden;
}

p span {
    position: relative;
    display: inline-block;
    opacity: 0;
    transform: translateY(15px) translateZ(0);
    transition-property: transform, opacity;
    transition-duration: .3s, .2s;
}

.button:hover ~ p span {
    opacity: 1;
    color: #ddd;
    transform: translateY(0) translateZ(0);
    transition-duration: 1s, .2s;
}

p span:after,
p span:before {
    position: absolute;
    content: attr(data-text);
    top: 0;
    left: 0;
    z-index: 1;
    transform: translateZ(0);
}

p span:after {
    color: #e62541;
    transition-property: opacity;
    transition-duration: .1s;
}

.button:hover ~ p span:after {
    opacity: 0;
    transition-property: opacity;
    transition-duration: .4s;
}

@for $i from 1 to 21 {
    p span:nth-child(#{$i}) {
        transition-delay: #{$i * 0.04}s;

        &::after {
            transition-delay: #{$i * 0.04 + 0.2}s;
        }
    }
}
其實動畫本身不太復雜,主要講兩點:
hover 狀態下和非 hover 狀態下的 transition-duration 是不一樣的,是因為取消 hover 過程中,動畫消失過程的時間通常是要求更短的;
借助了 SASS 的循環 @for $i from 1 to 21 {} 遞增給每個 span 和它的偽元素添加了遞增的 transition-delay;
最終,我們可以得到如下的結果:

看完上述內容,你們掌握怎樣利用CSS background系列屬性實現一些花式的文字效果的方法了嗎?如果還想學到更多技能或想了解更多相關內容,歡迎關注億速云行業資訊頻道,感謝各位的閱讀!
免責聲明:本站發布的內容(圖片、視頻和文字)以原創、轉載和分享為主,文章觀點不代表本網站立場,如果涉及侵權請聯系站長郵箱:is@yisu.com進行舉報,并提供相關證據,一經查實,將立刻刪除涉嫌侵權內容。