您好,登錄后才能下訂單哦!
您好,登錄后才能下訂單哦!
這篇文章主要介紹了怎么使用React創建視頻和動畫 ,具有一定借鑒價值,感興趣的朋友可以參考下,希望大家閱讀完這篇文章之后大有收獲,下面讓小編帶著大家一起了解一下。
Remotion是一個最近推出的庫,它允許您使用 React 創建視頻和動態圖形。作為一名 Web 開發人員,我發現它非常有趣,因為它為我們自己創建視頻和動畫打開了一扇新的大門。
它的官網:
https://www.remotion.dev/
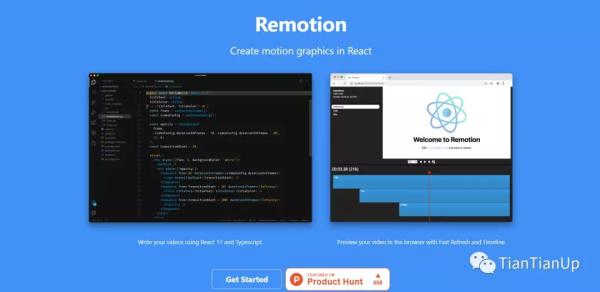
Source: https://www.remotion.dev/
正如我提到的,Remotion是最近推出的一個令人興奮的庫,它允許你使用你最喜歡的網絡技術,如HTML、CSS、JavaScript、TypeScript等來創建視頻和動畫。
除此之外,你還可以使用你所有關于編程、函數、算法、API的知識來為視頻添加各種效果。作為一個基于React的庫,Remotion能夠最大限度地利用Reacts的特性,如可重用的組件、強大的組合和快速重載。
Remotion還配備了一個被稱為Remotion Player的播放器,它給你帶來了真正的視頻編輯器的感覺,它可以用瀏覽器來播放和審查你的視頻。
創建一個新的Remotion項目是非常簡單的。但有兩個依賴項你應該先安裝。
步驟1:安裝NodeJS和FFMPEG
由于安裝NodeJS是非常常見的,我將重點介紹安裝FFMPEG。首先,你需要從他們的下載頁面下載合適版本的FFMPEG。
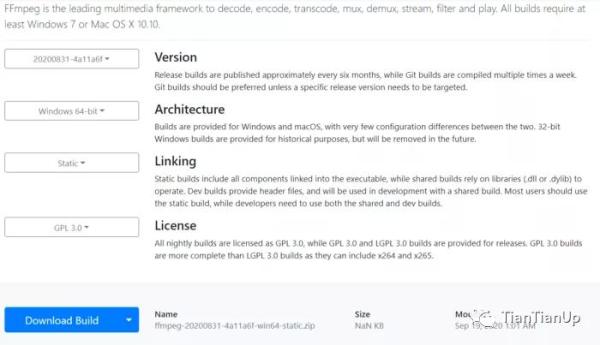
FFMPEG Downloads page.
然后將其解壓到你選擇的文件夾中,并在CMD中以管理員權限運行以下命令(在windows中)來更新你的路徑變量。
setx /M PATH "path\to\ffmpeg\bin;%PATH%"
第2步:啟動新項目
安裝完上述依賴后,初始化一個新的Remotion視頻只需要一個命令,你可以使用yarn或npm來實現。
yarn create video or npm init video
你已經成功地初始化了你的第一個Remotion項目,你可以使用npm run start來啟動該項目。
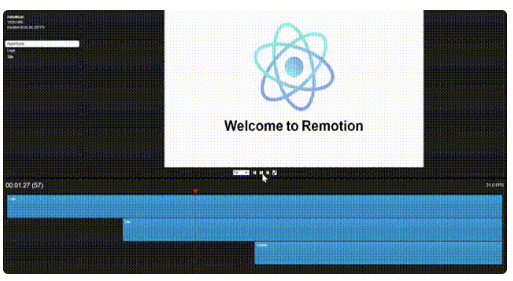
Default Remotion Project
既然你已經啟動了你的Remotion項目,你可以開始創建你的視頻。但我認為在這之前,如果你對Remotion的基礎知識有一定的了解會更好。
Video Properties
Width, height, durationInFrames, fps是由Remotion提供的視頻屬性。
你可以在組件中使用這些屬性來配置組件的像素大小,該組件應該播放多少幀,以及每秒鐘的幀數。
import { useVideoConfig } from “remotion”;export const ExampleVideo = () => { const { fps, durationInFrames, width, height } = useVideoConfig();return ( <div style={{ flex: 1, justifyContent: “center”, alignItems: “center” }}> This video is {durationInFrames / fps} seconds long. </div> ); };建議使用useVideoConfig派生這些屬性,就像上面的例子一樣,使你的組件可以重復使用。
Compositions
Compositions也是Remotion中的一種組件,在這里你可以使用上述屬性作為元數據。
import {Composition} from 'remotion'; import {HelloReaders} from './HelloReaders';export const RemotionVideo: React.FC = () => { return ( <> <Composition id=”HelloReaders” component={HelloReaders} durationInFrames={150} fps={30} width={1024} height={720} defaultProps={{ titleText: ‘Welcome to My Blog’, titleColor: ‘black’, }} /> <Composition ... /> <Composition ... /> </> ); }如果你觀察項目中的Video.tsx文件,你會看到3個Composition組件,每個組件中都有元數據,包括視頻屬性。
同時,這些組合也顯示在Remotion Player的左上角。
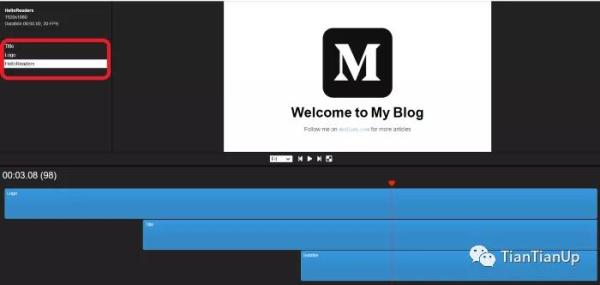
Compositions List
Animation Properties
當涉及到視頻時,動畫是最重要的,而Remotion為您提供了配置一些驚人的動畫的自由。例如,如果你需要一個簡單的臉部效果,你可以逐幀調整幀的不透明度。
const frame = useCurrentFrame(); const opacity = frame >= 20 ? 1 : (frame / 20); return ( <div style={{ opacity: opacity }}> Hello Readers! </div> )除此之外,Remotion還有2個內建的函數,名為interpolate和spring,你可以用它們來建立更高級的動畫。
插值函數接受4個輸入參數,包括輸入值(主要是幀),輸入可以承擔的范圍值,你想把輸入映射到的數值范圍,以及一個可選參數。
彈簧動畫通過使動畫更自然,讓你在演示中更有創意。例如,下面的彈簧動畫配置會給你的文本添加一個小的縮放效果。
const {fps} = useVideoConfig(); const scale = spring({ fps, from: 0, to: 1, frame });return ( <span style={{ color: titleColor, marginLeft: 10, marginRight: 10, transform: `scale(${scale})`, display: ‘inline-block’, }} > Welcome to My Blog </span> )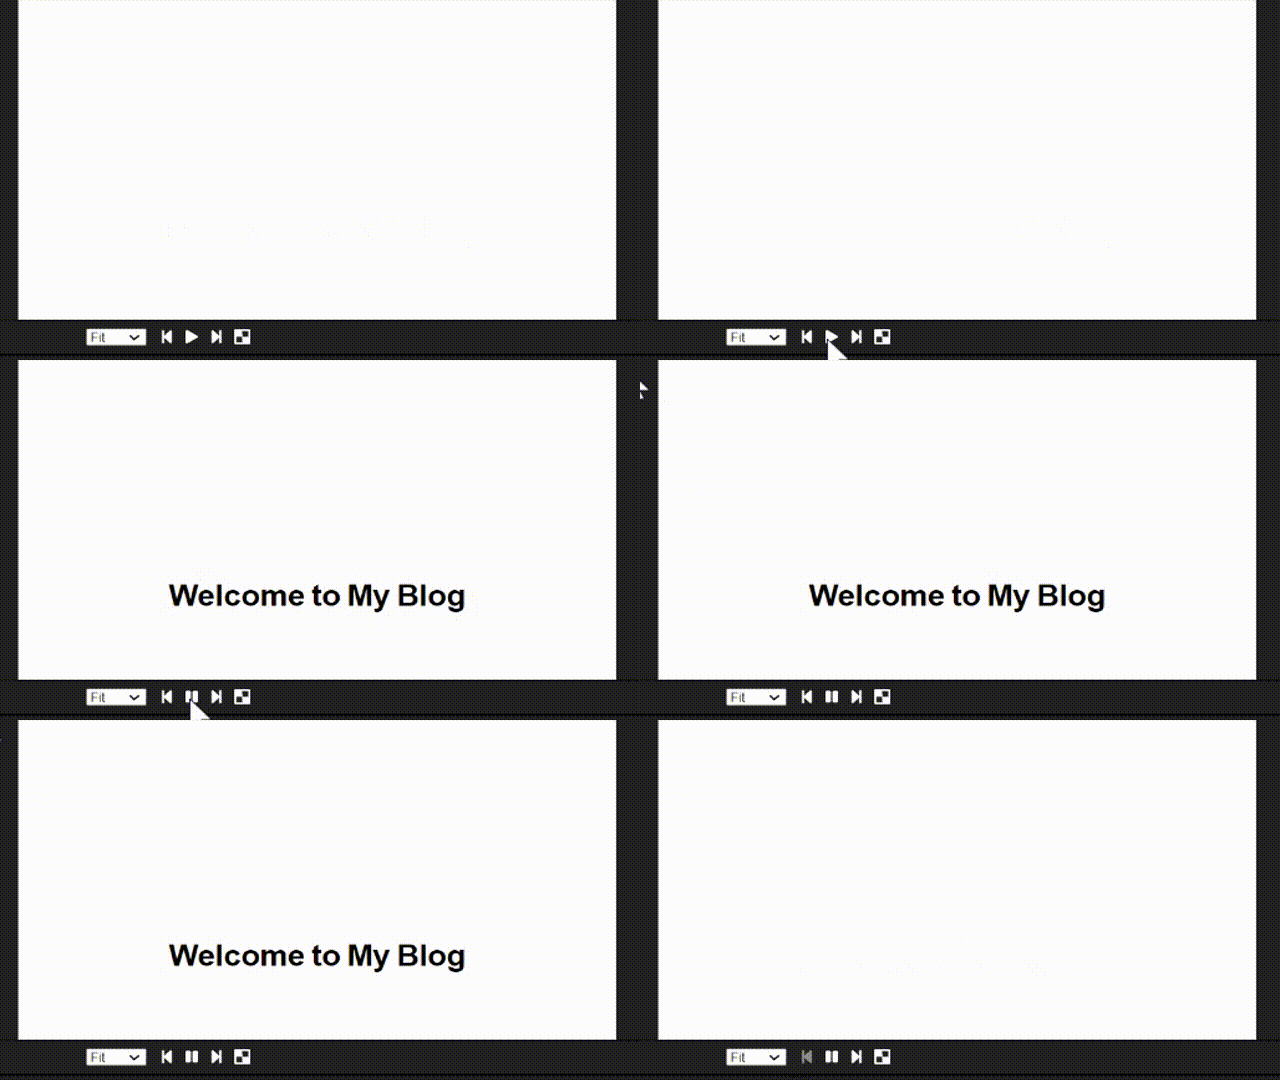
Spring animation
Sequence Component
Remotion中的 Sequence組件完成了2個主要任務。它主要是用來給視頻中的元素分配不同的時間框架。在保持元素之間的聯系的同時,它也允許你重復使用同一個組件。
Sequence組件是一個高階組件,它有能力容納子組件。除此之外,它還接受3個prop,包括2個必需的prop和1個可選的prop。
name : 這是一個可選的prop。你指定的名字將出現在Remotion播放器的時間線上。如果你使用正確的命名模式,你將能夠理解每個組件是如何連接的。
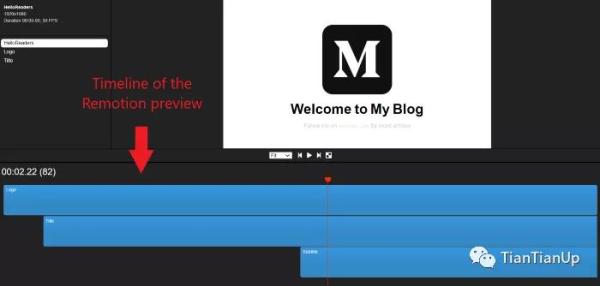
Timeline View of Remotion Player
from: 這定義了框架,該組件應該出現在視頻中。
durationInFrames: 以幀為單位的Sequence組件的長度。
例如,下面的Sequence組件將在20幀后出現在視頻中,并將持續到結束,因為durationOnFrames是無限的。
<Sequence from={20} durationInFrames={Infinity}> <Title titleText={titleText} titleColor={titleColor} /></Sequence>由于你現在對Remotion中的幾個基本屬性和組件有了基本的了解,我們可以開始使用Remotion創建第一個視頻。
正如你在上面的例子中已經看到的,我將創建一個簡單的視頻來顯示我的博客的標志和歡迎詞,并有一些動畫。
我將使用我們在文章開頭創建的默認項目布局。
步驟1
首先,我為我的視頻中的3個元素創建了3個組件:Logo.tsx, Title.tsx和SubText.tsx。
Logo.tsx file:
import {spring, useCurrentFrame, useVideoConfig} from ‘remotion’; import {Img} from ‘remotion’; import image from ‘./logo.png’ export const Logo: React.FC<{ transitionStart: number; }> = ({transitionStart}) => { const videoConfig = useVideoConfig(); const frame = useCurrentFrame(); return ( <div style={{ textAlign: ‘center’, marginTop: ‘10%’, width: videoConfig.width, height: videoConfig.height, }} > <Img style={{ transform:`scale(${spring({ fps: videoConfig.fps, frame: frame — transitionStart, config: { damping: 100, stiffness: 200, mass: 0.5, }, })})`, }} src={image}></Img> </div> ); };Title.tsx file:
import {spring, useCurrentFrame, useVideoConfig} from 'remotion';export const Title: React.FC<{ titleText: string; titleColor: string; }> = ({titleText, titleColor}) => { const videoConfig = useVideoConfig(); const frame = useCurrentFrame(); const text = titleText.split(‘ ‘).map((text) => ` ${text} `); return ( <h2 style={{ fontFamily: ‘Helvetica, Arial’, fontWeight: ‘bold’, fontSize: 110, textAlign: ‘center’, position: ‘absolute’, bottom: 160, width: ‘100%’, }} > {text.map((text, i) => { return ( <span key={text} style={{ color: titleColor, marginLeft: 10, marginRight: 10, transform: `scale(${spring({ fps: videoConfig.fps, frame: frame — i * 5, config: { damping: 100, stiffness: 200, mass: 0.5, }, })})`, display: ‘inline-block’, }} > {text} </span> ); })} </h2> ); };SubText.tsx file:
import {interpolate, useCurrentFrame} from 'remotion';export const Title: React.FC<{ titleText: string; titleColor: string; }> = ({titleText, titleColor}) => { const frame = useCurrentFrame(); const opacity = interpolate(frame, [0, 30], [0, 1]);return ( <div style={{ fontFamily: 'Helvetica, Arial', fontSize: 40, textAlign: 'center', position: 'absolute', bottom: 140, width: '100%', opacity, }} > Follow me on{' '}<code> medium.com </code>{' '} for more articles </div> ); };步驟2
然后,我把這3個組件導入到MyVideo.tsx中,并用Sequence組件包裝,為每個組件分配相關的時間框架。除此之外,我還將幾個prop和動畫傳遞給子組件。
import {interpolate, Sequence, useCurrentFrame, useVideoConfig} from ‘remotion’; import {Logo} from ‘./components/Logo’; import {SubText} from ‘./components/SubText’; import {Title} from ‘./components/Title’;export const MyVideo: React.FC<{ titleText: string; titleColor: string; }> = ({titleText, titleColor}) => {const frame = useCurrentFrame(); const videoConfig = useVideoConfig(); const opacity = interpolate( frame, [videoConfig.durationInFrames — 25, videoConfig.durationInFrames 15 ], [1, 0], {extrapolateLeft: ‘clamp’,extrapolateRight: ‘clamp’,} ); const transitionStart = 0;return ( <div style={{flex: 1, backgroundColor: ‘white’}}> <div style={{opacity}}> <Sequence from={0} durationInFrames={videoConfig.durationInFrames}> <Logo transitionStart={transitionStart} /> </Sequence> <Sequence from={transitionStart + 35} durationInFrames={Infinity}> <Title titleText={titleText} titleColor={titleColor} /> </Sequence> <Sequence from={transitionStart + 75} durationInFrames={Infinity}> <SubText /> </Sequence> </div> </div> ); };步驟3
最后,我將上述所有文件導入Video.tsx,并使用Composition組件傳遞相關元數據。
import {Composition} from ‘remotion’; import {MyVideo} from ‘./MyVideo’; import {Logo} from ‘./components/Logo’; import {SubText} from ‘./components/SubText’; export const RemotionVideo: React.FC = () => { return ( <> <Composition id=”HelloReaders” component={HelloReaders} durationInFrames={150} fps={30} width={1920} height={1080} defaultProps={{ titleText: ‘Welcome to My Blog’, titleColor: ‘black’, }} /> <Composition id=”Logo” component={Logo} durationInFrames={200} fps={30} width={1920} height={1080} /> <Composition id=”Title” component={SubText} durationInFrames={100} fps={30} width={1920} height={1080} /> </> ); };現在,你就可以運行你的第一個Remotion視頻了。你可以使用npm run start在開發模式下看到它,或者使用npm run build保存為mp4文件。
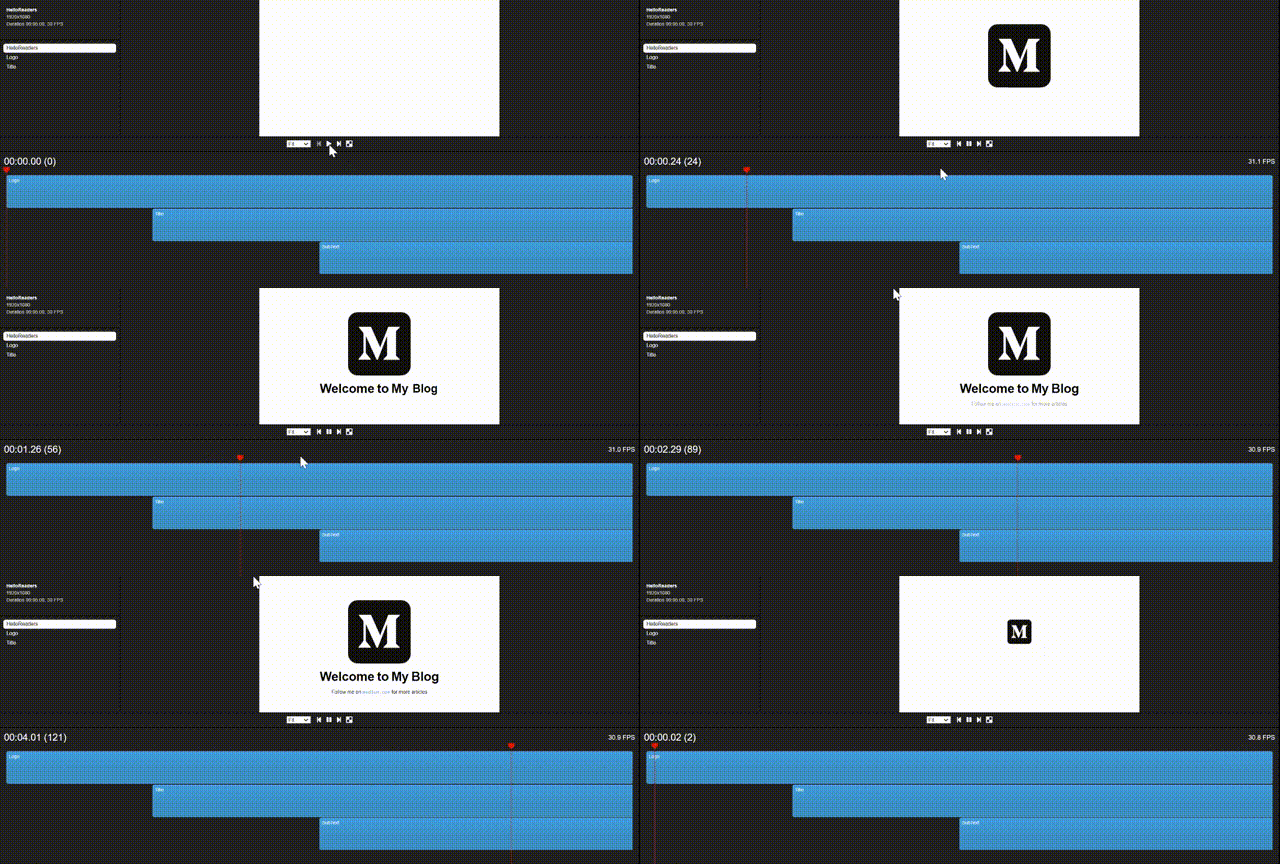
Finalized Video in Development Mode
雖然Remotion還很年輕,但它已經有了一些驚人的功能。它可能還達不到專業視頻編輯器的質量。但我們肯定可以期待一些驚喜的到來。
此外,Remotion還有像參數化渲染、服務器端渲染和數據獲取這樣的功能,這些對于開發者來說是非常熟悉的。他們可以利用自己的經驗,從這個工具中獲得最大的收益。
最重要的是,對于那些尋求創建個人使用的小視頻或動畫的方法的人來說,它是一個很好的選擇。
在我看來,我們可以利用Remotion來創建簡單的視頻和動畫,用我們所掌握的網絡開發知識。但在視頻編輯功能方面,很多東西需要改進和簡化。
不過,我強烈建議你下載Remotion,并給它一個機會。這將是一種全新的體驗。
感謝你能夠認真閱讀完這篇文章,希望小編分享的“怎么使用React創建視頻和動畫 ”這篇文章對大家有幫助,同時也希望大家多多支持億速云,關注億速云行業資訊頻道,更多相關知識等著你來學習!
免責聲明:本站發布的內容(圖片、視頻和文字)以原創、轉載和分享為主,文章觀點不代表本網站立場,如果涉及侵權請聯系站長郵箱:is@yisu.com進行舉報,并提供相關證據,一經查實,將立刻刪除涉嫌侵權內容。