您好,登錄后才能下訂單哦!
您好,登錄后才能下訂單哦!
這篇文章主要講解了“Springboot環境搭建的步驟”,文中的講解內容簡單清晰,易于學習與理解,下面請大家跟著小編的思路慢慢深入,一起來研究和學習“Springboot環境搭建的步驟”吧!
Springboot環境搭建
一、Eclipse搭建
1、使用插件創建
各個版本的Eclipse 對應的STS插件下載地址https://blog.csdn.net/zhen_6137/article/details/79384798
注意:StS插件運行必須是JDK1.8 否則會出現安裝失敗的情況
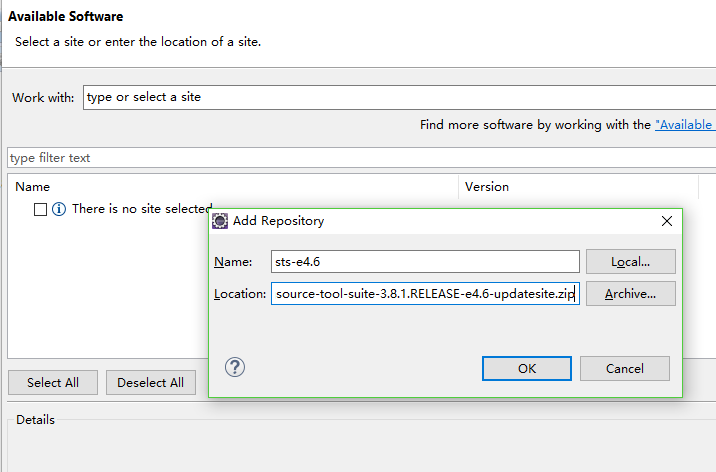
Help->Install New Software->Add->Archive Location:選中你下載的sts壓縮包,Name:隨便寫
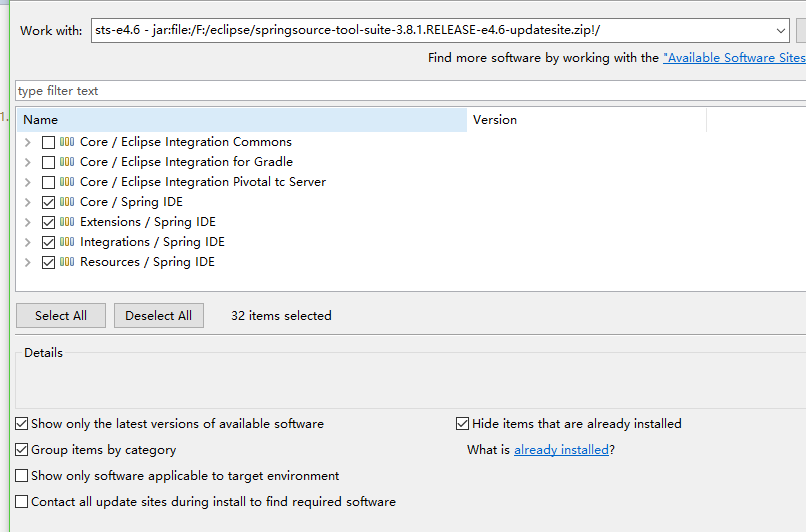
勾選帶有Spring IDE的項 (有4項),并去掉Contact all update…前面的勾選
新建項目
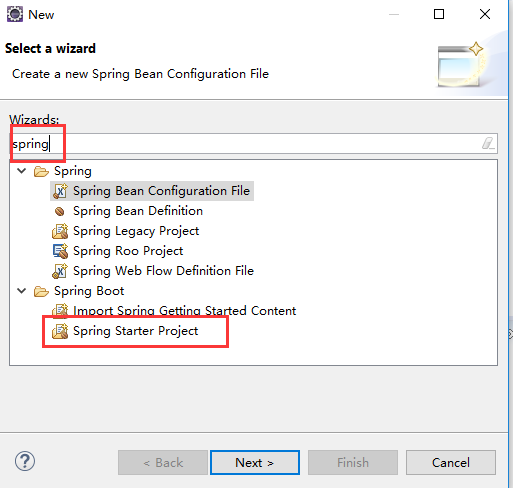
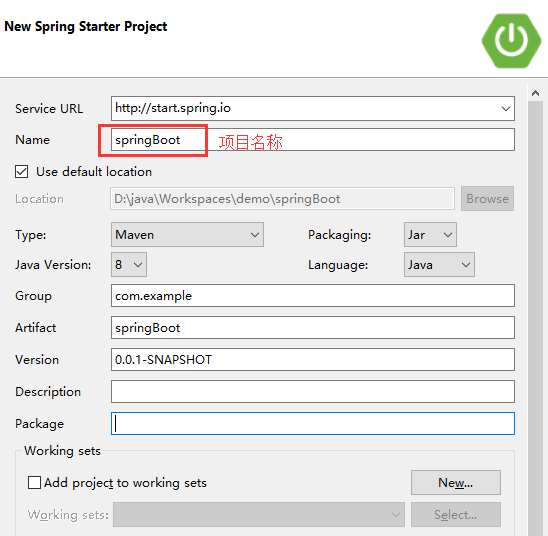
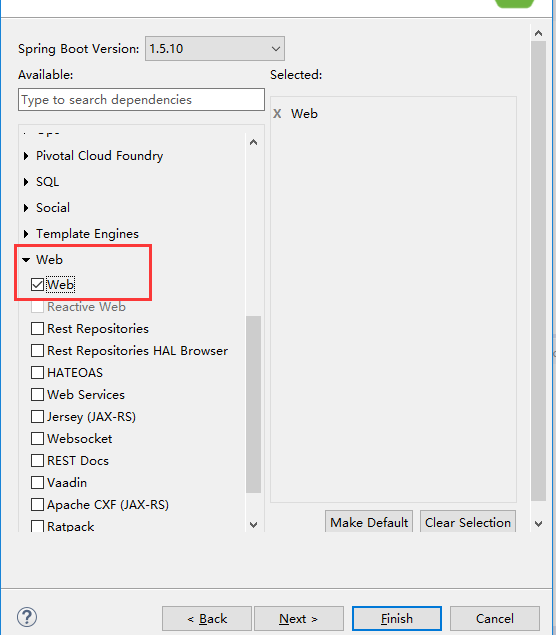
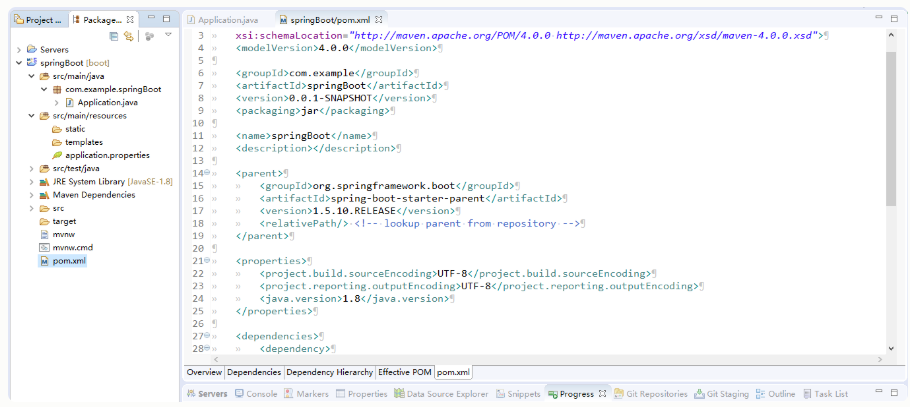
2、不使用插件創建
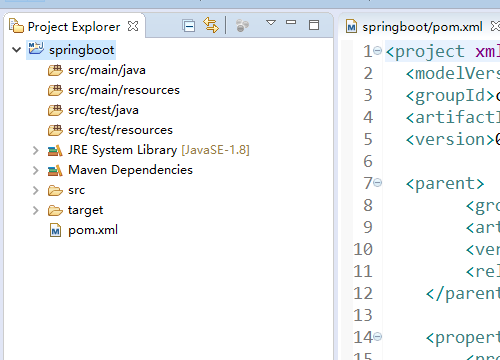
創建maven項目

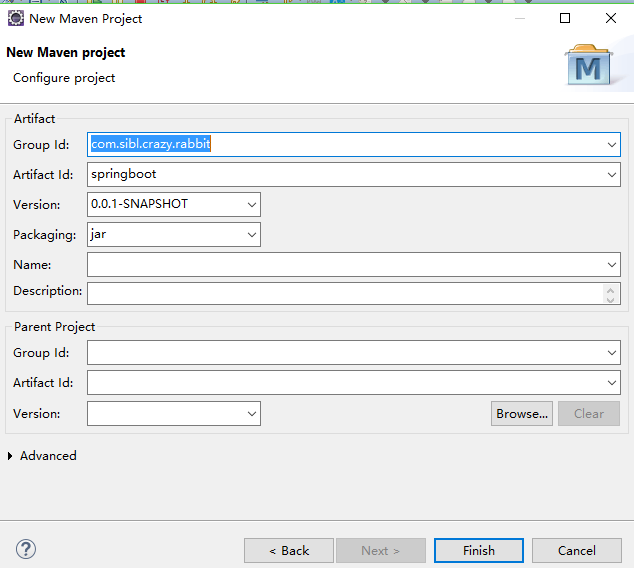
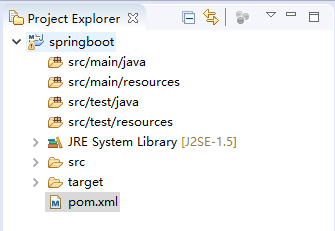
maven工程創建好了,下面我們要做的就是缺少的東西(如下)
第一步:導入pom文件相關依賴
Springboot版本選擇參考:https://blog.csdn.net/u011402896/article/details/79958116
<parent>
<groupId>org.springframework.boot</groupId>
<artifactId>spring-boot-starter-parent</artifactId>
<version>2.0.8.RELEASE</version>
<relativePath /> <!-- lookup parent from repository -->
</parent>
<properties>
<project.build.sourceEncoding>UTF-8</project.build.sourceEncoding>
<project.reporting.outputEncoding>UTF-8</project.reporting.outputEncoding>
<java.version>1.8</java.version>
</properties>
<dependencies>
<dependency>
<groupId>org.springframework.boot</groupId>
<artifactId>spring-boot-starter-web</artifactId>
</dependency>
<dependency>
<groupId>org.springframework.boot</groupId>
<artifactId>spring-boot-starter-test</artifactId>
<scope>test</scope>
</dependency>
</dependencies>
<build>
<plugins>
<plugin>
<groupId>org.springframework.boot</groupId>
<artifactId>spring-boot-maven-plugin</artifactId>
</plugin>
</plugins>
</build>
注意:pom.xml 出現org.codehaus.plexus.archiver.jar.Manifest.write(java.io.PrintWriter) 錯誤
解決方法:help-----Install New Software------Work with輸入 http://repo1.maven.org/maven2/.m2e/connectors/m2eclipse-mavenarchiver/0.17.2/N/LATEST/
next 安裝更新后,重啟eclipse,項目maven update 即可
二、IDEA搭建(自行查找)
三、STS(Spring tool suite)搭建(自行查找)
感謝各位的閱讀,以上就是“Springboot環境搭建的步驟”的內容了,經過本文的學習后,相信大家對Springboot環境搭建的步驟這一問題有了更深刻的體會,具體使用情況還需要大家實踐驗證。這里是億速云,小編將為大家推送更多相關知識點的文章,歡迎關注!
免責聲明:本站發布的內容(圖片、視頻和文字)以原創、轉載和分享為主,文章觀點不代表本網站立場,如果涉及侵權請聯系站長郵箱:is@yisu.com進行舉報,并提供相關證據,一經查實,將立刻刪除涉嫌侵權內容。