您好,登錄后才能下訂單哦!
您好,登錄后才能下訂單哦!
這篇文章主要講解了“怎么用Java整合Shiro實現用戶登錄認證功能”,文中的講解內容簡單清晰,易于學習與理解,下面請大家跟著小編的思路慢慢深入,一起來研究和學習“怎么用Java整合Shiro實現用戶登錄認證功能”吧!
內容:
對于Shiro,相信各位小伙伴應該聽說過,甚至應該也使用過!簡單而言,它是一個很好用的用戶身份認證、權限授權框架,可以實現用戶登錄認證,權限、資源授權、會話管理等功能,在本秒殺系統中,我們將主要采用該框架實現對用戶身份的認證和用戶的登錄功能。
值得一提的是,本篇博文介紹的“Shiro實現用戶登錄認證”功能模塊涉及到的數據庫表為用戶信息表user,下面進入代碼實戰環節。
<!--shiro權限控制-->
<dependency>
    <groupId>org.apache.shiro</groupId>
    <artifactId>shiro-ehcache</artifactId>
    <version>${shiro.version}</version>
</dependency>

<dependency>
    <groupId>org.apache.shiro</groupId>
    <artifactId>shiro-core</artifactId>
    <version>${shiro.version}</version>
</dependency>

<dependency>
    <groupId>org.apache.shiro</groupId>
    <artifactId>shiro-web</artifactId>
    <version>${shiro.version}</version>
</dependency>

<dependency>
    <groupId>org.apache.shiro</groupId>
    <artifactId>shiro-spring</artifactId>
    <version>${shiro.version}</version>
</dependency>
(2)緊接著是在UserController控制器中開發用戶前往登錄、用戶登錄以及用戶退出登錄的請求對應的功能方法,其完整的源代碼如下所示:
@Autowired
private Environment env;

//跳到登錄頁
@RequestMapping(value = {"/to/login","/unauth"})
public String toLogin(){
    return "login";
}

//登錄認證
@RequestMapping(value = "/login",method = RequestMethod.POST)
public String login(@RequestParam String userName, @RequestParam String password, ModelMap modelMap){
    String errorMsg="";
    try {
        if (!SecurityUtils.getSubject().isAuthenticated()){
            String newPsd=new Md5Hash(password,env.getProperty("shiro.encrypt.password.salt")).toString();
            UsernamePasswordToken token=new UsernamePasswordToken(userName,newPsd);
            SecurityUtils.getSubject().login(token);
        }
    }catch (UnknownAccountException e){
        errorMsg=e.getMessage();
        modelMap.addAttribute("userName",userName);
    }catch (DisabledAccountException e){
        errorMsg=e.getMessage();
        modelMap.addAttribute("userName",userName);
    }catch (IncorrectCredentialsException e){
        errorMsg=e.getMessage();
        modelMap.addAttribute("userName",userName);
    }catch (Exception e){
        errorMsg="用戶登錄異常,請聯系管理員!";
        e.printStackTrace();
    }
    if (StringUtils.isBlank(errorMsg)){
        return "redirect:/index";
    }else{
        modelMap.addAttribute("errorMsg",errorMsg);
        return "login";
    }
}

//退出登錄
@RequestMapping(value = "/logout")
public String logout(){
    SecurityUtils.getSubject().logout();
    return "login";
}
其中,在匹配用戶的密碼時,我們在這里采用的Md5Hash的方法,即MD5加密的方式進行匹配(因為數據庫的user表中用戶的密碼字段存儲的正是采用MD5加密后的加密串)
前端頁面login.jsp的內容比較簡單,只需要用戶輸入最基本的用戶名和密碼即可,如下圖所示為該頁面的部分核心源代碼:

當前端提交“用戶登錄”請求時,將以“提交表單”的形式將用戶名、密碼提交到后端UserController控制器對應的登錄方法中,該方法首先會進行最基本的參數判斷與校驗,校驗通過之后,會調用Shiro內置的組件SecurityUtils.getSubject().login()方法執行登錄操作,其中的登錄操作將主要在 “自定義的Realm的doGetAuthenticationInfo方法”中執行。
(3)接下來是基于Shiro的AuthorizingRealm,開發自定義的Realm,并實現其中的用戶登錄認證方法,即doGetAuthenticationInfo()方法。其完整的源代碼如下所示:
/**
 * 用戶自定義的realm-用于shiro的認證、授權
 * @Author:debug (SteadyJack)
 * @Date: 2019/7/2 17:55
 **/
public class CustomRealm extends AuthorizingRealm{
    private static final Logger log= LoggerFactory.getLogger(CustomRealm.class);

    private static final Long sessionKeyTimeOut=3600_000L;
    @Autowired
    private UserMapper userMapper;

    //授權
    @Override
    protected AuthorizationInfo doGetAuthorizationInfo(PrincipalCollection principalCollection) {
        return null;
    }

    //認證-登錄
    @Override
    protected AuthenticationInfo doGetAuthenticationInfo(AuthenticationToken authenticationToken) throws AuthenticationException {
        UsernamePasswordToken token= (UsernamePasswordToken) authenticationToken;
        String userName=token.getUsername();
        String password=String.valueOf(token.getPassword());
        log.info("當前登錄的用戶名={} 密碼={} ",userName,password);

        User user=userMapper.selectByUserName(userName);
        if (user==null){
            throw new UnknownAccountException("用戶名不存在!");
        }
        if (!Objects.equals(1,user.getIsActive().intValue())){
            throw new DisabledAccountException("當前用戶已被禁用!");
        }
        if (!user.getPassword().equals(password)){
            throw new IncorrectCredentialsException("用戶名密碼不匹配!");
        }

        SimpleAuthenticationInfo info=new SimpleAuthenticationInfo(user.getUserName(),password,getName());
        setSession("uid",user.getId());
        return info;
    }

    /**
     * 將key與對應的value塞入shiro的session中-最終交給HttpSession進行管理(如果是分布式session配置,那么就是交給redis管理)
     * @param key
     * @param value
     */
    private void setSession(String key,Object value){
        Session session=SecurityUtils.getSubject().getSession();
        if (session!=null){
            session.setAttribute(key,value);
            session.setTimeout(sessionKeyTimeOut);
        }
    }
}
其中,userMapper.selectByUserName(userName);主要用于根據userName查詢用戶實體信息,其對應的動態Sql的寫法如下所示:
<!--根據用戶名查詢-->
<select id="selectByUserName" resultType="com.debug.kill.model.entity.User">
  SELECT <include refid="Base_Column_List"/>
  FROM user
  WHERE user_name = #{userName}
</select>值得一提的是,當用戶登錄成功時(即用戶名和密碼的取值跟數據庫的user表相匹配),我們會借助Shiro的Session會話機制將當前用戶的信息存儲至服務器會話中,并緩存一定時間!(在這里是3600s,即1個小時)!
(4)最后是我們需要實現“用戶在訪問待秒殺商品詳情或者搶購商品或者任何需要進行攔截的業務請求時,如何自動檢測用戶是否處于登錄的狀態?如果已經登錄,則直接進入業務請求對應的方法邏輯,否則,需要前往用戶登錄頁要求用戶進行登錄”。
基于這樣的需求,我們需要借助Shiro的組件ShiroFilterFactoryBean 實現“用戶是否登錄”的判斷,以及借助FilterChainDefinitionMap攔截一些需要授權的鏈接URL,其完整的源代碼如下所示:
/**
 * shiro的通用化配置
 * @Author:debug (SteadyJack)
 * @Date: 2019/7/2 17:54
 **/
@Configuration
public class ShiroConfig {

    @Bean
    public CustomRealm customRealm(){
        return new CustomRealm();
    }

    @Bean
    public SecurityManager securityManager(){
        DefaultWebSecurityManager securityManager=new DefaultWebSecurityManager();
        securityManager.setRealm(customRealm());
        securityManager.setRememberMeManager(null);
        return securityManager;
    }

    @Bean
    public ShiroFilterFactoryBean shiroFilterFactoryBean(){
        ShiroFilterFactoryBean bean=new ShiroFilterFactoryBean();
        bean.setSecurityManager(securityManager());
        bean.setLoginUrl("/to/login");
        bean.setUnauthorizedUrl("/unauth");
	   //對于一些授權的鏈接URL進行攔截
        Map<String, String> filterChainDefinitionMap=new HashMap<>();
        filterChainDefinitionMap.put("/to/login","anon");
        filterChainDefinitionMap.put("/**","anon");

        filterChainDefinitionMap.put("/kill/execute","authc");
        filterChainDefinitionMap.put("/item/detail/*","authc");

        bean.setFilterChainDefinitionMap(filterChainDefinitionMap);
        return bean;
    }

}
從上述該源代碼中可以看出,Shiro的ShiroFilterFactoryBean組件將會對 URL=/kill/execute 和 URL=/item/detail/* 的鏈接進行攔截,即當用戶訪問這些URL時,系統會要求當前的用戶進行登錄(前提是用戶還沒登錄的情況下!如果已經登錄,則直接略過,進入實際的業務模塊!)
除此之外,Shiro的ShiroFilterFactoryBean組件還設定了 “前往登錄頁”和“用戶沒授權/沒登錄的前提下的調整頁”的鏈接,分別是 /to/login 和 /unauth!
(5)至此,整合Shiro框架實現用戶的登錄認證的前后端代碼實戰已經完畢了,將項目/系統運行在外置的tomcat服務器中,打開瀏覽器即可訪問進入“待秒殺商品的列表頁”,點擊“詳情”,此時,由于用戶還沒登陸,故而將跳轉至用戶登錄頁,如下圖所示:

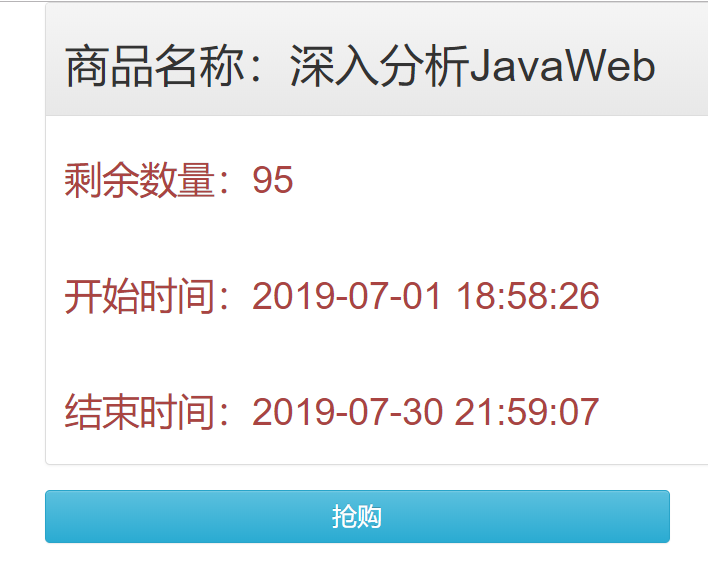
輸入用戶名:debug,密碼:123456,點擊“登錄”按鈕,即可登錄成功,并成功進入“詳情頁”,如下圖所示:

登錄成功之后,再回到剛剛上一個列表頁,即“待秒殺商品的列表頁”,再次點擊“詳情”按鈕,此時會直接進入“待秒殺商品的詳情頁”,而不會跳轉至“用戶登錄頁”,而且用戶的登錄態將會持續1個小時!(這是借助Shiro的Session的來實現的)。
感謝各位的閱讀,以上就是“怎么用Java整合Shiro實現用戶登錄認證功能”的內容了,經過本文的學習后,相信大家對怎么用Java整合Shiro實現用戶登錄認證功能這一問題有了更深刻的體會,具體使用情況還需要大家實踐驗證。這里是億速云,小編將為大家推送更多相關知識點的文章,歡迎關注!
免責聲明:本站發布的內容(圖片、視頻和文字)以原創、轉載和分享為主,文章觀點不代表本網站立場,如果涉及侵權請聯系站長郵箱:is@yisu.com進行舉報,并提供相關證據,一經查實,將立刻刪除涉嫌侵權內容。