您好,登錄后才能下訂單哦!
您好,登錄后才能下訂單哦!
這篇文章主要講解了“微服務中eureka+zuul的基本部署教程”,文中的講解內容簡單清晰,易于學習與理解,下面請大家跟著小編的思路慢慢深入,一起來研究和學習“微服務中eureka+zuul的基本部署教程”吧!
由于前段時間遇到工作危機差點被開讓我意識到技術的重要性,所以在公司架構師的建議下開始了解和學習微服務,首先學習的就是zuul網關和eureka注冊中心,因為白天工作開發量比較多,所以只能晚上抽空學習,如今終于可以簡單的部署一套環境并成功運行起來了,雖然這些對于老手來說可以算是皮毛了,但是對我來說還是值得高興的。
關于zuul和eureka的相關介紹我就不多說了一搜一大把,直接上配置。
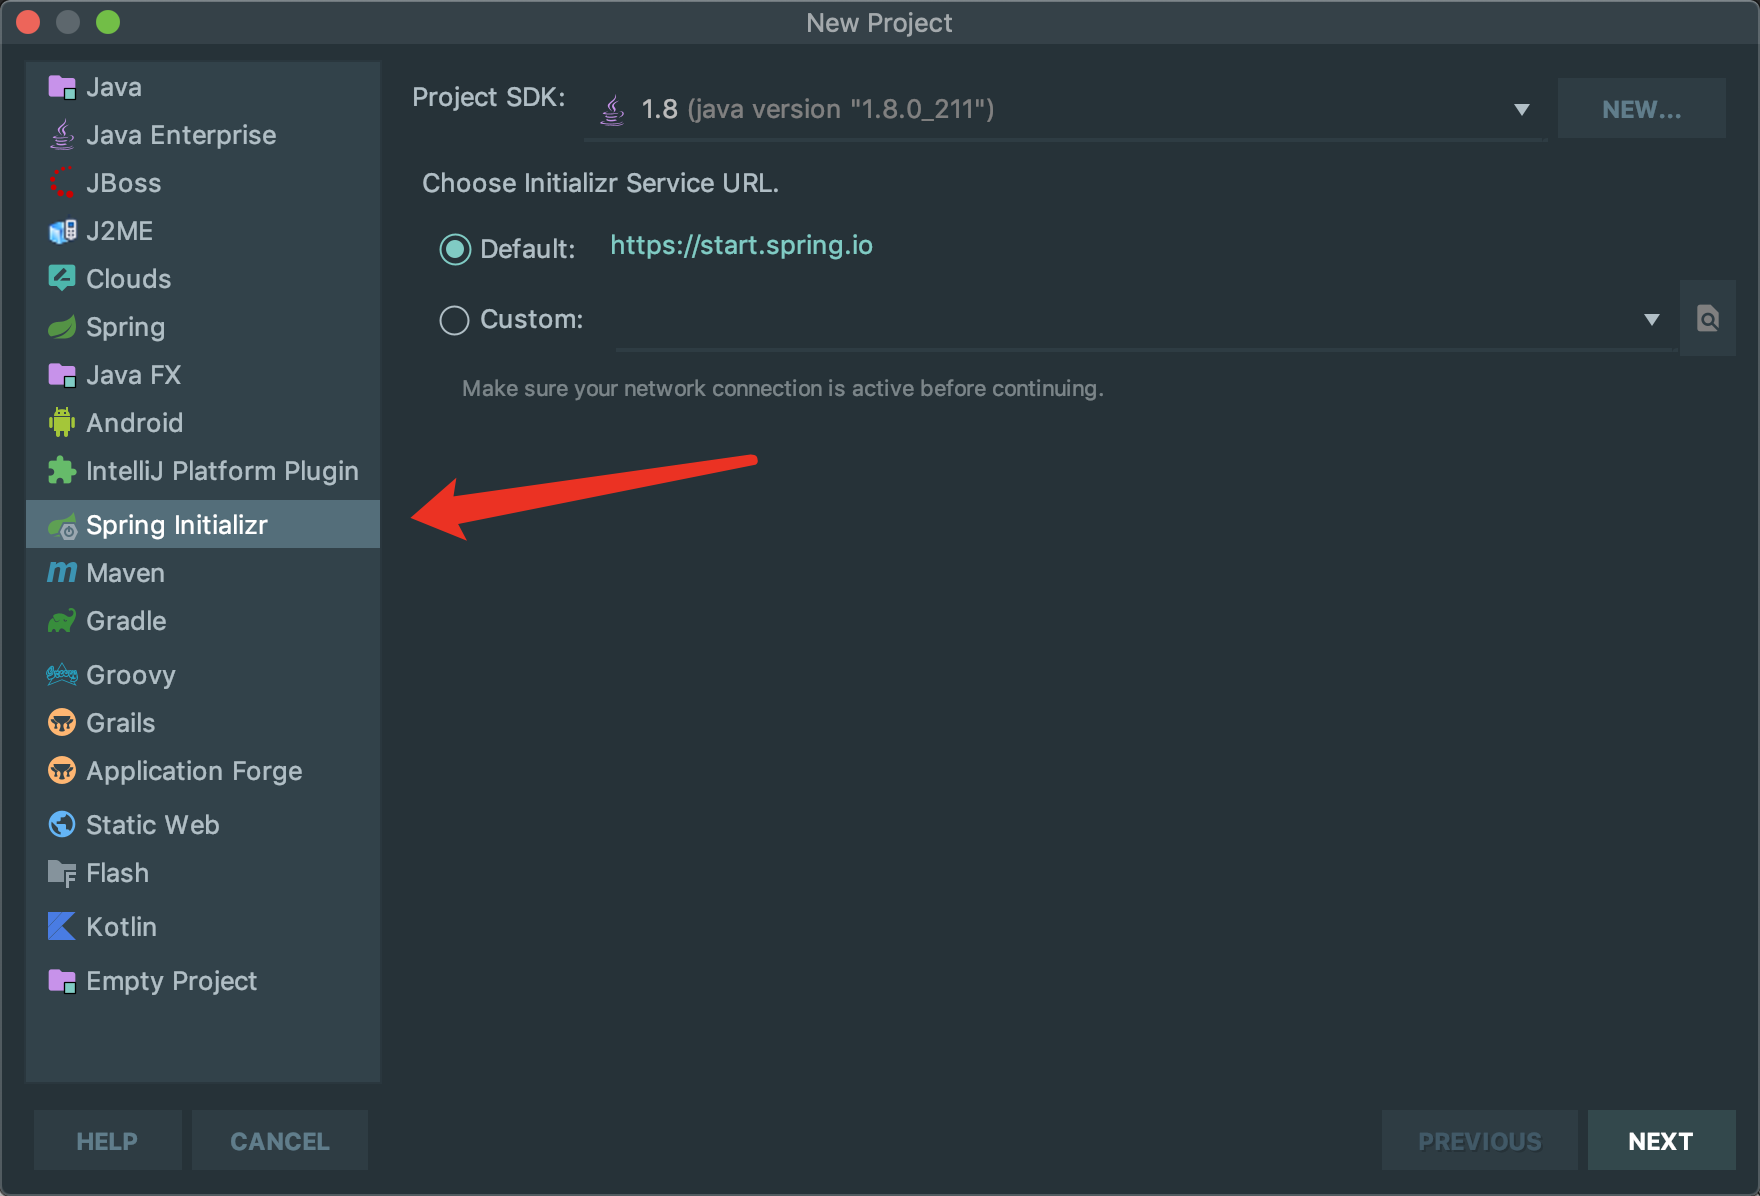
1.首先創建Spring boot。

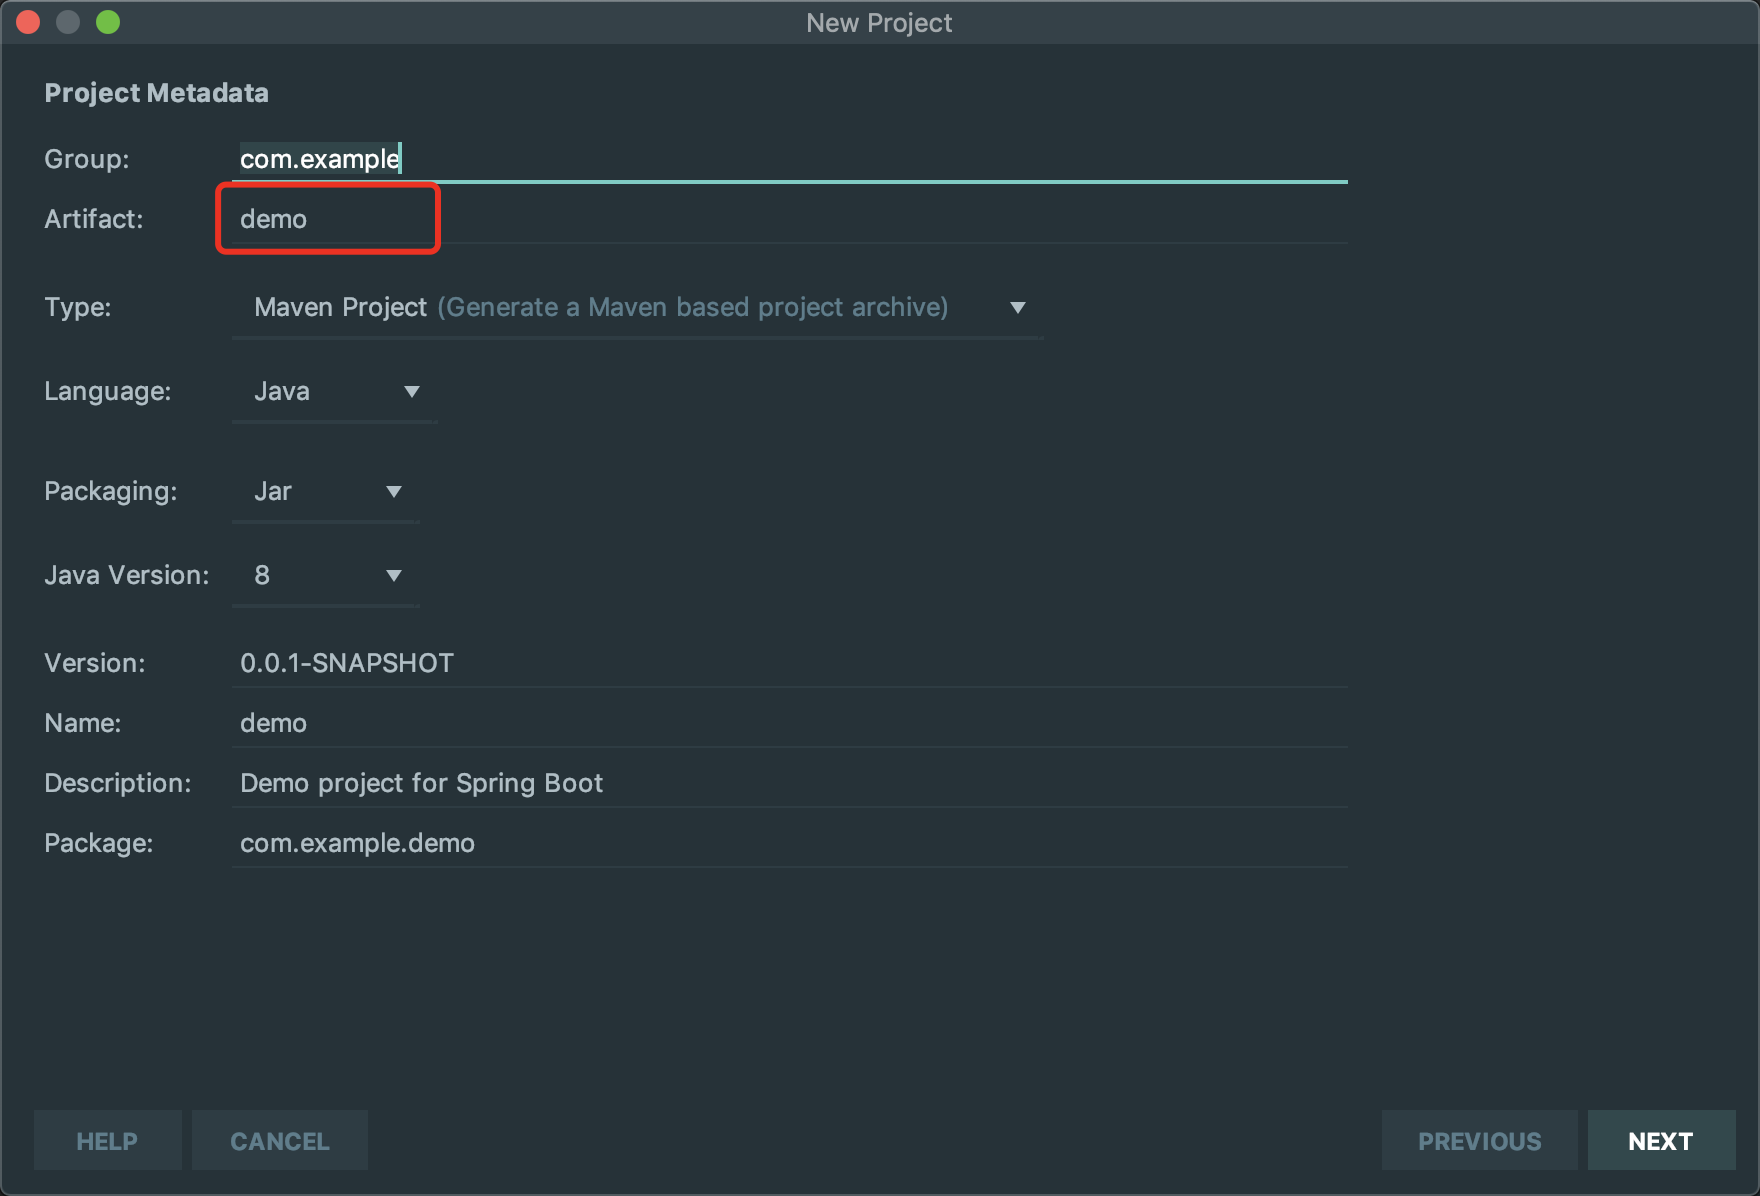
下一步修改項目名

然后一直下一步就可以了,中間選擇組件的時候我直接跳過,創建后在pom里加也可以。
2.引入相關依賴
eureka:
 <!-- 服務端 ->
 <dependency>
    <groupId>org.springframework.cloud</groupId>
    <artifactId>spring-cloud-starter-netflix-eureka-server</artifactId>
  </dependency>
zuul:
        <dependency>
            <groupId>org.springframework.cloud</groupId>
            <artifactId>spring-cloud-starter-netflix-zuul</artifactId>
        </dependency>
        <!-- 客戶端 -->
        <dependency>
            <groupId>org.springframework.cloud</groupId>
            <artifactId>spring-cloud-starter-netflix-eureka-client</artifactId>
        </dependency>
dome1、dome2:
        <!-- 客戶端 -->
        <dependency>
            <groupId>org.springframework.cloud</groupId>
            <artifactId>spring-cloud-starter-netflix-eureka-client</artifactId>
        </dependency>

        <dependency>
            <groupId>org.springframework.boot</groupId>
            <artifactId>spring-boot-starter-web</artifactId>
        </dependency>
3.啟動類注解
eureka:
@EnableEurekaServer
zuul:
@EnableZuulProxy
dome1、dome2:
@EnableEurekaClient
4:配置文件
eureka:application.properties
server.port=8080
eureka.instance.hostname=127.0.0.1
# 是否向服務中心注冊自己
eureka.client.register-with-eureka=false
# 是否檢索服務
eureka.client.fetch-registry=false
eureka.instance.prefer-ip-address=true
# 服務注冊中心的配置內容,指定服務注冊中心的位置
eureka.client.service-url.defaultZone=http://${eureka.instance.hostname}:${server.port}/eureka/
zuul:application.yml
server:
  port: 8084 #服務端口
spring:
  application:
    name: api-zuul #服務名
eureka:
  client:
    registry-fetch-interval-seconds: 5 # 獲取服務列表的周期:5s
    service-url:
      defaultZone: http://127.0.0.1:8080/eureka #eureka地址
zuul:
  prefix: /api # 添加路由前綴所有訪問路由加這個前綴
  retryable: true #是否開啟重試功能
  routes:
    api: # 隨便起
      path: /service/** #訪問地址以service請求的都會轉發到service-provider-A
      serviceId: service-provider-A # 如果兩個服務名都是以service-provider-A注冊到eureka,zuul會隨機轉發
dome1、dome2:application.properties(端口不同,服務名相同)
# 注冊中心的注冊地址
eureka.client.service-url.defaultZone=http://127.0.0.1:8080/eureka/
# 服務名稱--調用的時候根據名稱來調用該服務的方法
spring.application.name=service-provider-A
server.port=8081
以上配置為負載均衡的配置,反向代理可將zuul中routes下的配置新增一個名,path和serviceid為另一個服務名就可以。
dome1、dome2需要各自創建一個測試類
package com.example.eurekaclientdemo.controller;

import org.springframework.web.bind.annotation.GetMapping;
import org.springframework.web.bind.annotation.PathVariable;
import org.springframework.web.bind.annotation.RequestMapping;
import org.springframework.web.bind.annotation.RestController;

import java.util.HashMap;
import java.util.Map;

@RequestMapping("/users")
@RestController
public class UserController {

    @GetMapping("/{name}")
    public Map<String,Object> getUser(@PathVariable("name") String userName) {
        Map<String,Object> data = new HashMap<>();
        data.put("id",userName);
        data.put("from","provider-A-1");
        return data;
    }

}
package com.example.eurekaclient2demo.controller;
import org.springframework.web.bind.annotation.GetMapping;
import org.springframework.web.bind.annotation.PathVariable;
import org.springframework.web.bind.annotation.RequestMapping;
import org.springframework.web.bind.annotation.RestController;
import java.util.HashMap;
import java.util.Map;
@RequestMapping("/users")
@RestController
public class UserController {
@GetMapping("/{name}")
public Map<String,Object> getUser(@PathVariable("name") String userName) {
Map<String,Object> data = new HashMap<>();
data.put("id",userName);
data.put("from","provider-A-2");
return data;
}
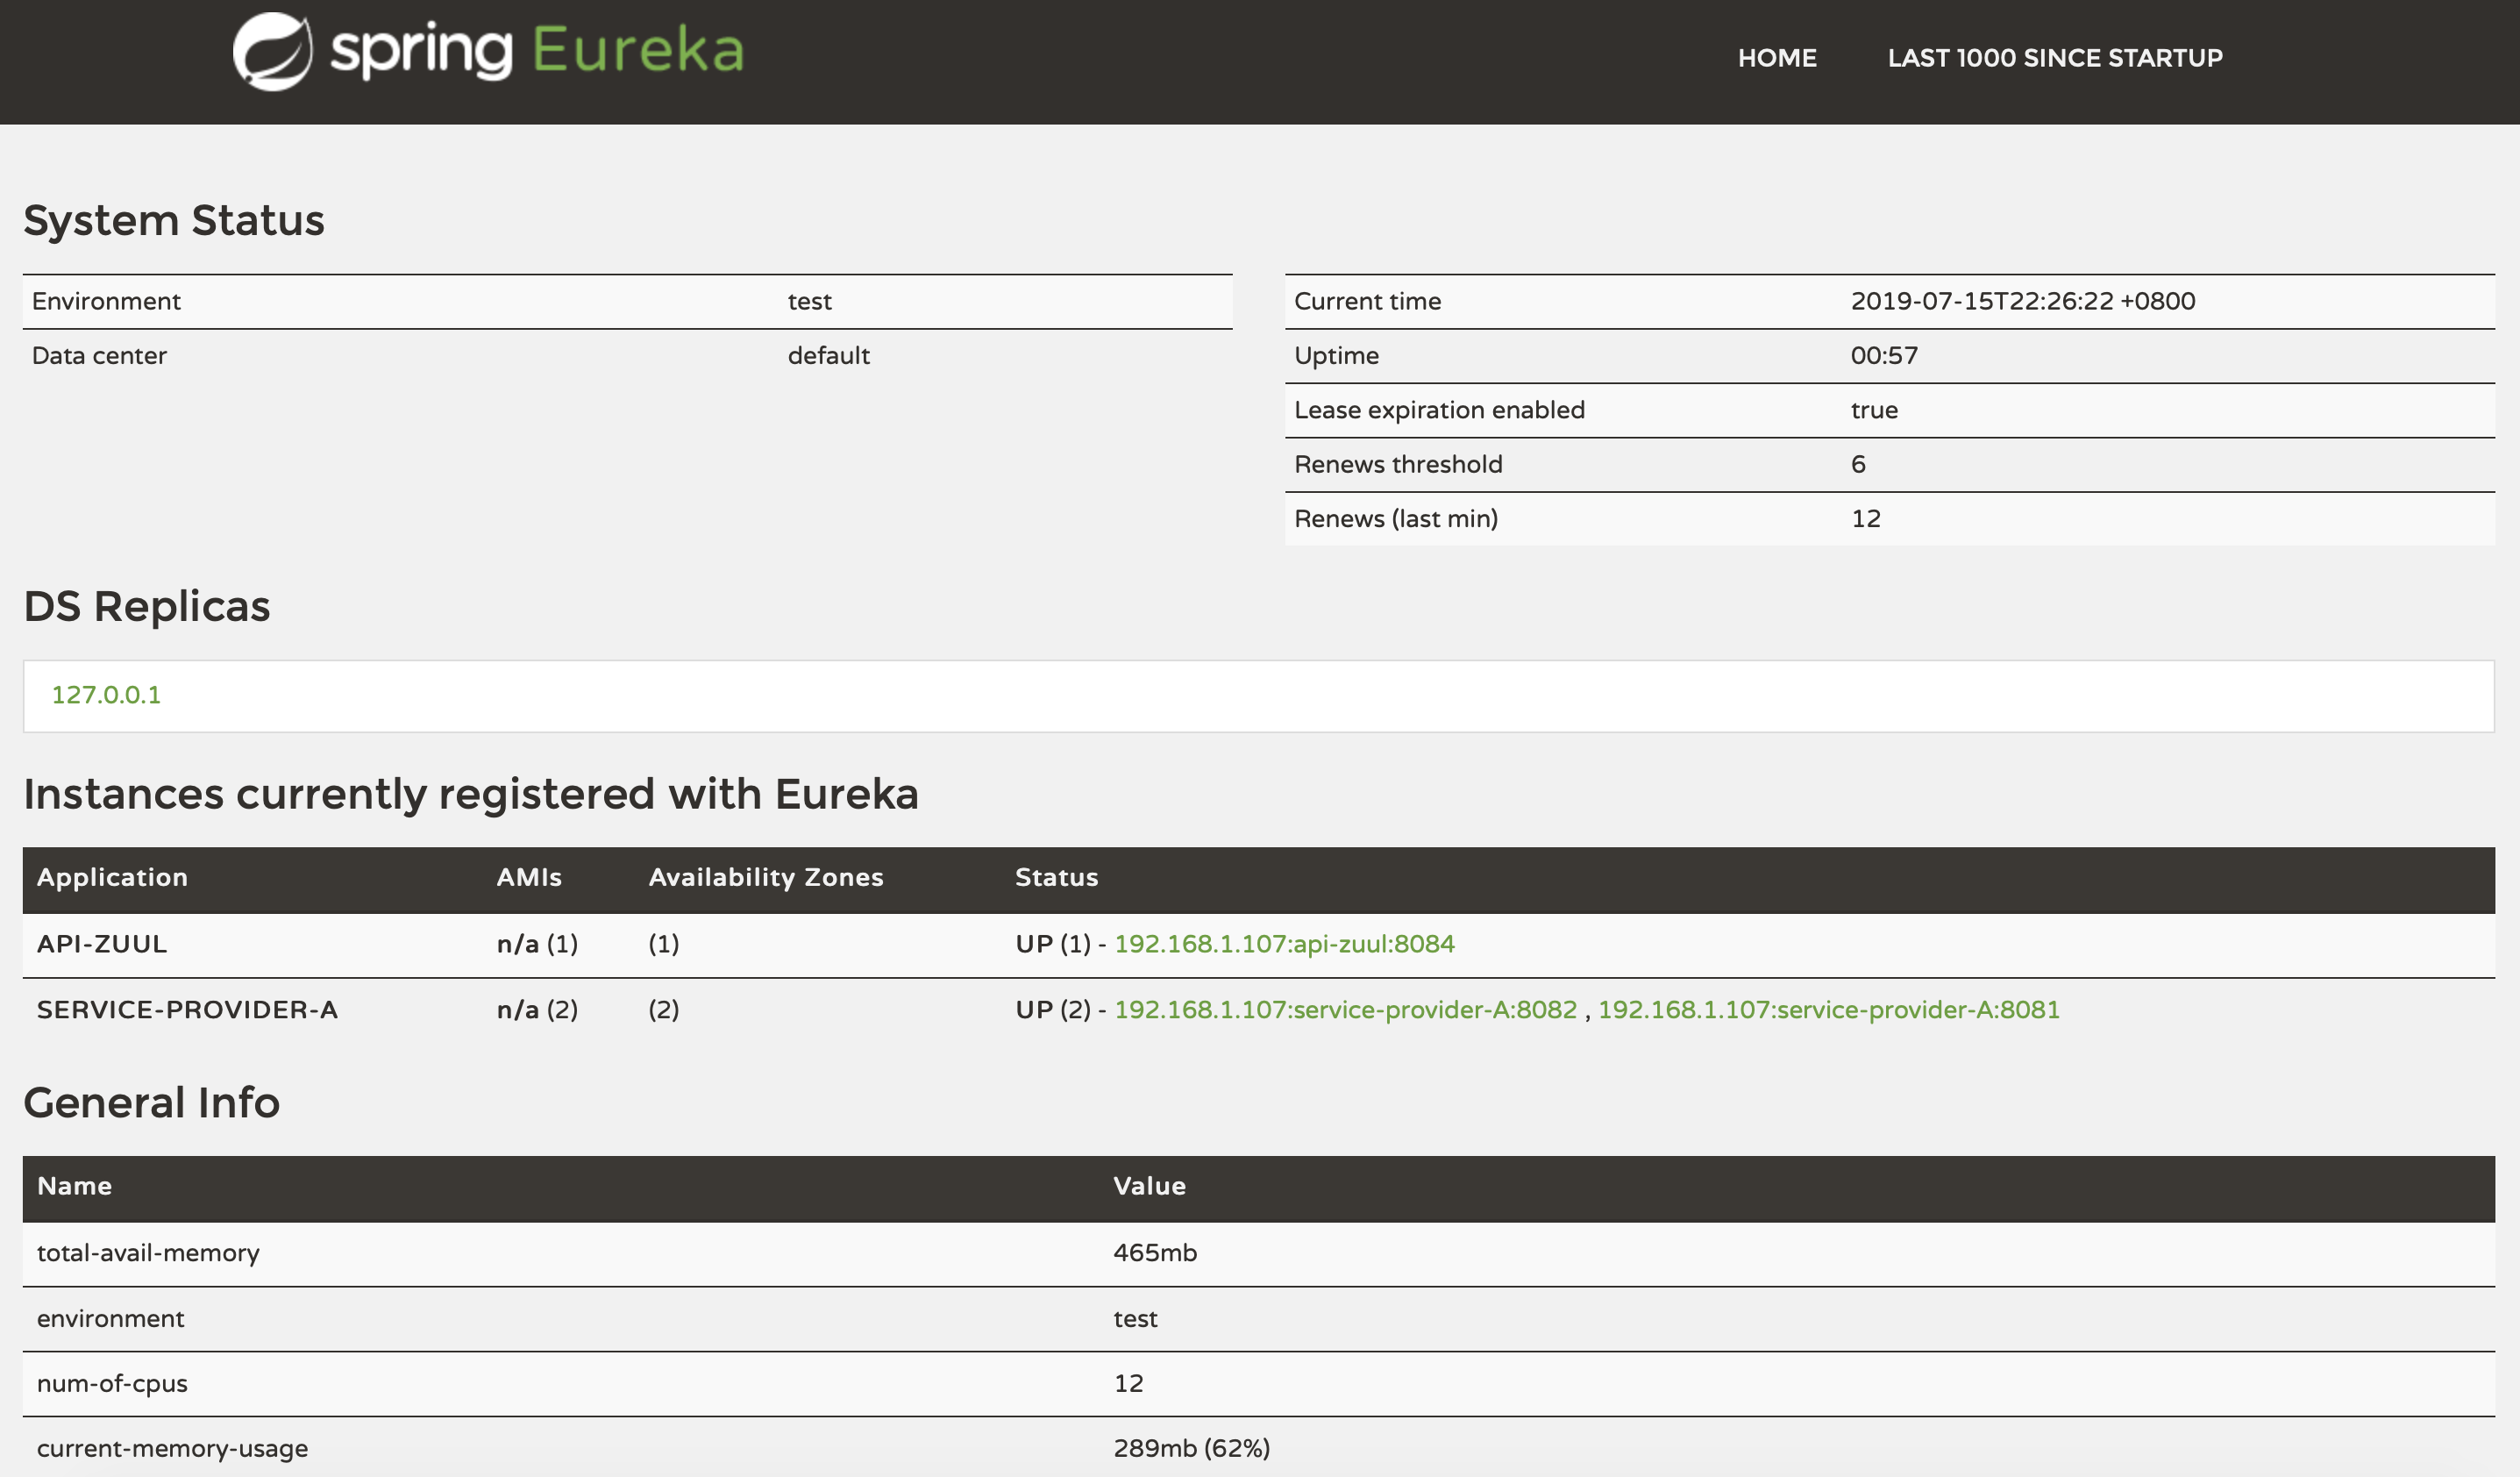
}以上配置完成后,依次啟動eureka、zuul、dome1、dome2。在瀏覽器輸入http://127.0.0.1:8080后查看注冊的服務

然后在瀏覽器輸入http://127.0.0.1:8084/api/service/users/sdffsd,需要刷新來看效果。


感謝各位的閱讀,以上就是“微服務中eureka+zuul的基本部署教程”的內容了,經過本文的學習后,相信大家對微服務中eureka+zuul的基本部署教程這一問題有了更深刻的體會,具體使用情況還需要大家實踐驗證。這里是億速云,小編將為大家推送更多相關知識點的文章,歡迎關注!
免責聲明:本站發布的內容(圖片、視頻和文字)以原創、轉載和分享為主,文章觀點不代表本網站立場,如果涉及侵權請聯系站長郵箱:is@yisu.com進行舉報,并提供相關證據,一經查實,將立刻刪除涉嫌侵權內容。