您好,登錄后才能下訂單哦!
您好,登錄后才能下訂單哦!
本篇文章為大家展示了SpringBoot中對MongoDB的基本操作是怎樣的,內容簡明扼要并且容易理解,絕對能使你眼前一亮,通過這篇文章的詳細介紹希望你能有所收獲。
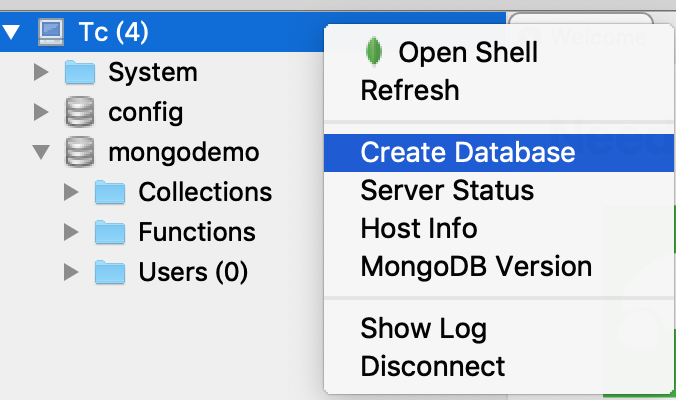
首先 在MongoDB 操作客戶端 Robo 3T 中 創建數據庫:

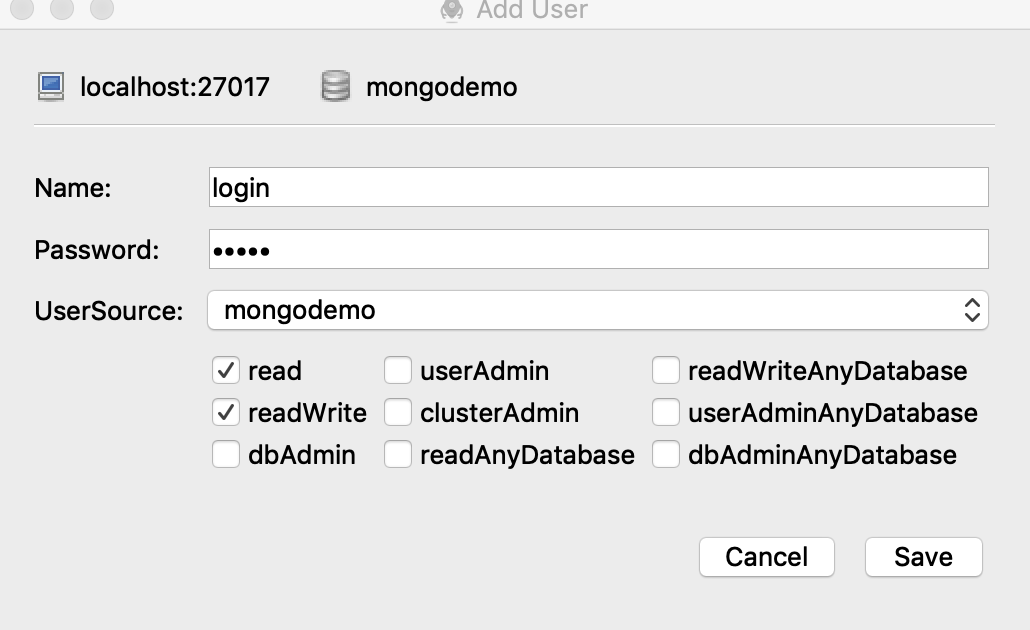
增加用戶User:

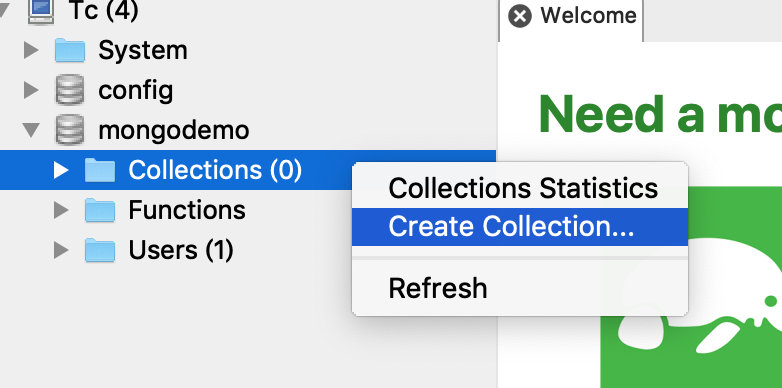
創建 Collections 集合(類似mysql 中的 表):

后面我們大部分都是基于創建的Collection “collectiondemo”操作的。
  <dependencies>
		<dependency>
			<groupId>org.springframework.boot</groupId>
			<artifactId>spring-boot-starter-data-mongodb</artifactId>
			<version> 2.1.7.RELEASE</version>
		</dependency>
		<dependency>
			<groupId>org.springframework.boot</groupId>
			<artifactId>spring-boot-starter-web</artifactId>
			<version> 2.1.7.RELEASE</version>
		</dependency>

		<dependency>
			<groupId>org.springframework.boot</groupId>
			<artifactId>spring-boot-starter-test</artifactId>
			<scope>test</scope>
			<version> 2.1.7.RELEASE</version>
		</dependency>
	</dependencies>
spring.data.mongodb.host=localhost
spring.data.mongodb.port=27017
spring.data.mongodb.database=mongodemo
spring.data.mongodb.username=login
spring.data.mongodb.password=login
定義 MongoTemplate
	 @Autowired
	private MongoTemplate mongoTemplate;

	private static String COLLECTION_DEMO = "collectiondemo";
基于 mongoTemplate 操作
   @PostMapping("/insertDocument")
	public void insertDocument(String document) {
		//獲取集合
		MongoCollection<Document> collection = mongoTemplate.getCollection(COLLECTION_DEMO);
		Document parse = Document.parse(document);
		//插入文檔
		collection.insertOne(parse);
	}
postman 測試參數:

在 Robo 中 可以查詢到:

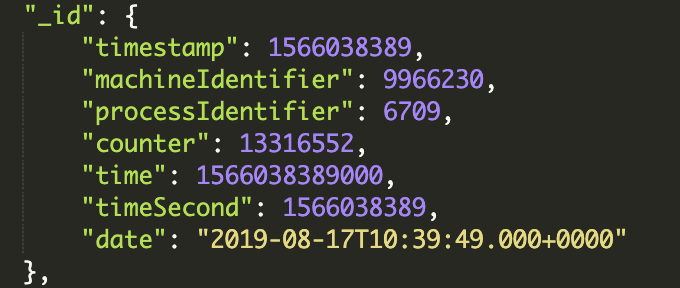
添加數據成功 ,其中 ObjectId是一個12字節的 BSON 類型字符串, 由

組成
	@PutMapping("/updateDocument")
	public Long updateDocument(String queryDocument, String ducument) {
		MongoCollection<Document> collection = mongoTemplate.getCollection(COLLECTION_DEMO);
		BasicDBObject queryParse = BasicDBObject.parse(queryDocument);
		BasicDBObject parse = BasicDBObject.parse(ducument);
		UpdateResult result = collection.updateOne(queryParse, new BasicDBObject("$set",parse));
		return result.getModifiedCount();
	}
輸入參數:

可以看到:

但有個問題,當參數中 key 在 mongodb 不存在時,會自己創建:

之前mongodb并沒有 age 字段,現在可以看到:

這可能對有些業務場景,對key要求嚴格的 就無法通過這個滿足條件 ,此時mongodb 中 可以用$exists 解決:
	@PutMapping("/updateDocumentOnlyHave")
	public Long updateDocumentOnlyHave(String id, String ducument) {
		MongoCollection<Document> collection = mongoTemplate.getCollection(COLLECTION_DEMO);
		BasicDBObject parse = BasicDBObject.parse(ducument);
		Set<String> keySet = parse.keySet();
		BasicDBObject dbObject = new BasicDBObject();
		dbObject.put("id",id);
		for (String key : keySet) {
			dbObject.put(key, new BasicDBObject("$exists",true));
		}
		UpdateResult result = collection.updateOne(dbObject, new BasicDBObject("$set",parse));
		return result.getModifiedCount();
} @GetMapping("/listDocuments")
public List<Document> findDocuments() {
MongoCollection<Document> collection = mongoTemplate.getCollection(COLLECTION_DEMO);
FindIterable<Document> documents = collection.find();
List<Document> listDocuments = new ArrayList<>();
for (Document document : documents) {
listDocuments.add(document);
}
return listDocuments;
} @DeleteMapping("/deleteDocument")
public DeleteResult deleteDocument(String name) {
MongoCollection<Document> collection = mongoTemplate.getCollection(COLLECTION_DEMO);
DeleteResult result = collection.deleteOne(new BasicDBObject("name", name));
return result;
}上述內容就是SpringBoot中對MongoDB的基本操作是怎樣的,你們學到知識或技能了嗎?如果還想學到更多技能或者豐富自己的知識儲備,歡迎關注億速云行業資訊頻道。
免責聲明:本站發布的內容(圖片、視頻和文字)以原創、轉載和分享為主,文章觀點不代表本網站立場,如果涉及侵權請聯系站長郵箱:is@yisu.com進行舉報,并提供相關證據,一經查實,將立刻刪除涉嫌侵權內容。