您好,登錄后才能下訂單哦!
您好,登錄后才能下訂單哦!
如何用ggplot2實現一幅叫不上來名字的圖,相信很多沒有經驗的人對此束手無策,為此本文總結了問題出現的原因和解決方法,通過這篇文章希望你能解決這個問題。
在論文里看到了一張圖如下: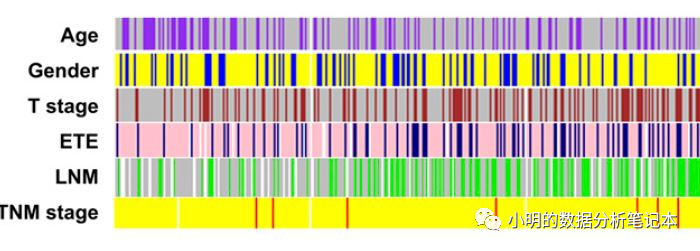
最近可能會用到,就琢磨了一下如何實現。不知道這種圖叫什么名字,沒辦法搜索。但是感覺R語言里應該有現成的包來做這幅圖。這幅圖和ggplot2做的熱圖有點像。試著用ggplot2來實現這張圖。通常用ggplot2做熱圖會用geom_tile()函數
參考 https://www.r-bloggers.com/how-to-make-a-simple-heatmap-in-ggplot2/構造數據集
df<-expand.grid(teams=paste0("Team",LETTERS[1:4]),
                metrics=paste0("Metric",1:4))
df$performance<-rnorm(nrow(df))
head(df)

library(ggplot2)
ggplot(data=df,aes(x=teams,y=metrics))+
  geom_tile(aes(fill=performance))+
  theme_bw()+
  scale_fill_continuous(low="red",high="blue")
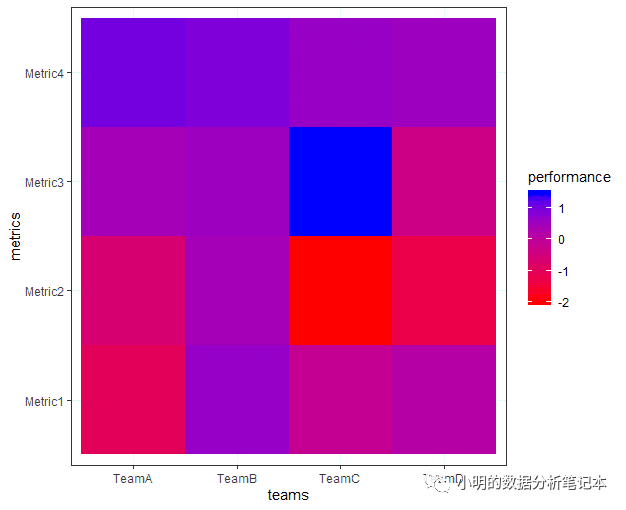
這里遇到的問題是:如何實現Metric4,3,2,1添加不同的顏色,比如Metric4是紅藍漸變色,Metric3我想填充黃綠漸變色。
想到一個解決辦法是將Metric4,3,2,1 分成四份數據集,分別使用geom_tile()函數作圖,然后在將圖拼接起來。
df1<-data.frame(A=paste("var",1:100),
                B=rep("TeamA",100),
                D=sample(c("Yes","No"),100,replace = T))
head(df1)
p1<-ggplot(df1,aes(x=A,y=B))+
  geom_tile(aes(fill=D))+
  scale_y_discrete(expand = c(0,0))+
  labs(x="",y="")+theme_bw()+
  scale_fill_manual(values = c("purple","grey"))
p1
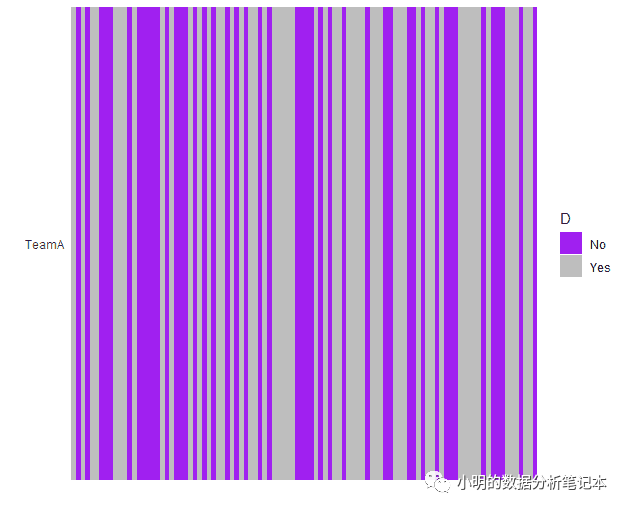
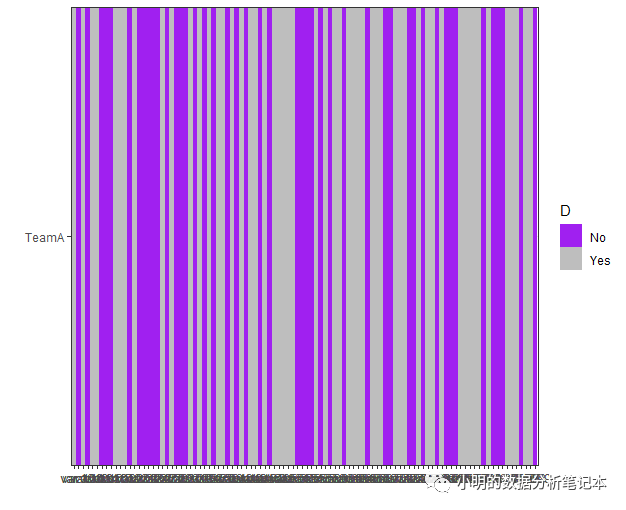 接下來調整圖片的一些細節:去掉x軸的文字標簽;去掉x軸和y軸的小短線;去掉邊框
p1<-ggplot(df1,aes(x=A,y=B))+
  geom_tile(aes(fill=D))+
  scale_y_discrete(expand = c(0,0))+
  labs(x="",y="")+theme_bw()+
  scale_fill_manual(values = c("purple","grey"))+
  theme(axis.text.x = element_blank(),
        axis.ticks = element_blank(),
        panel.border = element_blank())
p1
df2<-data.frame(A=paste("var",1:100),
                B=rep("TeamA",100),
                D=sample(c("Yes","No"),100,replace = T))
p2<-ggplot(df2,aes(x=A,y=B))+
  geom_tile(aes(fill=D))+
  scale_y_discrete(expand = c(0,0))+
  labs(x="",y="")+theme_bw()+
  scale_fill_manual(values = c("red","grey"))+
  theme(axis.text.x = element_blank(),
        axis.ticks = element_blank(),
        panel.border = element_blank())
df3<-data.frame(A=paste("var",1:100),
                B=rep("TeamA",100),
                D=sample(c("Yes","No"),100,replace = T))
p3<-ggplot(df3,aes(x=A,y=B))+
  geom_tile(aes(fill=D))+
  scale_y_discrete(expand = c(0,0))+
  labs(x="",y="")+theme_bw()+
  scale_fill_manual(values = c("green","grey"))+
  theme(axis.text.x = element_blank(),
        axis.ticks = element_blank(),
        panel.border = element_blank())
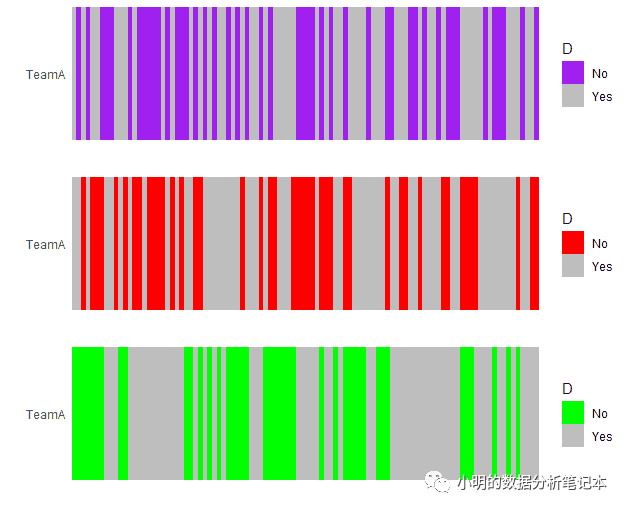
找到了 https://github.com/wilkelab/cowplot/issues/31可以使用 plot.margin = unit(c(0,0,0,0),'cm')加到主題theme()設置里
p1.1<-p1+theme(plot.margin = unit(c(0,0,0,0),'cm'))
p2.1<-p2+theme(plot.margin = unit(c(0,0,0,0),'cm'))
p3.1<-p3+theme(plot.margin = unit(c(0,0,0,0),'cm'))
plot_grid(p1.1,p2.1,p3.1,ncol = 1)
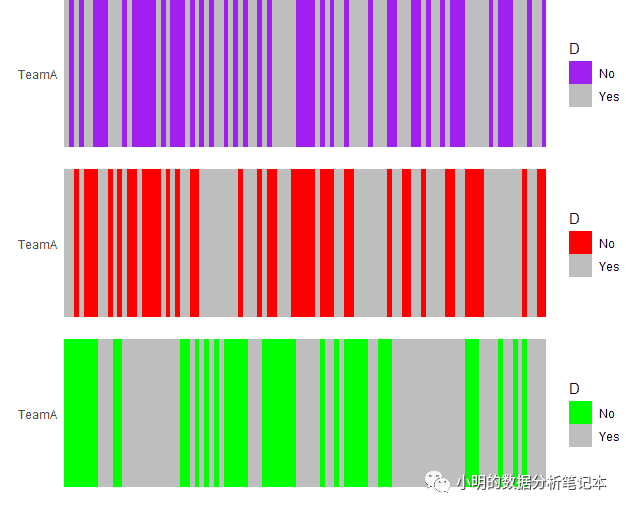
變化不是太大。看看 https://github.com/wilkelab/cowplot/issues/31這篇文章發現theme(plot.margin = unit(c(0,0,0,0),'cm'))里面的數值可以設置為負數
p1.2<-p1+theme(plot.margin = unit(c(-0.5,-0.5,-0.5,-0.5),'cm'))
p2.2<-p2+theme(plot.margin = unit(c(-0.5,-0.5,-0.5,-0.5),'cm'))
p3.2<-p3+theme(plot.margin = unit(c(-0.5,-0.5,-0.5,-0.5),'cm'))
plot_grid(p1.2,p2.2,p3.2,ncol = 1)
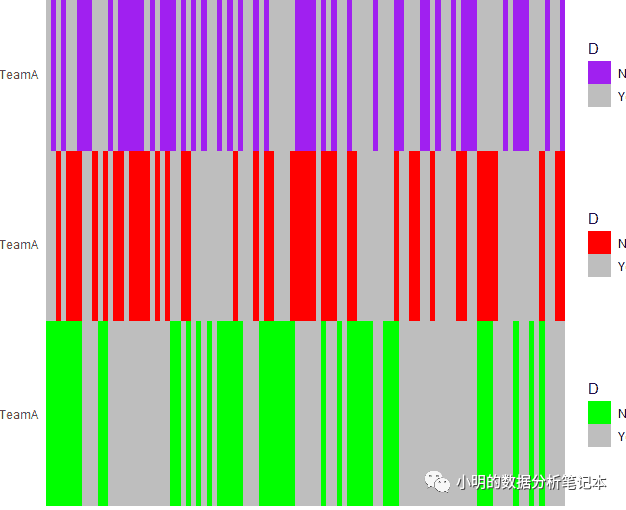
這樣三幅圖就挨到一起去了。每個單獨的小圖有些高,可以輸出圖片時壓縮整體的高
p1.2<-p1+theme(plot.margin = unit(c(0,-0.3,-0.3,-0.3),'cm'))
p2.2<-p2+theme(plot.margin = unit(c(-0.3,-0.3,-0.3,-0.3),'cm'))
p3.2<-p3+theme(plot.margin = unit(c(-0.3,-0.3,-0.3,-0.3),'cm'))
png("Rplot18.png",height = 120)
plot_grid(p1.2,p2.2,p3.2,ncol = 1)
dev.off()
 圖例有些被蓋住和,可以改變圖例的大小
p1.3<-p1+theme(plot.margin = unit(c(0,-0.3,-0.3,-0.3),'cm'),
               legend.key.size = unit(0.2,'cm'),
               legend.title=element_text(size=3),
               legend.text=element_text(size=2))
p2.3<-p2+theme(plot.margin = unit(c(-0.3,-0.3,-0.3,-0.3),'cm'),
               legend.key.size = unit(0.2,'cm'),
               legend.title=element_text(size=3),
               legend.text=element_text(size=2))
p3.3<-p3+theme(plot.margin = unit(c(-0.3,-0.3,-0.3,-0.3),'cm'),
               legend.key.size = unit(0.2,'cm'),
               legend.title=element_text(size=3),
               legend.text=element_text(size=2))
png("Rplot19.png",height = 120)
plot_grid(p1.3,p2.3,p3.3,ncol = 1)
dev.off()
#修改圖例大小還可以用
        legend.key.height = unit(0.2,'cm'),
        legend.key.width = unit(0.2,'cm')
#還有一個小知識點是:plot.margin = unit(c(-0.3,-0.3,-0.3,-0.3)四個數字控制的位置分別是上右下左

看完上述內容,你們掌握如何用ggplot2實現一幅叫不上來名字的圖的方法了嗎?如果還想學到更多技能或想了解更多相關內容,歡迎關注億速云行業資訊頻道,感謝各位的閱讀!
免責聲明:本站發布的內容(圖片、視頻和文字)以原創、轉載和分享為主,文章觀點不代表本網站立場,如果涉及侵權請聯系站長郵箱:is@yisu.com進行舉報,并提供相關證據,一經查實,將立刻刪除涉嫌侵權內容。