您好,登錄后才能下訂單哦!
您好,登錄后才能下訂單哦!
今天小編給大家分享的是css3如何實現3d翻轉效果,相信很多人都不太了解,為了讓大家更加了解,所以給大家總結了以下內容,一起往下看吧。一定會有所收獲的哦。
css是一種用來表現HTML或XML等文件樣式的計算機語言,主要是用來設計網頁的樣式,使網頁更加美化。它也是一種定義樣式結構如字體、顏色、位置等的語言,并且css樣式可以直接存儲于HTML網頁或者單獨的樣式單文件中,而樣式規則的優先級由css根據這個層次結構決定,從而實現級聯效果,發展至今,css不僅能裝飾網頁,也可以配合各種腳本對于網頁進行格式化。
在css3中,可以使用transform屬性配合rotateY()、rotateX()等3d旋轉函數來實現3d翻轉效果。rotateX()可以使元素繞其X軸旋轉給定角度,rotateY()可以使元素繞其Y軸旋轉給定角度。
1、HTML結構
<div class="stage">
    <div class="flipBox">
        <figure class="pic front">Front</figure>
        <figure class="pic back">Back</figure>
    </div>
</div>
上述HTML的結構是:
p.stage規定了一個3D舞臺,基本上所有使用CSS3 3D變換的實現都會這么做,規定perspective樣式從而達到透視效果
p.flipBox是真正實現翻面的容器,稍后將對它進行3D變換
figure代表兩張圖片,一張是正面,一張是背面
思路是:將figure.front和figure.back作為翻轉圖片的正反面。圖片翻轉后,figure.back將變成面對用戶的那一面,figure.front將背對用戶。
初始狀態下figure.back是水平翻轉過的(即transform: rotateY(180deg)),這樣圖片翻轉后背面的文字將正著顯示(否則翻轉過來以后背面的文字是倒著的——因為反轉之前是正著的嘛~)。
3、CSS結構
body,figure {
    margin: 0;
    padding: 0;
}
.stage {
    width: 200px;
    height: 100px;
    margin: 40px;
    perspective: 1000px;
}
.flipBox {
    width: 200px;
    height: 100px;
    position: relative;
    transform-style: preserve-3d;
    transition: transform 1s;
}
.pic {
    width: 200px;
    height: 100px;
    font-size: 24px;
    color: #fff;
    line-height: 100px;
    text-align: center;
    position: absolute;
    top: 0;
    left: 0;
    backface-visibility: hidden;
}
.front {
    background: #f00;
}
.back {
    background: #090;
    transform: rotateY(180deg);
}
現在分析每個元素的CSS:
body,figure {
    margin: 0;
    padding: 0;
}
沒什么好說的,去掉內外邊距!
.stage {
    width: 200px;
    height: 100px;
    margin: 40px;
    perspective: 1000px;
}
為3D舞臺定義樣式。margin是為了距離瀏覽器左邊和上邊有一些距離,讓變換顯示的更完整。perspective規定了3D元素距攝像機(或人眼)的距離,值越小3D元素離人眼越近,值越大3D元素離人眼越遠。
.flipBox {
    width: 200px;
    height: 100px;
    position: relative;
    transform-style: preserve-3d;
    transition: transform 1s;
}
為翻轉盒子定義樣式。這個元素是真正進行3D變換的元素。其position屬性是為其兩個子figure元素創造定位點,以便兩個子figure元素定位到p.flipBox的左上角實現兩張圖片的對齊。transform-style屬性是必須的,這規定了p.flipBox元素的后代元素是以哪種形式進行3D變換(preserve-3d表示后代元素任然以3d的模式進行變換;另一個值flat表示只對p.flipBox進行3D變換,后代元素則只是p.flipBox平面中的內容,不進行3D變換),這和After Effect中的偽3D十分相似。transition規定只變換transform屬性,時間為1s.
.pic {
    width: 200px;
    height: 100px;
    font-size: 24px;
    color: #fff;
    line-height: 100px;
    text-align: center;
    position: absolute;
    top: 0;
    left: 0;
    backface-visibility: hidden;
}
為兩張圖片(這里的兩個figure)規定統一的樣式。使用絕對定位,定位到p.flipBox的左上角,而兩個figure的大小又是一樣的,所以完美重疊。backface-visibility是一個重要的屬性,它規定背對用戶的3D元素是否顯示,這里應該規定為不顯示(hidden),否則不該顯示背面的時候背面會顯示出來。比如初始狀態,顯然不應該顯示figure.back,但又因為figure.back是后渲染的,所以會覆蓋在figure.front上,我們之前為figure.back規定了transform: rotateY(180deg),所以figure.front是背對用戶的,將不顯示。再比如翻轉過后,figure.front會擋在figure.back前面,不過此時figure.front將會背對用戶,所以被backface-visibility隱藏了,這正是我們想要的。
.front {
    background: #f00;
}
規定了圖片正面為紅色。
.back {
    background: #090;
    transform: rotateY(180deg);
}
規定了圖片背面為綠色,同時,transform: rotateY(180deg)規定在初始狀態,figure.back是水平翻轉180°的。
3、開始旋轉圖片
.stage:hover .flipBox {
 transform: rotateY(-180deg);
}
當鼠標移入3D舞臺時,將p.flipBox旋轉-180°,實現圖片翻轉效果。這里讓p.flipBox旋轉+180°也是可以的,只是旋轉的方向不同罷了。 
1、圖片準備
為減少HTTP請求,這里使用精靈圖。 
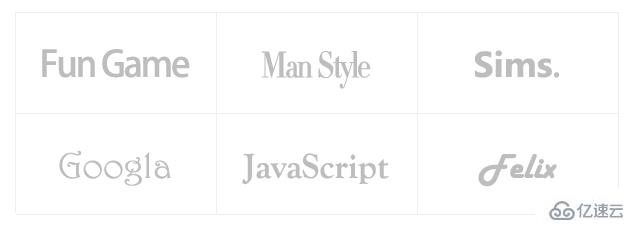
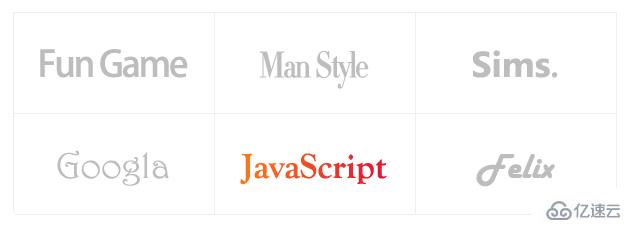
圖片大小為200*200,分上下兩部分,上方為翻轉圖片的正面(黑白),下方為翻轉圖片的背面(彩色)。上方和下方的logo都經過水平居中和垂直居中,以保證翻轉前后logo位置一致。
2、代碼實現
<!doctype html>
<html>
<head>
    <meta charset="UTF-8">
    <title>JavaScript Study</title>
    <style>
        html,body,ul,li,a,figure,h5 {
            padding: 0;
            margin: 0;
        }
        ul {
            list-style: none;
        }
        h5 {
            display: none;
        }
        .Stage {
            width: 604px;
            height: 203px;
            margin: 50px;
            border-left: 1px solid #f5f5f5;
            border-top: 1px solid #f5f5f5;
            perspective: 10000px;
        }
        .trigger {
            display: block;
            float: left;
            width: 200px;
            height:100px;
            border-right: 1px solid #f5f5f5;
            border-bottom: 1px solid #f5f5f5;
            position: relative;
        }
        .flipBox {
            display: block;
            width: 100%;
            height: 100%;
            transform-style: preserve-3d;
            transition: transform 1.2s;
            transition-delay: 0.03s;
        }
        .trigger:hover .flipBox {
            transform: perspective(10000px) rotateY(-180deg);    /*這里的perspective為每個flipBox規定單獨的視點距離,解決Chrome中統一視點的問題*/
        }
        .plane {
            width: 200px;
            height: 100px;
            position: absolute;
            top: 0;
            left: 0;
            backface-visibility: hidden;
        }
        .back {
            transform: rotateY(180deg);
        }
        .logo1 figure.front {
            background: url("pic.png") center 0 no-repeat;
        }
        .logo2 figure.front {
            background: url("pic_2.png") center 0 no-repeat;
        }
        .logo3 figure.front {
            background: url("pic_3.png") center 0 no-repeat;
        }
        .logo4 figure.front {
            background: url("pic_4.png") center 0 no-repeat;
        }
        .logo5 figure.front {
            background: url("pic_5.png") center 0 no-repeat;
        }
        .logo6 figure.front {
            background: url("pic_6.png") center 0 no-repeat;
        }
        .logo1 figure.back {
            background: url("pic.png") center -100px no-repeat;
        }
        .logo2 figure.back {
            background: url("pic_2.png") center -100px no-repeat;
        }
        .logo3 figure.back {
            background: url("pic_3.png") center -100px no-repeat;
        }
        .logo4 figure.back {
            background: url("pic_4.png") center -100px no-repeat;
        }
        .logo5 figure.back {
            background: url("pic_5.png") center -100px no-repeat;
        }
        .logo6 figure.back {
            background: url("pic_6.png") center -100px no-repeat;
        }
    </style>
</head>
<body>
<div>
    <ul>
        <li>
            <a class="flipBox logo1" href="#">
                <h5>Fun Games</h5>
                <figure class="plane front"></figure>
                <figure class="plane back"></figure>
            </a>
        </li>
        <li>
            <a class="flipBox logo2" href="#">
                <h5>Man Style</h5>
                <figure class="plane front"></figure>
                <figure class="plane back"></figure>
            </a>
        </li>
        <li>
            <a class="flipBox logo3" href="#">
                <h5>Sims.</h5>
                <figure class="plane front"></figure>
                <figure class="plane back"></figure>
            </a>
        </li>
        <li>
            <a class="flipBox logo4" href="#">
                <h5>Googla</h5>
                <figure class="plane front"></figure>
                <figure class="plane back"></figure>
            </a>
        </li>
        <li>
            <a class="flipBox logo5" href="#">
                <h5>JavaScript</h5>
                <figure class="plane front"></figure>
                <figure class="plane back"></figure>
            </a>
        </li>
        <li>
            <a class="flipBox logo6" href="#">
                <h5>Felix</h5>
                <figure class="plane front"></figure>
                <figure class="plane back"></figure>
            </a>
        </li>
    </ul>
</div>
</body>
</html>

關于css3如何實現3d翻轉效果就分享到這里了,希望以上內容可以對大家有一定的參考價值,可以學以致用。如果喜歡本篇文章,不妨把它分享出去讓更多的人看到。
免責聲明:本站發布的內容(圖片、視頻和文字)以原創、轉載和分享為主,文章觀點不代表本網站立場,如果涉及侵權請聯系站長郵箱:is@yisu.com進行舉報,并提供相關證據,一經查實,將立刻刪除涉嫌侵權內容。